Sonic Illustrations was technically born around 2013. Back then I
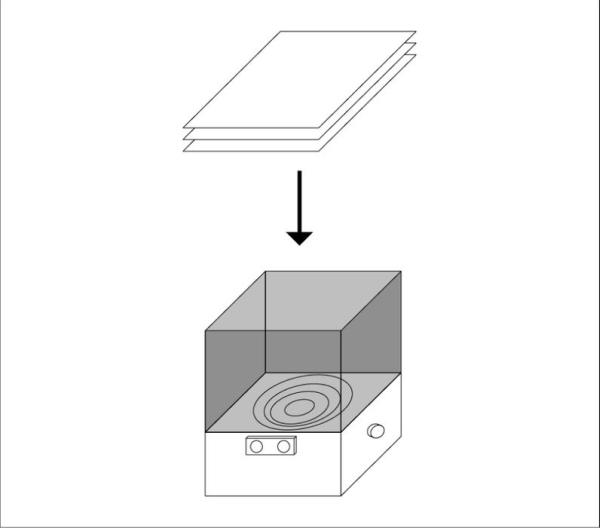
started a little experiment in my bedroom which also served as my workshop. I used the bass reflex speaker of my computer setup, put some clingwrap over it, poured some ecoline on the top of it, put some paper on top and played some audio through the speaker. The results were basically paintings created by the soundwaves of the audio. By the vibrations of the bass reflex speaker, the ecoline splattered onto the paper creating these (in my opinion) beautiful circular illustrations. I’d always wanted to re-create this experiment but with a bit more of a professional and permanent setup. Thus, almost eight years later, Sonic Illustrations was born.
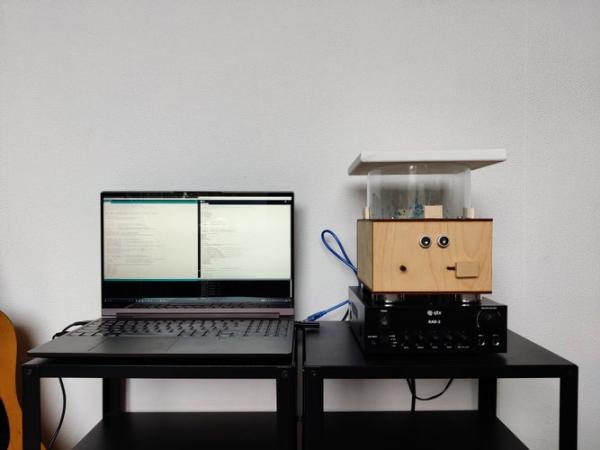
In these pictures you can see the setup as I created it now in 2021. It was definitely an improvement from the setup I used back in 2013.
You can view this project on my personal portfolio website by clicking here!
Supplies
- Triplex wood 3mm thickness (Total of at least 340mm x 440mm)
- Lasercutter or any type of saw + a steady hand
- Rotating potentiometer [PTV09 Series 9mm Rotary Linear Potentiometers]
- Sliding potentiometer [Grove – Slide Potentiometer 0 – 10K Ohm]
- Ultrasonic proximity sensor [HC-SR04]
- Plexiglass tube (10-15cm diameter depending on the size of your speaker)
- Speaker (Any frequency range will do, but the lower the better!)
- Any kind of amplifier
- 4x bolts to keep the speaker in place
- 200mm Male to Male jumper wires [Arduino kit]
- Laptop with Arduino and Processing IDE installed
- An Arduino UNO!
Step 1: Humble Beginnings
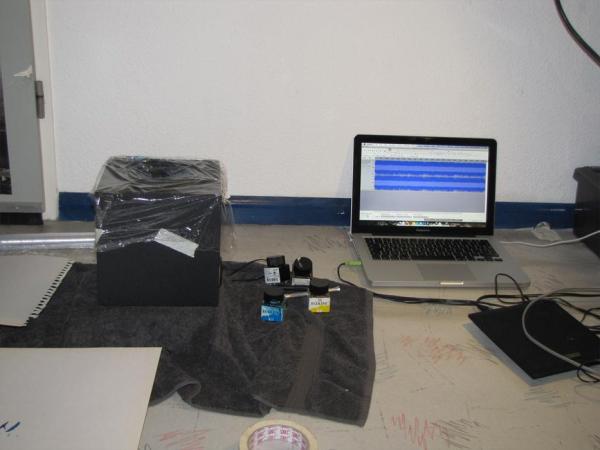
These images show the humble setup that I used back in 2013. It was a lot more simple but the results definitely sparked my interest. I always wanted to make a more permanent setup for this experiment so this is what this instructable is for!
Step 2: Sketchy
The first thing I did was draw out a sketch for the setup that I had in mind for my permanent Sonic Illustrations setup. It would become an interactive installation with which you can create paintings through sonic vibrations. Some parts ended up being changed slightly but this would be the basic idea which I would eventually create.
Step 3: The Wooden House
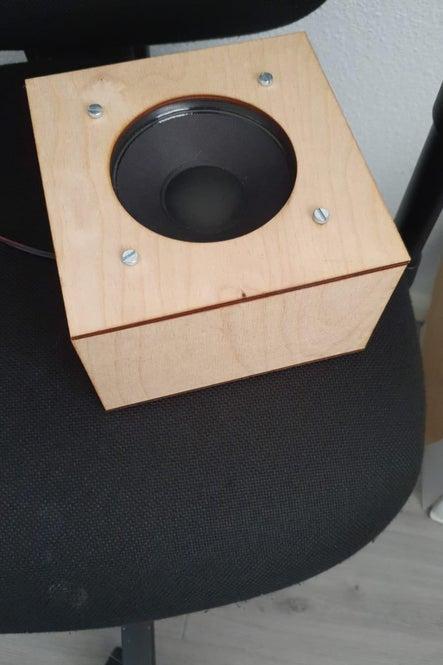
I then started building the base for the speaker. This housing is where all the other parts would live inside of as well. I used a lasercutter to cut the different parts for the box out of the Triplex wood. You can see the Illustrator drawing I used as well. (It’s pretty basic, I know but at least it has the correct dimensions.)
Step 4: Schematics
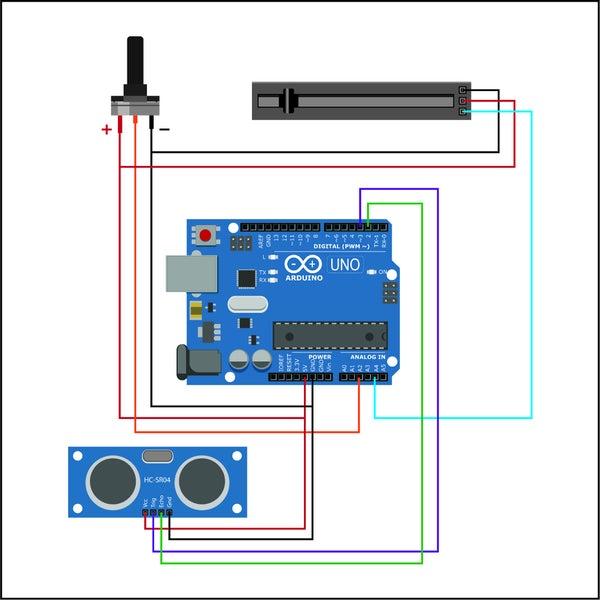
So these are the schematic drawings I made to get a clear understanding of what parts I’d need and how I’d have to connect them. (Bare with me, this was the first time that I’ve drawn schematic drawings all by myself!) It definitely helped me figure out how to connect everything for this setup.
Step 5: Testing the Setup
Next, I set out to create a proof-of-concept setup to test out my sensors with the Arduino. I first wired up my rotating potentiometer and the proximity sensor. I used some code examples off the Arduino forums to get the proximity sensor going and the potentiometer was pretty straightforward. (There’s plenty of examples that can be found online.)
Step 6: The Dreaded Code
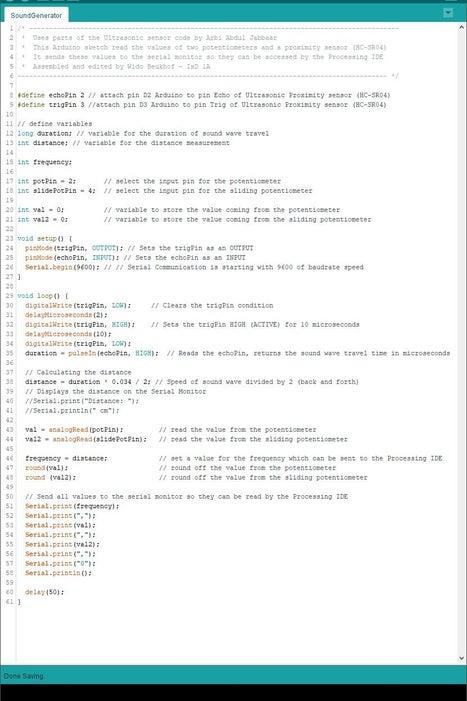
In the next two images you can see both the code from the Arduino IDE as well as the Processing IDE. Since the Arduino itself is quite limited and what kind of noises it can create (Unless you’re using an MP3 module for the Arduino) so I decided to use Processing to create the actual sounds. The Arduino code reads the values from both potentiometers and the proximity sensors and then sends those values to the Serial monitor so that Processing can pick them up. The Processing code then takes these values and uses them to create and alter the waveforms with the Minim Processing library. The potentiometer randomizes the frequency of the waveforms, the siding potentiometer selects a different oscillator (sawWave, sineWave, squareWave and triangleWave) and the proximity sensor determines the frequency of the waveforms.
Step 7: Giving the Components a Place to Live
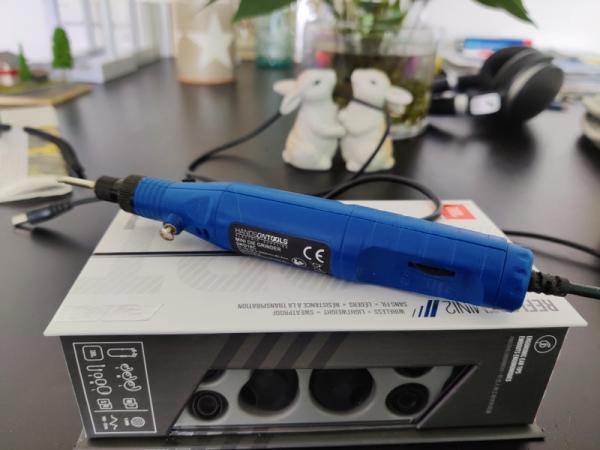
I used this little handheld die grinder to cut out holes in the wooden box through which the sensors could fit. Each sensor would have it’s own spot to live in. The biggest challenge here was definitely the sliding potentiometer which turned out a little less neat than the others.
Now that all of the sensors had a little place to live in, it was time to solder all the necessary wiring and place the components inside the box, including the Arduino. The cable management could have been better for sure but the giant speaker in the middle made it a little bit of a challenge to get everything to fit inside. However, it did fit and everything was now in place for the machine to work.
Step 8: I Think It’s Ready!

So the machine is now basically done. All the electronic components work, the code for both the Arduino IDE and the Processing IDE works, the machine is properly closed up for a nice and clean look. All that’s left now is to test it out! Well, this is where a new issue showed up.
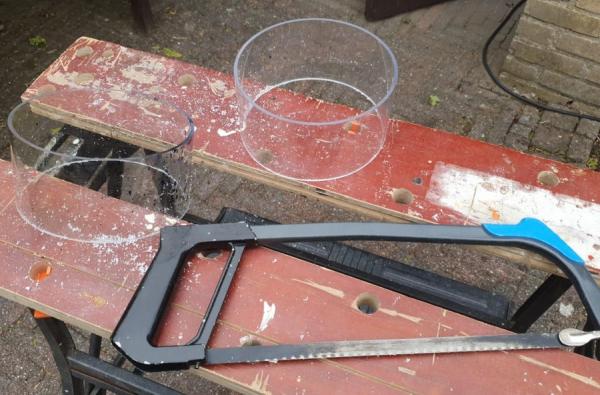
The first test of the completed setup actually went pretty well. With some clingwrap over the speaker so that the ecoline doesn’t destroy the speaker, the ecoline splattered upwards nicely due to the heavy vibrations of the speaker. I used a small amplifier to get some more volume out of the speaker. However, as it turns out, the clear plastic tube I have on top of the machine was a little bit too high. The ecoline doesn’t reach high enough to actually hit the canvas on top of the tube. So, it was time for some alterations.
Step 9: I Think It’s Ready 2.0!
So this is the finished Sonic Illustrations installation! After all this hard work it’s definitely time to try and create some illustrations with it!
Well, as it turns out, it wasn’t as easy as that.
Source: Sonic Illustrations