Arduino technology shines in the Smart Stick for the Visually Impaired because it builds accessibility features to empower visually impaired users. The assistive device utilizes ultrasonic sensors with buzzer components that integrate with Arduino for an innovative functional application.

What is the Smart Stick?
A handheld device known as the Smart Stick detects obstacles in front of users while emitting buzzer or vibration warning signals. This device functions to improve mobility and independence among visually disabled persons.
Key Features:
- Obstacle detection using ultrasonic sensors.
- Audible or tactile feedback to alert the user.
- The device works with a lightweight portable structure to support everyday applications.
How This Arduino Project Benefit Children with Sensory Issue
- Provides real-time feedback through vibrations or sounds to alert children to obstacles.
- Enhances mobility and spatial awareness for visually impaired children.
- Promotes independence by helping children safely navigate their environment.
- Uses tactile and auditory cues to support sensory processing.
Materials Needed for the Smart Stick
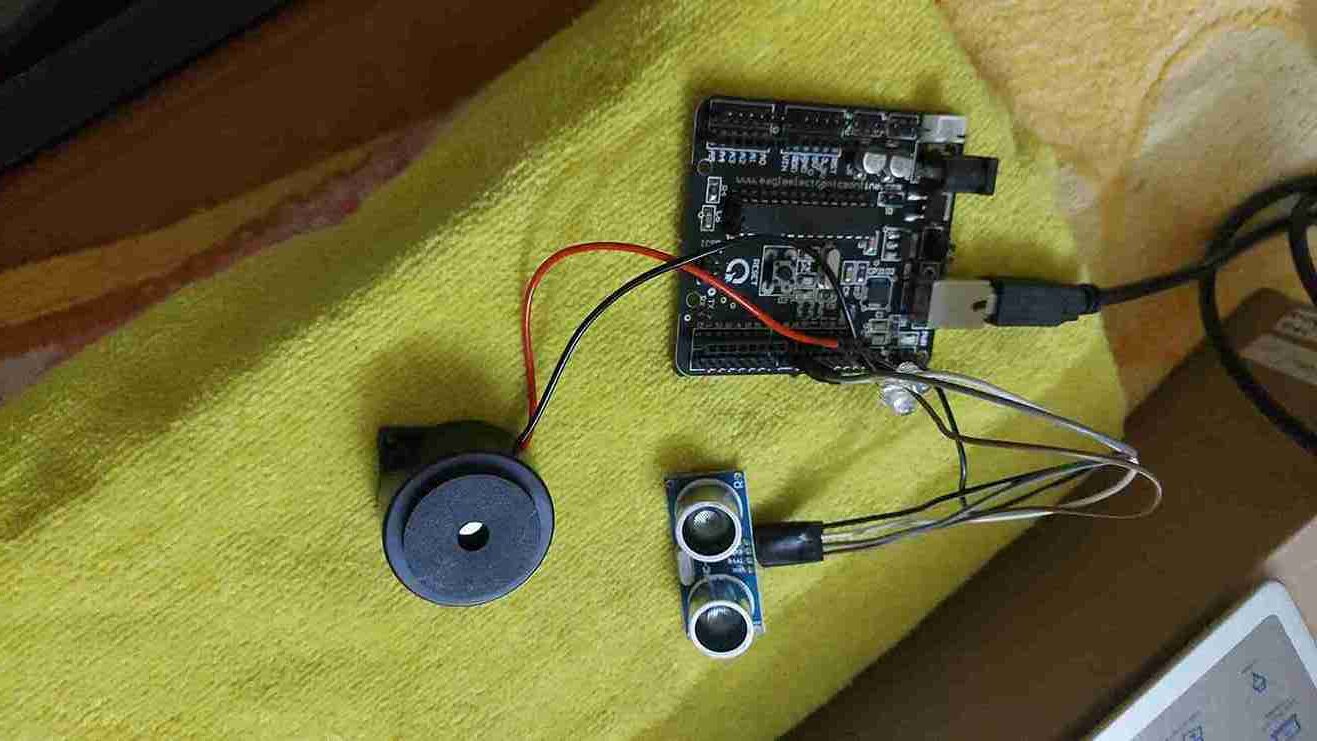
These materials are necessary to construct the project: Arduino Uno or Nano, HC-SR04 Ultrasonic Sensor, Buzzer or Vibration Motor along with a stick or cane and a battery pack.
- HC-SR04 Ultrasonic Sensor:
- VCC → 5V
- TRIG → D13
- ECHO → D12
- GND → Ground
- Buzzer:
- Positive(+) → D10
- Negative(-) → Ground
- Vibration Motor:
- Positive(+) → D7
- Negative(-) → Ground
- LED:
- Positive(+) → D2
- Negative(-) → Ground
- HC-SR04 Ultrasonic Sensor:
How Does the Smart Stick Work?
- The ultrasonic sensor sends out waves and measures the time it takes for the waves to return after hitting an obstacle. This time is converted into distance.
- If the distance is less than 100 cm, the buzzer and vibration motor are triggered to alert the user.
- The LED indicates that the system is powered on.
The implemented process enables safe navigation by users throughout their area while decreasing their potential for accidents.

Step-by-Step Guide to Build the Smart Stick
- Draft and obtain all required elements which include the Arduino board and ultrasonic sensor and buzzer and any remaining materials in the list.
- Perform the next step by connecting the ultrasonic sensor to the Arduino combined with the buzzer or vibration motor. Mount the components onto a stick by using a stick or cane.
- The Arduino needs program code to process distance readings while generating feedback signals when obstacles appear before the user.
- The device must be tested by calibrating the sensor range while optimizing its sensitivity level.
- Finish the device by mounting it safely while making it easy to keep.
Code:
long cm, duration;
void setup() {
Serial.begin(9600);
pinMode(13, OUTPUT); // TrigPin
pinMode(12, INPUT); // EchoPin
pinMode(10, OUTPUT); // Buzzer
pinMode(2, OUTPUT); // LED
pinMode(7, OUTPUT); // Vibration Motor
}
void loop() {
digitalWrite(13, LOW);
delayMicroseconds(20);
digitalWrite(13, HIGH);
delayMicroseconds(20);
digitalWrite(13, LOW);
delayMicroseconds(20);
duration = pulseIn(12, HIGH);
cm = duration * 0.034 / 2;
if (cm < 100) {
tone(10, 3000);
digitalWrite(7, HIGH);
delay(500);
noTone(10);
delay(30);
} else {
digitalWrite(7, LOW);
}
delay(50);
}
Troubleshooting or Bugs:
- Incorrect sensor readings: Ensure the ultrasonic sensor is properly connected and calibrated.
- No feedback: Check the buzzer and motor wiring and test the code for proper pin settings.
- Power issues: Ensure the power supply is adequate for the components.
Testing Guide:
- Step 1: Power up the system and check the LED to ensure the Arduino is on.
- Step 2: Test the sensor by placing obstacles at varying distances. The buzzer or vibration motor should activate when an obstacle is within 100 cm.
- Step 3: Fine-tune the sensor range and motor sensitivity based on the feedback.
Why Build the Smart Stick?
Using engineering skills and social responsibility the Smart Stick for the Visually Impaired represents an exceptional DIY solution. The device provides a budget-friendly solution which users can personalize along with practical benefits for their needs in obstacle detection.