
Summary of Servo Motor Control using Arduino
This tutorial explains how to control a servo motor using an Arduino Uno. It details the motor's function for precise positioning in low-speed applications like robotics and flight controls. The guide covers the three-wire configuration (power, ground, signal) and the mechanism of using PWM duty ratios to adjust shaft angles. Additionally, it lists necessary hardware components and software requirements to build the project.
Parts used in the Servo Motor Control Project:
- ARDUINO UNO
- Power supply (5v)
- 100uF capacitor
- Two buttons
- Two 1KΩ resistors
- Servo motor
- Arduino IDE (Arduino nightly)
In this tutorial we are going to control a servo motor by ARDUINO UNO. Servo Motors are used where there is a need for accurate shaft movement or position. These are not proposed for high speed applications. These are proposed for low speed, medium torque and accurate position application. These motors are used in robotic arm machines, flight controls and control systems.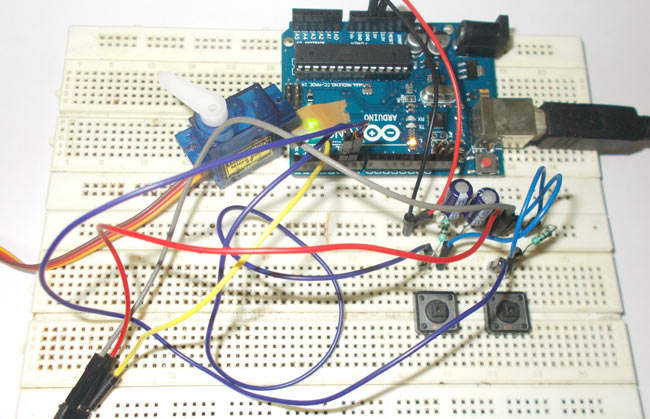
Servo motors are available at different shapes and sizes. A servo motor will have mainly there wires, one is for positive voltage another is for ground and last one is for position setting. The RED wire is connected to power, Black wire is connected to ground and YELLOW wire is connected to signal.
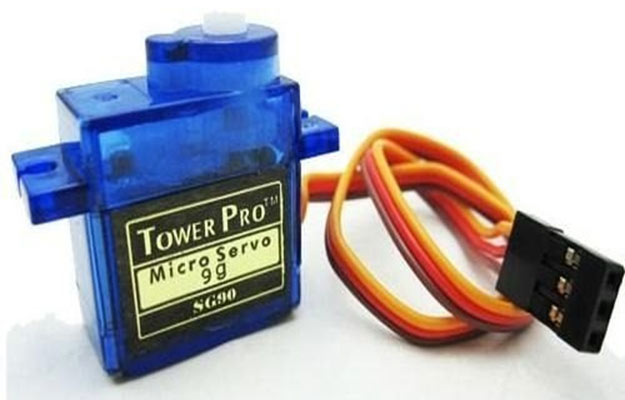
A servo motor is a combination of DC motor, position control system, gears. The position of the shaft of the DC motor is adjusted by the control electronics in the servo, based on the duty ratio of the PWM signal the SIGNAL pin.
Simply speaking the control electronics adjust shaft position by controlling DC motor. This data regarding position of shaft is sent through the SIGNAL pin. The position data to the control should be sent in the form of PWM signal through the Signal pin of servo motor.
The frequency of PWM (Pulse Width Modulated) signal can vary based on type of servo motor. The important thing here is the DUTY RATIO of the PWM signal. Based on this DUTY RATION the control electronics adjust the shaft.
As shown in figure below, for the shaft to be moved to 9o clock the TURN ON RATION must be 1/18.ie. 1ms of ON time and 17ms of OFF time in a 18ms signal.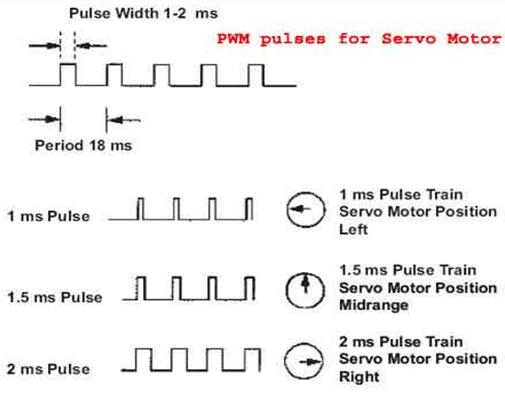
For the shaft to be moved to 12o clock the ON time of signal must be 1.5ms and OFF time should be 16.5ms. This ratio is decoded by control system in servo and it adjusts the position based on it. This PWM in here is generated by using ARDUINO UNO.
Circuit Components
Hardware: ARDUINO UNO, power supply (5v), 100uF capacitor , buttons (two pieces), 1KΩ resistor (two pieces), Servo motor (which needed to be tested).
Software: arduino IDE (Arduino nightly).
Read More: Servo Motor Control using Arduino
- What are servo motors proposed for?
Servo motors are proposed for low speed, medium torque, and accurate position applications such as robotic arm machines and flight controls. - How many wires does a servo motor have?
A servo motor has mainly three wires: one for positive voltage, one for ground, and one for position setting. - Which wire connects to power on a servo motor?
The RED wire is connected to power. - How does the control electronics adjust the shaft position?
The control electronics adjust the shaft position by controlling the DC motor based on the duty ratio of the PWM signal sent through the SIGNAL pin. - What determines the shaft position in the tutorial example?
The duty ratio of the PWM signal determines the position; for example, a 1ms ON time moves the shaft to 9 o clock while 1.5ms moves it to 12 o clock. - Does the frequency of the PWM signal vary?
Yes, the frequency of the PWM signal can vary based on the type of servo motor. - What software is required for this project?
The project requires Arduino IDE specifically the Arduino nightly version. - Can servo motors be used for high speed applications?
No, servo motors are not proposed for high speed applications.
