Summary of Scrolling Text Display (A to Z Guide)
This article guides users in building a mini scrolling text display using an Arduino Nano and 8x8 LED modules. It focuses on hardware assembly, including cutting plywood for the casing, soldering components like the voltage booster and battery holder, and installing existing code without requiring prior programming knowledge. The project utilizes specific tools for woodworking and electronics to create a self-contained device powered by a protected 18650 Li-Ion battery.
Parts used in the Mini Scrolling Text Display:
- Arduino Nano
- Two 8x8 LED Displays
- Protected 18650 Li-Ion Battery
- 18650 Battery Holder
- Booster Module
- On/Off Switch
- Breadboard
- Wires
- 6mm Thickness Plywood
- Small Wood Screws
- Wood Glue
- Wood Oil
- Epoxy
- Electrical Tape
- Sandpaper
- Silicone Feet
In this instructable / video I will guide you with step by step instructions how to make scrolling text display with Arduino.
I won’t be explaining how to make code for Arduino, I will show you how to use existing code. What and where you need to connect and install that you could make scrolling text display like this without any previous knowledge of Arduino.
Arduino software – https://www.arduino.cc/en/Main/Software
Code and library – http://bit.ly/arduinocodelibrary
Original link – https://github.com/riyas-org/max7219
Provided Amazon links are affiliates
Tools You’ll Need:
- Router https://amzn.to/2DVXXZC
- Drill: https://amzn.to/2U5QQmL
- Jigsaw https://amzn.to/2rg4uXx
- Fretsaw https://amzn.to/2Ece851
- Clamps https://amzn.to/2E8EBkQ
- Small clamp https://amzn.to/2Pto6AQ
- Tape measure https://amzn.to/2rfS4Ph
- Combination square https://amzn.to/2PtmtmN
- Small utility knife https://amzn.to/2L6Gi2J
- Hot glue gun https://amzn.to/2PdCgpI
- Digital Multimeter https://amzn.to/2rf0EO3
- Soldering kit: https://amzn.to/2Q613Bf
- Wire cutting pliers https://amzn.to/2rvrL80
- Wire Stripper https://amzn.to/2PvTK0z
- Soldering helping hand https://amzn.to/2EedeoI
Materials You’ll Need:
- 6mm thickness plywood (local hardware store)
- Small wood screw (local hardware store)
- Wood glue: https://amzn.to/2E8Baus
- Wood oil https://amzn.to/2UrHKB0
- Epoxy https://amzn.to/2Q8N3GU
- Electrical tape: https://amzn.to/2QsKK0P
- Sandpaper https://amzn.to/2M1mUE7
- Silicone feet https://amzn.to/2PbfWgs
- Arduino Nano https://amzn.to/2PuatkY
- 8×8 LED Display 2x https://amzn.to/2L8Gmz0
- Protected 18650 Li-Ion battery https://amzn.to/2PrZ7y0
- 18650 battery holder https://amzn.to/2SyZMzw
- Booster module https://amzn.to/2rwVIEl
- On/Off switch https://amzn.to/2PwVruS
- Breadboard https://amzn.to/2PxftVY
- Wires (local hardware store)
You can follow me:
- YouTube: https://www.youtube.com/channel/UCaaSGD6wIhpYZhav…
- Instagram: https://www.instagram.com/diyperspective
- Twitter: https://twitter.com/diyperspective
- Facebook: https://www.facebook.com/diyperspective
Step 1: Preview
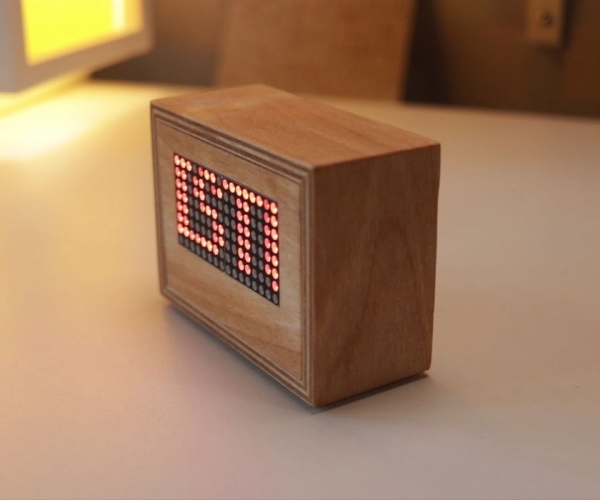
Preview of the mini scrolling text display.
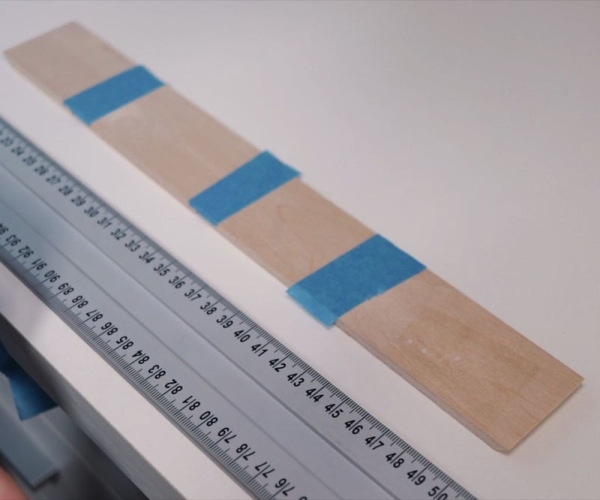
Step 2: Cutting Plywood
To make a simple box first I cut sides, top and bottom from 6mm plywood. Add painters or electrical tape to prevent any chipping.
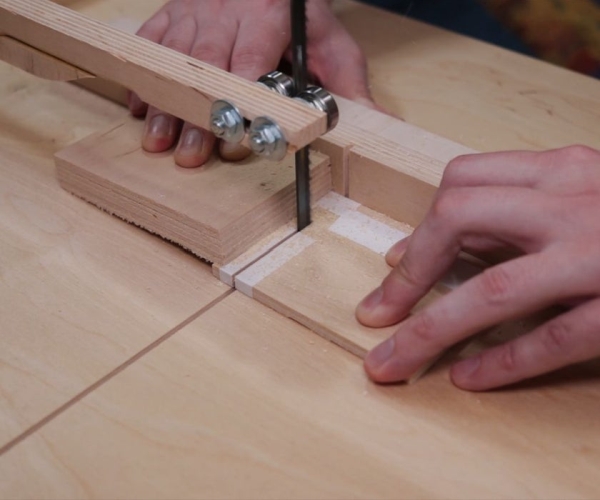
Step 3: New Jig
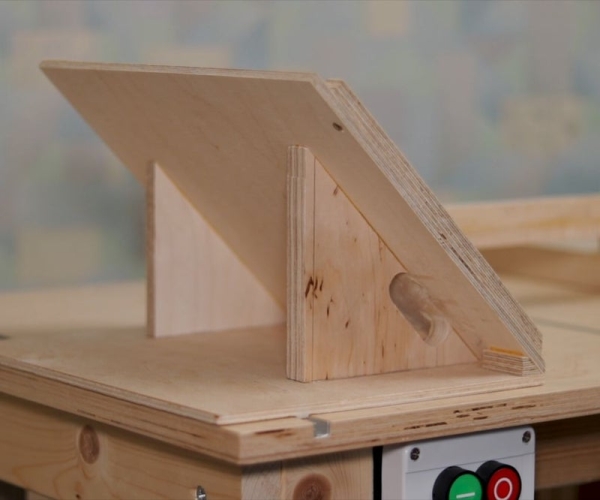
If you wondering, this is my new jig for bevel cuts for my jigsaw table. It’s very simple jig, but very useful.
Clamped stop block helps to cut pieces at the same size.
Step 4: Gluing
Connect all sides with painters tape and glue them.
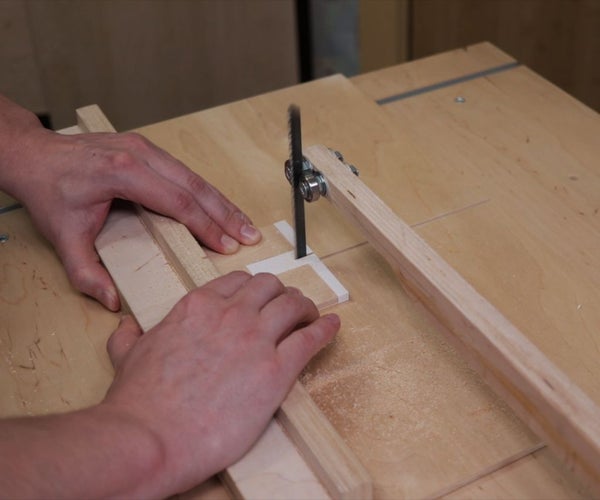
Step 5: Cutting Front and Back
Then I cut front and back pieces. In front piece I drilled hole and made hole for LED displays with a fretsaw.
To get straight looking cuts I trimmed inside with a jigsaw.
Step 6: Making Slot for the Chips
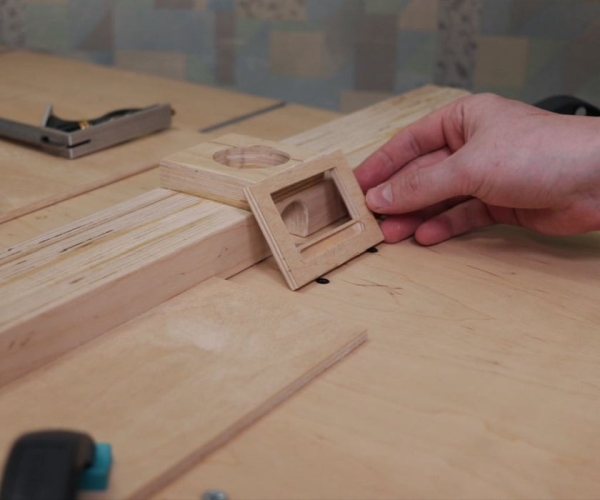
I routed slots for chips of the LED display, as I wanted that display would be flush with outside of the front piece.
Step 7: Components That You Need
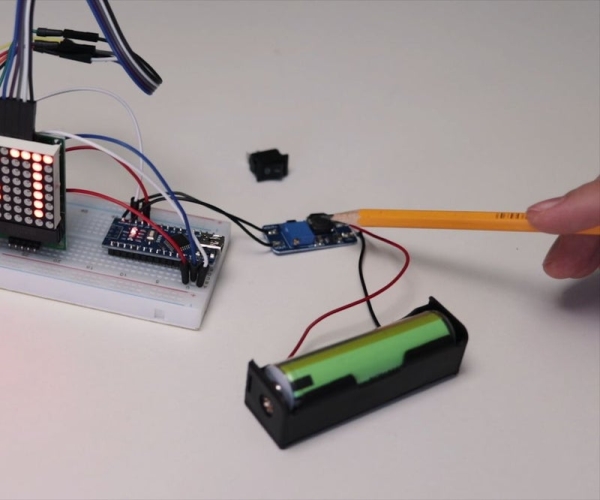
For this build you need (links in first page):
- Arduino Nano
- 2x 8×8 LED displays
- Voltage booster
- Protected 18650 battery
- Battery holder
- On/Off switch
Before soldering Voltage booster to the circuit make sure to adjust it’s output voltage to 5V with potentiometer on the chip.
Step 8: Before Soldering
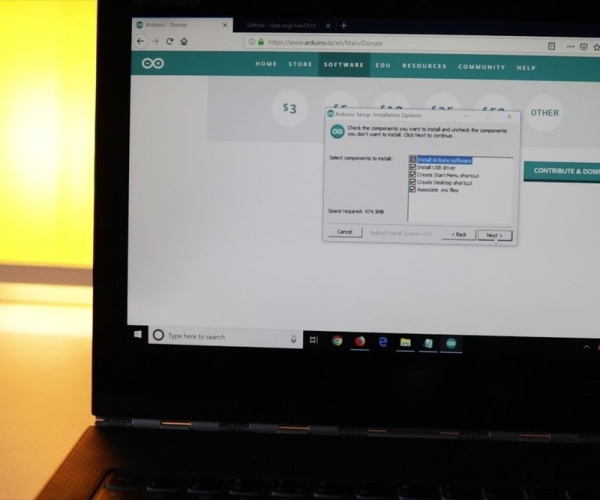
Download and install Arduino software – https://www.arduino.cc/en/Main/Software
If you get prompt messages like in a picture just agree and install.
Source: Scrolling Text Display (A to Z Guide)
- How do I prepare the wood before cutting?
Add painters or electrical tape to prevent any chipping during the cutting process. - What is the purpose of the jig mentioned in Step 3?
The jig helps make bevel cuts with a jigsaw and uses a clamped stop block to cut pieces at the same size. - How should the LED displays be positioned on the front piece?
You must route slots so that the display chips are flush with the outside of the front piece. - What voltage should the booster module be adjusted to?
You must adjust the output voltage to 5V using the potentiometer on the chip before soldering it. - Do I need to write my own code for this project?
No, you will use existing code provided via links rather than writing code from scratch. - What software is required to run the Arduino?
You need to download and install the official Arduino software from arduino.cc. - How can I ensure straight cuts when trimming the inside of the front piece?
Trim the inside with a jigsaw after drilling holes with a fretsaw to get straight looking cuts. - What power source does this device use?
The device is powered by a protected 18650 Li-Ion battery connected through a booster module.