Summary of Scan QR Codes with Raspberry Pi Pico
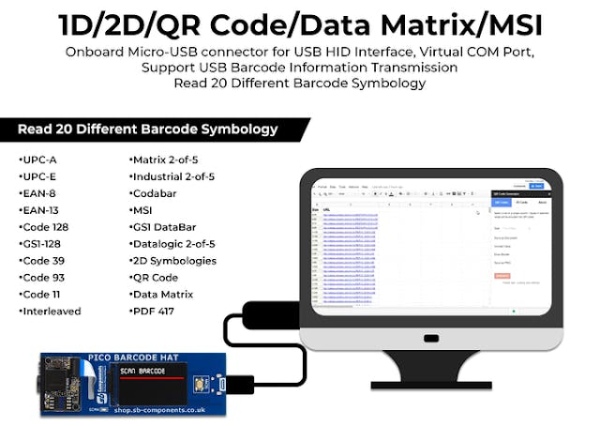
Summary: Use a Barcode & QR Code HAT with a Raspberry Pi Pico to read QR codes and create barcodes/QR codes in Python. QR codes encode various data types using black-and-white modules and alignment patterns. The Python qrcode library (with PIL) generates QR images; QRCode class supports customization (version, error correction, box size, border). The Pico HAT can act in USB-KBW (keyboard) mode to send scanned data to the host.
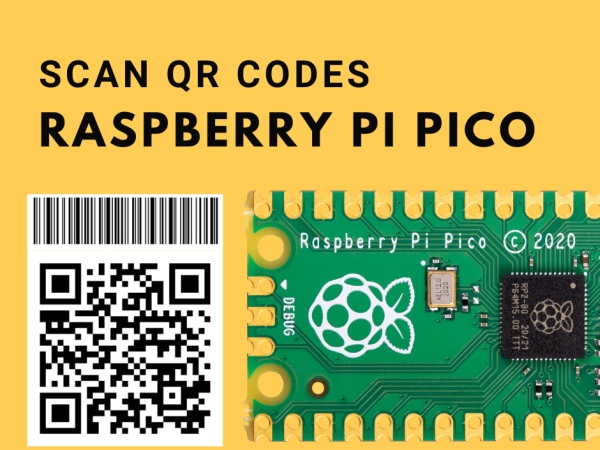
Parts used in the Barcode & QR Code HAT and Raspberry Pi Pico project:
- Barcode & QR Code HAT
- Raspberry Pi Pico
- Host computer (to receive USB-KBW input)
- Python environment with qrcode and PIL (Pillow) libraries
- Printer (optional, to print combined QR code sheet)
To extract information from QR codes and use a Barcode & QR Code HAT and a Raspberry Pi Pico.
Description
To extract information from QR codes and (even create your own barcode & QR Code using Python), use a Barcode & QR Code HAT and a Raspberry Pi Pico.
What Are QR Codes and How Do They Work?
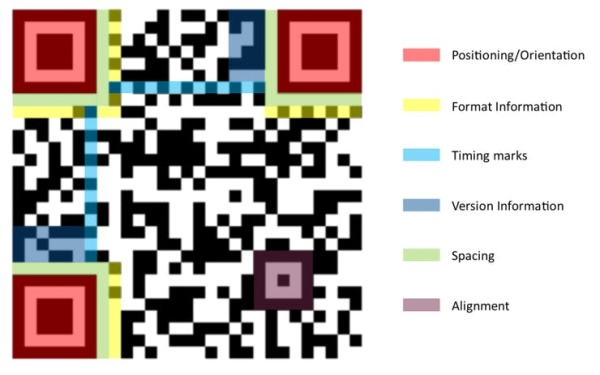
QR codes, which are similar to barcodes in that they can encode data represented by black and white squares, are similar to QR codes. Instead of employing a laser, a camera detects the difference between the spaces and delivers the data to be processed. They’re made up of multiple huge squares that help align and place the QR code’s boundaries, as well as formatting columns, a version number, and the data itself.
They can encode a wide range of data types, includingintegers, characters, and binary, allowing for a wide range of creativeapplications. Advertisers frequently include URLs that drive users to theirwebsites. Other businesses may use a QR code to encode critical product data, such as a serial number, and attach it to a component.
Create Barcodes & QR Codes with Python
Creating Barcode In Python
I’ve already created a blog on “Create Barcodes with Pure Python”
Creating QR Code in Python
Users can easily encode data within a QR code and thenexport it as a picture using the Python tool “qrcode.” Run thefollowing command to install it:
pip3 installqrcode[pil]
Then you can use it in a script to create a PIL picture using:
import qrcodecode = qrcode.make('Hello world!')The image may then be saved as a file by using
code.save(<filename>.png)The QRCode class allows you to further personalise yourcodes with settings like size, error correction amount, version, and borderwidth.
>>> import qrcode>>> code = qrcode.make('Hello world')>>> code.save('hellocode.png')The QRCode class allows you to further personalise your codeswith settings like size, error correction amount, version, and border width.
>>> qr = qrcode.QRCode(version=20,error_correction=qrcode.constants.ERROR_CORRECT_M, box_size=10, border=4)>>> qr.add_data('https://shopmakergenix.blogspot.com')>>> qr.make(fit=True)>>> img =qr.make_image(fill_color="black", black_color="white")>>> img.save('url_example.png')After you’ve made all of your personalised QR codes, combinethem into a single sheet and print it.
Setting Up the Raspberry Pi Pico
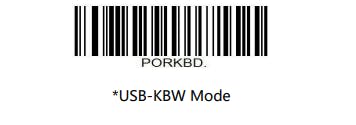
The default mode is USB-KBW, or USB keyboard mode, which sends data to the host by simulating a USB keyboard.
Source: Scan QR Codes with Raspberry Pi Pico
- What is the purpose of using a Barcode & QR Code HAT with a Raspberry Pi Pico?
To extract information from QR codes and send the data to a host, and to enable QR/barcode scanning using the Pico. - How do QR codes encode data?
QR codes encode data as black and white squares with alignment patterns, format information, version number, and the encoded data itself. - Can I create QR codes using Python?
Yes, using the qrcode library (with PIL) you can generate and save QR code images in Python. - What command installs the qrcode library with PIL support?
pip3 install qrcode[pil] - How do I save a simple QR code image in Python?
Use qrcode.make with your data and then call save on the resulting image, for example code = qrcode.make('Hello world!') then code.save(filename.png). - How can I customize QR code size and error correction?
Use the QRCode class with parameters like version, error_correction, box_size, and border, then add_data and make the image. - How do I combine multiple QR codes for printing?
After creating personalized QR code images, combine them into a single sheet and print it. - What is the default USB mode of the Raspberry Pi Pico with this HAT?
The default mode is USB-KBW, which sends scanned data by simulating a USB keyboard.