
Summary of Running LED dice
This article describes an LED dice project using six LEDs in a circular pattern to create a chasing effect upon shaking. Powered by a 3V coin cell, it utilizes a PIC12LF1822 microcontroller and a tilt switch for randomization. The circuit employs Charlieplexing to drive the LEDs through three I/O pins with current-limiting resistors. A slide switch controls power, while the microcontroller automatically enters sleep mode to conserve battery life if left on.
Parts used in the LED Dice Project:
- Six LEDs arranged in a circular pattern
- PIC12LF1822 microcontroller
- Three 100 Ohm resistors
- Horizontally placed tilt switch (vibration switch)
- Pull up resistor
- Power on/off slide switch
- Circular PCB
- CR2032 battery holder
- 3V coin cell battery
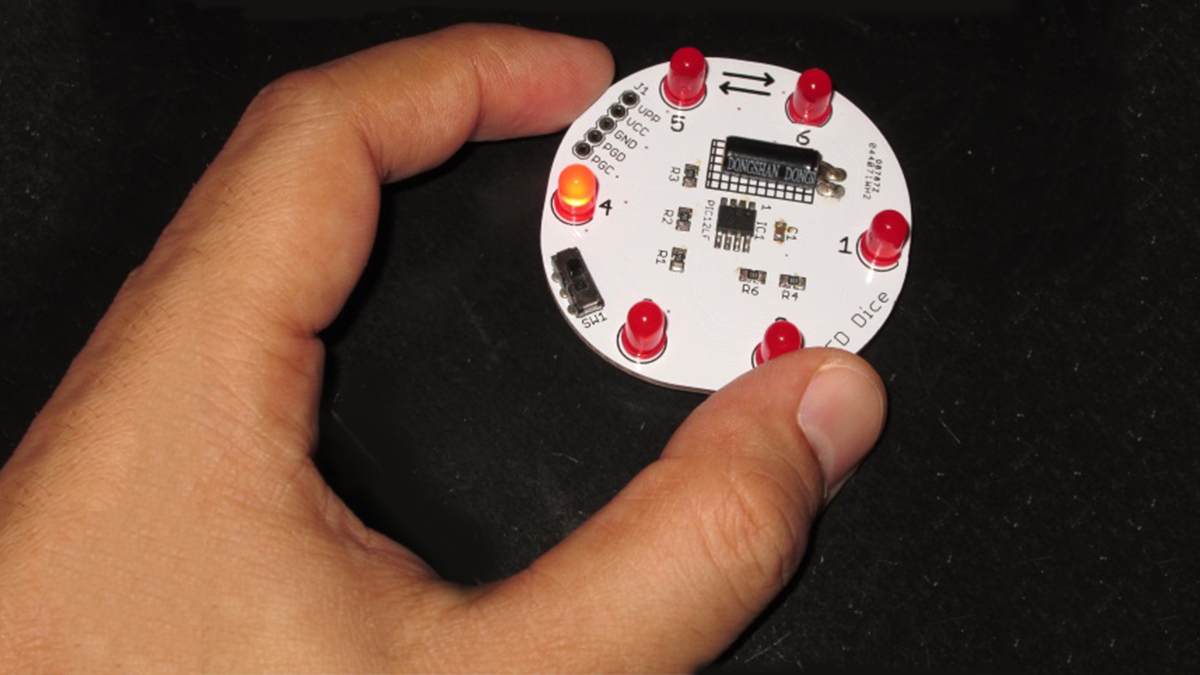
Tons of LED dice projects with different output forms have been published online. The most common output configuration in those projects is a 3-1-3 setup (two rows of three LEDs and one LED at in the middle) of seven LEDs, which simulates the actual patterns of dots found on the six faces of a traditional dice. When it is rolled, one or more LEDs are selectively turned on to display a random number between 1 to 6. This project is about a similar LED dice but with a slightly different output form. It uses 6 LEDs which are arranged in a circular pattern and are labeled 1 through 6. They create a chasing effect when the dice is rolled. The chasing effect slows down gradually, and eventually stops at one of the six LEDs. The rolling is done by a gentle shaking of the dice horizontally. The LED dice is powered with a 3V coin cell battery and uses PIC12LF1822 microcontroller to generate a random number and drive the output LEDs.
Circuit diagram
The six LEDs are driven through 3 I/O pins of PIC12LF1822 microcontroller using the Charlieplexing technique. Three 100 Ohm resistors are placed in series with the I/O lines to limit the LED currents. A horizontally placed tilt switch (also known as vibration switch) is used to sense the shaking of the dice. A tilt switch is simply a tube with a tiny conductive metal ball that rolls inside it, and has two electrical contacts that are accessible from external leads. When its tilted upright, the ball rolls onto the two metallic contacts, thus short-circuiting them together. The tilt sensor along with a pull up resistor generates an interrupt signal on GP2/INT pin of the PIC12LF1822 microcontroller and the dice is rolled. A power on/off slide switch is also included in the project. In case you forgot to turn it off, the PIC microcontroller will be programmed to automatically go to sleep mode to save the power consumption. A circular shape PCB is designed for this project. The CR2032 battery holder is placed on the bottom side of the PCB, whereas rest of the electronics and LEDs go on the top side. The design files can be downloaded from the link provided at the end of this section.
For more detail: Running LED dice
-
How is the rolling action initiated?
The rolling is done by a gentle horizontal shaking of the dice which activates the tilt switch. -
What technique is used to drive the six LEDs?
The LEDs are driven through three I/O pins using the Charlieplexing technique. -
How does the project save power consumption?
The microcontroller is programmed to automatically go to sleep mode if the device is left on. -
What component senses the shaking of the dice?
A horizontally placed tilt switch or vibration switch is used to sense the shaking. -
What is the purpose of the three 100 Ohm resistors?
They are placed in series with the I/O lines to limit the LED currents. -
How are the LEDs labeled in this specific project?
The six LEDs are arranged in a circle and labeled 1 through 6. -
Where is the battery holder located on the PCB?
The CR2032 battery holder is placed on the bottom side of the circular PCB. -
Which pin of the microcontroller receives the interrupt signal?
The tilt sensor generates an interrupt signal on the GP2/INT pin of the PIC12LF1822.
