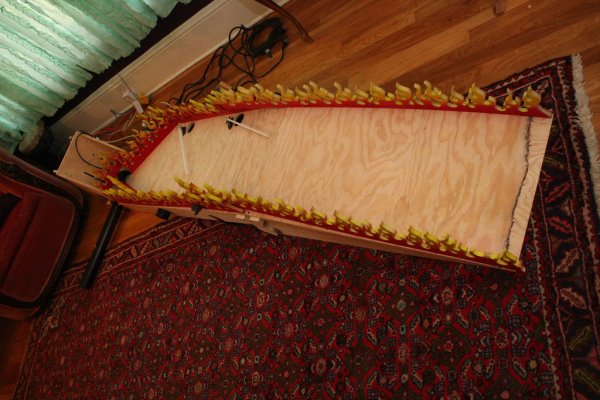
My company has annual events where we all get together for fun – to blow off steam and have a little competition. In the past we have had softball and bowling competitions. This year someone had an inspiration: each department would build a putt-putt ‘hole’ in the officed and we would all compete to make the best hole. There were some amazing contributions. This is my contribution to the IT department’s hole:
“Fire in the hole”
This was a multi-part obstacle course kind of hole. First was the “windmill” (a ceiling fan on its side!)making it past that put your ball in front of my ramp of action. The ramp of action gave your ball either a boost to the hole bypassing the dreaded sand trap of styrofoam, put your in a good position to make it past the sand trap, or dropped your ball into a bad position. Past the sand trap was the goal hole. This instructable will show you how to make your own ramp of action.
This instructable will illustrate a few basic arduino control concepts. Take any that appeal – all or just some or only one could be used to make another awesome puttputt hole.
In this instructable I will show
how to activate an electric nail gun from an arduino
how to activate a fog machine from that arduino
how to run servos from the arduino
how to activate a 10Amp, 3/4HP electric motor from that same arduino
I will also be showing how I read infrared sensors, and base the activation of the above components on the reading of the infrared sensors.
Let’s start with a brief overview of the idea:
I wanted to incorporate stuff I had lying around in this impressive putt-putt hole.
The main idea I had was to have the ball go into one of several random holes lying in your path which would send your ball flying either closer to the goal hole or farther away from it.
I had electric motors, an electric nail gun, and a fog machine on hand.
Additionally I had a teensy-duino and 3 servos on hand as well as a couple of infrared emitters and detectors from disassembled computer mice.
I thought that the best thing would be to have the ball shoot out at a high enough velocity to be shot through tubes which would make the ball travel far enough to bypass the sandtrap.
Ultimately what I finished up with is a ramp up to a sloped surface. On the sloped surface are 2 plastic “wipers” driven by servos. These each wipe the ball into a hole which is located at the base of each servo. There is a third hole which the ball will get to if it is missed by the other two wipers. Each hole sends the ball out the side at varying velocities. The first hole just lets the ball roll out. The second hole has an electric nail gun in it and shoots the ball out of the side. The third and final hole has a 3/4hp electric motor with a propellor like attachment which smacks the ball out to the side. The third hole also has a fog machine connected to it so that when the ball comes out of the side, it pushes fog out with it for added smoke effect!
This instructable will walk through my thought processes as well as my discoveries, work-arounds, trials and errors. I will include some improvements which I have not made but I think would enhance the project if they were to be added or used instead.
A laser cutter will be a huge enhancement to my shop – I have great ideas that would benefit from the use of a laser cutter – much more intricate parts could be involved, engraving of fine details, the possibilities are endless and I can’t wait to start exploring them!
Step 1: Prototype Ball Sensor
The first step was to decide whether or not the IR emitter / detector pair would be sensitive enough to tell when a golf ball went through the tube. The infrared detector I found at radioshack is a photodiode which has 2 legs and is essentially an LED that operates in reverse – when exposed to IR, it produces voltage. I would have liked to attach an interrupt to this setup but did not realize what was necessary, so in this case, the loop() is fast enough to detect a ball moving fairly quickly.
the video below shows the prototype circuit in action.
Also I have attached an image showing the emitter/detector setup, the pins connected to the teensyduino and the arduino code I used to test the setup.
It works pretty well.
An improvement would have been to get some phototransistors. These would have allowed me to use interrupts in the code which may have made detecting the balls faster but overall the results are good.
For more detail: PuttDuino putt-putt hole with Arduino

