As soon as I started learning about and using addressable LEDs like the NeoPixel my mind jumped straight to thinking about all the stuff I could stick these on to give it a cool look. Of course, the first thing that came to mind was a bike and a skateboard. So in the project, we are going to learn about how to create a NeoPixel SkateBoard addon.
The goal is to create a case using TinkerCad, 3d print it, write some code, upload it, put it all together and finally take it out for a ride.
Step 1: Addressable LEDs?
In a past project, we talked in length about what an addressable LED is and how to control it through code. We aren’t going to dive as deep into the theory in this project but we will take an overview look at what they are. You can check out the last project Here for some more info.
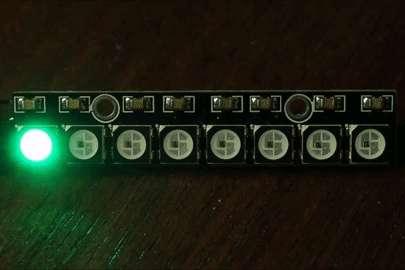
Addressable LEDs are LEDs that can communicate with each other, this allows strings of commands to be sent through one data pin to control many many LEDs. This is a big advantage over standard LEDs as they only have their power and ground pins (Short leg and long leg) this means if we want to control 4 standard LEDs we have to plug them into 4 digital pins on our microcontroller and set the pins to either HIGH or LOW whereas the addressable LEDs only ever need one digital pin to control them.
Step 2: Planning the Features
The first thing we need to do before jumping in is plan out the features we want this skateboard to have. For example, I want my skateboard to have a rechargeable battery (AAs are expensive) and I want all the mods I do to it to be easily removable.
It’s good to plan these things out before you start the project as you’ll save yourself so much headache when you start coding and designing it. A good example of this is my original idea was to stick a WIFI module in the board and have a phone app that could control it, I went ahead and programmed it into my code and then later chose not to use it because it makes the setup time before use too high. If I had planned my project out I could have avoided this waste of time.
The features I want my skateboard to have are:
- NeoPixel Animations (Makes it interesting to look at)
- Rechargeable Battery (Saves some $$)
- Strong Case (Needs to not break every time I fall)
- Easy to install (I have a few skateboards Id like to be able to easily put it on whichever one I’m using)
- No setup hassle (I want to just flick a switch and go)
Step 3: Parts List

Now that we have planned out the skateboards features we can start putting together a parts list for the project.
Parts:
- Microcontroller (ill be using the Arduino Pro Mini but I recommend the Nano) ( Here)
- NeoPixel Strip ( Here)
- Lithium Battery ( Here)
- Lithium Battery Charger and Discharger ( Here)
- Switch
Optional Extras:
- EL Wire and converter ( Here)
Tools:
- Soldering Iron
- Glue Gun
- 3D Printer
- Computer With Arduino IDE
Consumables:
- Hot Glue Stick
- Solder
- 3D printer filament
- Super Glue
Step 4: Making the Case
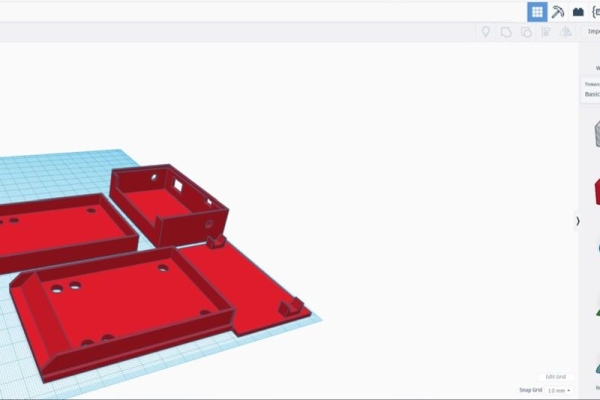
To make the case easy to install and remove I’m going to model it after a skateboard riser which is normally installed under the trucks. This was all done in TinkerCad and the 3D modules can be found below.
We are going to be printing 3 parts. The first part which is the lower main base is used to hold the NeoPixel, screw onto the skateboard trucks and have a spot in the back where we can attach a nut to screw on the second piece. The second piece is the top half which has space for the battery and all the circuitry, it also has holes cut out for the switch and charging port. and the last piece we are going to print is simply just a standard riser to make sure the skateboard stays level with all the mods we are doing.
Drop these into your slicer of choice (I’m using simplify 3D) and slice them for your printer. Once done start printing! Mine took about four and a half hours to print and came out really well. It takes quite a while because the walls of the print are extra thick making for a stronger case.
Step 5: Writing and Uploading the Code
Like we spoke about before we want to make sure the NeoPixel is displaying some cool animations to make this look interesting at night. To do this we are going to need to create these animations through code. If you want to find out more about how to create these animations check out the last project here.
To do this we are going to need the Arduino IDE which can be downloaded here and the Adafruit NeoPixel library which we will be installing into the IDE.
Once you’ve got the IDE open do the following:
- Click on Sketch
- Click on Include Library
- Click on Manage Libraries
- Search for NeoPixel
- Click on the one named “Adafruit NeoPixel“
- Click Install
Now the NeoPixel Libary is installed in our Arduino IDE. What’s nice about using the Adafruit NeoPixel library is that we can use the examples that come with it.
- Click on File
- Click on Examples
- Click on Adafruit NeoPixel
- Click on Strandtest
This will then load up a great example of how to use the NeoPixel library and animations. Using this you can create your own animations or you can use mine which can be downloaded from here.
Once you have chosen the code you want to you click on boards and select the board you are using and then click upload.
Step 6: Putting the Circuit Together
Our final circuit consists of two different circuits that serve different purposes. The first circuit is the Arduino and NeoPixel which make up the control circuit and we wire it up as follows:
- Ground on the NeoPixel goes to Ground on the Arduino
- VCC on the NeoPixel goes to 5 Volts on the Arduino
- DIN on the NeoPixel goes to Pin 6 on the Arduino
Now with the NeoPixel wired up, we can start wiring up the circuit that powers everything. This includes the Battery and Battery Managment System. This is how we wire it up:
- VCC on the Battery goes to IN + on the Battery Management System
- Ground on the Battery goes to In – on the Battery Management System
With both circuits wired up, we can start putting them together. You’ll notice on the battery management system has a 5 Volt output which we can wire directly to our Arduino. Heres how we do that.
- 5 Volt Out on the Battery Management System goes to the 5 Volt Pin on the Arduino
- Ground on the Battery Management System goes to the GroundPin on the Arduino
Just like that, all the wiring is done and we can move on. If anything was unclear or you want to double check your work refer to the included image or drop a comment!
Step 7: Putting It All Together

Finally, we can start with the best part, putting it all together. We are now going to put the circuit we designed into the case we made earlier and then finalize the whole thing on the skateboard.
Let’s start by mounting the circuitry in the casing, everything should fit perfectly into the second piece we 3D printed which was the top piece of the main case. Youll notice that there are some holes for the charging port, make sure these lineup.
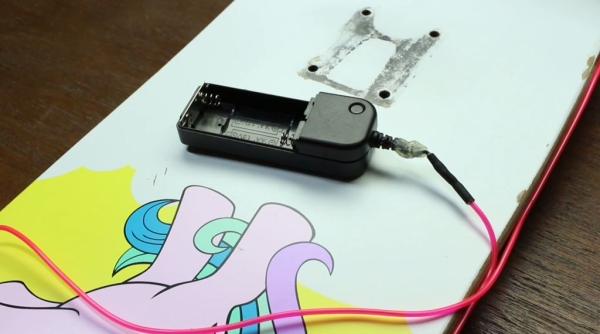
Next, we can mount the top piece with the circuitry onto the bottom main piece to make it complete. you’ll now see that our main piece have these holes which are for the trucks screws to go through. Mount it to the skateboard and you should now see a finished product! (don’t forget to mount the third riser piece in the back)
Step 8: Adding the EL Wire
I happened to have some EL wire in my workshop that perfectly matched my skateboards color scheme so I cut it and mounted it around the edge of my board and then glued the inverter in place. This definitely makes the board as a whole a lot weaker but gives it a cool look.
If you do choose to do this mod I recommend you be a little gentle with the board, the first mod can take a beating because made a strong case for it but this one isn’t as strong. Definitely avoid this step if you use your board for tricks.
Thanks so much for reading! If you have any questions please feel free to drop them in the comments section and ill be happy to answer them.
Source: NeoPixel SkateBoard