English:
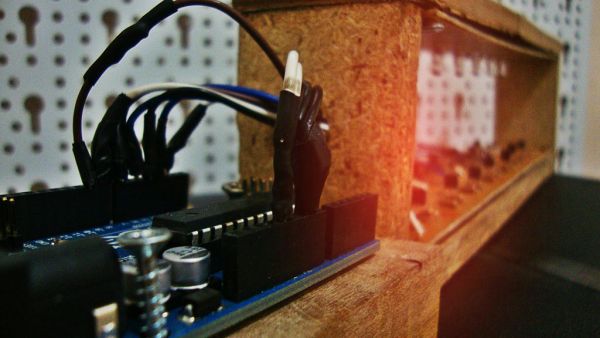
This is a simple and easy to make MIDI harp, it runs on an Arduino UNO and uses infrared sensors as strings.
It communicates with every recording software that has MIDI.
Its really fun to play with and also very cheap, so enjoy!!

Español:
Este es un simple y facil de hacer harpa MIDI, funciona con un Arduino UNO como controlador y tiene sensores infrarojos como cuerdas.
Puede comunicarse con cualquier software de grabacion que tenga la opcion de usar instrumentos MIDI.
Es muy divertida y bastante barato, disfruten!
Made on August 17th 2013 for the August Build night with Jameco
All materials provided by http://jameco.com/
Step 1: Materials
English
List of materials:
– 2N2222 Transistor (x14)
– Infrared LED’s (x7)
-Infrared reciever (x7)
-100 ohm resistors (x7)
-1K ohm resistors (x7)
-10K ohm resistors (x7)
-400 ohm resistors (x7)
-One sided PCB
-Arduino UNO
-Stranded cable, plenty.
-Breadboard pins
-Glue for wood
– PCB etching solution (Ferric chloride)
Tools:
– Dremmel
-plyers
-Solder iron
-Insulating tape
-Multimeter
Permanent marker
-Nail polish remover
-And everything you find helpful
Español
Materiales:
– Transistor 2N2222 (x14)
– LEDs infrarojos (x7)
-Receptores infrarojos (x7)
-100 ohm resistores (x7)
-1K ohm resistores (x7)
-10K ohm resistores (x7)
-400 ohm resistores (x7)
-PCB con cobre de un solo lado
-Arduino UNO
-Cable multifilar en cantidades necesarias.
-Pines de protoboard
-Pegamento de madera
-Liquido para PCB (Clorato de ferro)
Herramientas:
– Dremmel
– Alicates
-Soldadora o cautin.
-Cinta aislante
-Multimetro
-Marcador permanente
-Quita esmalte de uñas.
-Todo lo que encuentres necesario.
Step 2: The circuit!
English
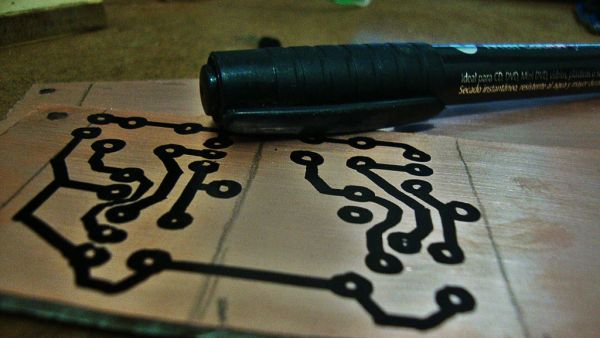
Start by cleaning the PCB with a dry sponge so it gets kind of shinny, and start drawing the circuit with the permanent marker.
Do this for the EMITER circuit and the RECIEVER circuit.
Apply a few layers of marker so that it protects the copper well.
You can use tha laser print method to make the PCB here a link to how to do this: http://www.instructables.com/id/PCB-making-guide/
After you’ve got the circuit, its time to bring the etching solution!
CAUTION: its important that you use rubber gloves, use a hard plastic or glass container to use the solution and do it on a ventilated place.
Dip the PCB for a few minutes in the solution until all the unmarked copper is gone. Then clean the pcb on water until all the solution is rinsed.
Clean the PCB with nail polish remover, and then clean it again with the sponge and you have you PCB ready to go!
Español
Empieza limpiando la placa PCB con una esponja hasta que la placa tenga brillo, y empieza a dibujar el circuito con el marcador permanente. Haz este procedimiento para la placa del emisor como la del receptor.
Aplica varias capas de marcador para poder proteger de buena forma el cobre.
Puedes usar el metodo de la impresion a laser para un mejor resultado aqui dejo un link para aprender como hacerlo: http://www.instructables.com/id/PCB-making-guide/
Despues de tener el circuito dibujado es hora de traer el quimico para el PCB!
IMPORTANTE: usa guantes de goma, usa un container de plastico duro o vidrio para contener el liquido y hazlo en un lugar ventilado.
Sumerge la placa en el quimico y remuevelo durante unos minutos hasta que el cobre descubierto se haya ido completamente, limpia la placa con agua hasta que quede sin quimicos. Limpia el marcador con el quita esmalte de uñas y termina limpiando con la esponja de nuevo para que este limpio y brilloso!
Step 3: Soldering!
English
Drill the holes on the PCB carefully with a dremmel.
Solder the components as shown on the circuit, and make sure that you leave a moveable space on the infrared reciever just in case that if it doesnt recieve the infrared light from the emmiter, you can adjust so that it does.
Español
Taladra los huecon en la placa con el dremmel.
Suelda los componentes electronicos como indica el circuito, asegurate de dejar un espacio para poder mover el receptor infrarojo en caso de que no reciba la luz infraroja del emisor, y asi poder ajustarlo.
For more detail: Mini invisible MIDI Harp

