Seeing smart home products being more common in our lives, I’ve started to think about the relationship between people and these products. If one day, smart home products become an indispensable part of everyone’s life, what attitudes should we take to coexist with them? How are we going to treat them?
We like to call smart home products with a human name, like Alexa. It seems that we are trying to see them as individuals with intelligence. But are we treating them that way? If electrical appliances really have life, will we treat them differently?
To imagine a world where technology has life, I made a 16×16 LED matrix with animation that only shows when people leave the room.
Supplies
As I’m located in China, some of my links are from Taobao.
- 16×16 LED Matrix
- Frame
- Acrylic sheet
- Wood grid
- Arduino Uno
- PIR sensor
- Lipoly Battery (Optional)
- Stranded-core wire in two colors
- Resistors
- Flush cutters
- Wire strippers
- Solder
- Soldering iron
- Glue gun
- Glue sticks
Step 1: Gather the Materials
- Prepare everything from the bill of materials.
- Download the ai. file and laser cut it.
- Before cutting, don’t forget to double-check the size of the LED matrix you bought with the size of the grid provided in the file. Adjustments might be needed if you are not buying from the list.
Step 2: Build the Circuit
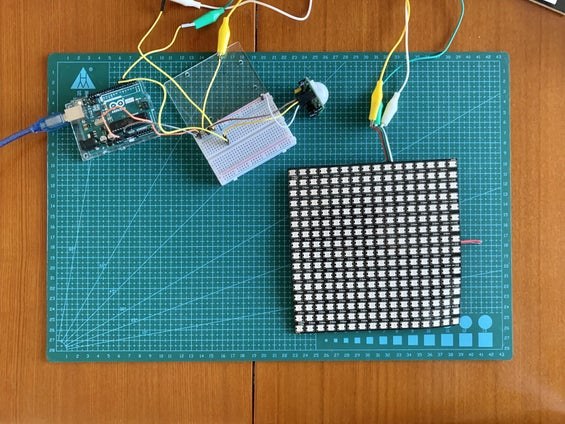
- Build your circuit according to the circuit diagram. You can test them on a breadboard first before soldering them together.
- Plugin your Arduino board to your computer.
- You will need an extra battery to power the matrix if you want your pixels in full brightness.
- Download Arduino IDE if you haven’t already. Copy the code and run it in your Arduino IDE. Don’t forget to install the Adafruit NeoMatrix libraries before running the code if you never used an LED matrix before. Read this Adafruit-NeoPixel-Uberguide about NeoMatrix libraries, it will tell you the basics about NeoMatrix and how to install the libraries.
- Download the code provided and upload the code to your Arduino.
- The bitmaps in the code are generated using this website tool and you can use it to transfer any 16×16 pixels image into a bitmap to replace the ones I’m using. (http://www.rinkydinkelectronics.com/t_imageconverter565.php)
- Set a camera in front of your matrix and leave the room to see if the matrix is showing in the right way. If not, go back to the circuit and start troubleshooting.
- Hurray! You’ve finished building the circuit! Let’s move on to assembly.
Step 3: Assembly
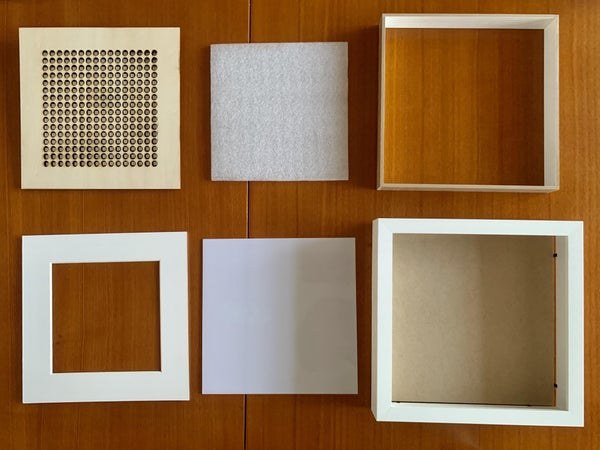
- Put the laser-cut grid above the LED matrix and the acrylic sheet above the grain.
- Put the PIR sensor under the acrylic sheet and use the glue gun to fix it in position.
- Put them together in the frame, and if necessary, use a glue gun to fix them in position.
- Fix the Arduino board in the back of the frame using the glue gun.
- Yeah! This project is almost done. Let’s plug it in and start testing.
Step 4: Testing
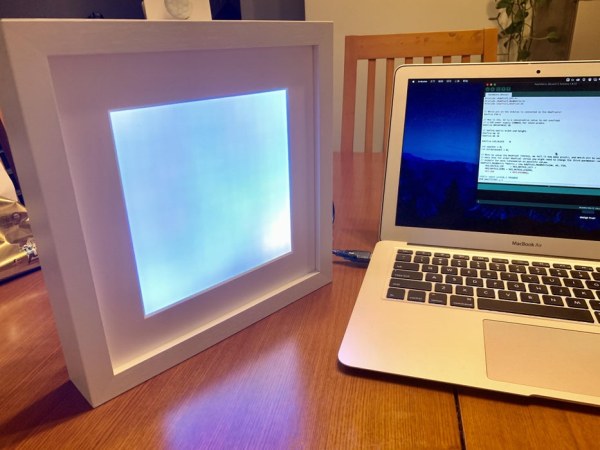
- Plugin the Arduino Uno with your computer.Set a camera in front of your matrix and leave the room.
- See if the matrix is performing, as shown in the video. If not, go back a few steps and troubleshoot.
- Congratulations! You have finished this tutorial!
Source: Living Pixels – Imagine Technology Has Life