
Summary of How To Make A Arduino Robotic Arm
This article provides a step-by-step guide to building a simple robotic arm using an Arduino UNO, four servos (two Parallax standard and two eBay micro), and two analog joysticks. The creator emphasizes using low-cost materials like foam board and wood scraps for construction. The tutorial covers material lists, software requirements, cutting instructions, assembly steps, and specific wiring connections for the base rotation and arm movements, aiming to assist other Arduino enthusiasts in creating their own projects.
Parts used in the Robotic Arm:
- Arduino UNO REV3
- (2) Bread Boards
- (2) Parallax servos
- (2) Ebay micro servos
- (2) Parallax analog joysticks
- Breadboard jumper cables
- Masking Tape
- Foam board
- Utility knife
- Scissors
In this instructable I will show you how to make a simple robotic arm controlled by 4 servos , 2 analog joysticks, and an Arduino UNO. It is very similar to my “2 Servos + Thumbstick” instructable. This tutorial is in particular to help out another Arduino user; “RobotZee”.
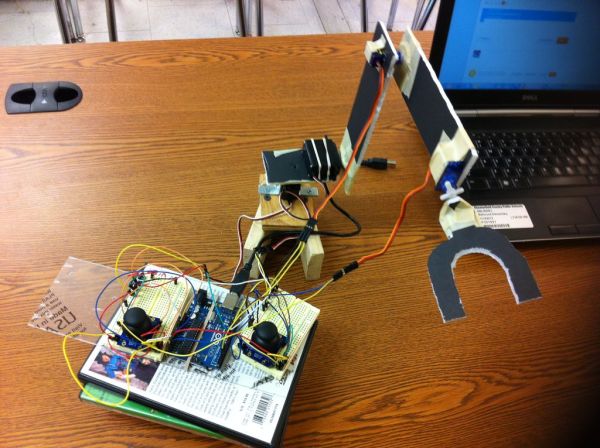
I will guide you step by step using simple construction parts. Remember this tutorial is to help you out and for you to have an idea on how to make your own robotic arm, using this one as an example. And like my other Arduinos Instructable all the electronic parts were bought @ RADIOSHACK, except for the micro servos. They were bought @ Ebay.
NOTE: The construction of this robotic arm is for examples purposes only. I have use simple and cheap materials for this project.
And this tutorial is to help out other Arduino users on their personal projects. No criticism will be taken personal nor because the construction and materials used for the robotic arm. In other words use this tutorial to built you own and better robotic arm. Thank to all of you…BI()ME(H75
Step 1: Materials & Software
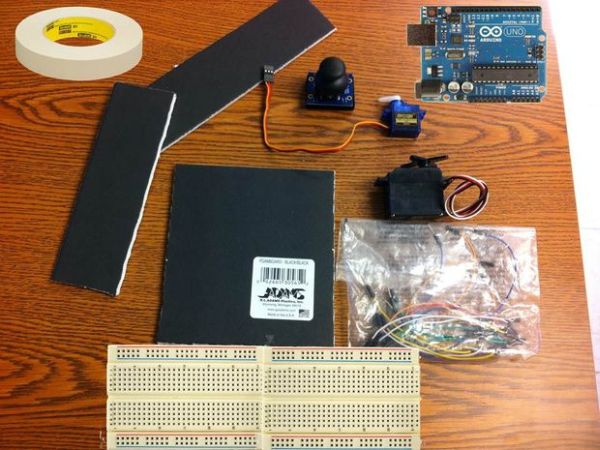
Here is the list in no particular order of the parts, tools and software needed for this project.
Parts:
1. Arduino UNO REV3
2. (2) Bread Boards
3. (2) Parallax servos
4. (2) Ebay micro servos
5. (2) Parallax analog joysticks
6. Breadboard jumper cables
7. Masking Tape
8. Foam board
9. Utility knife, scissors.
10. PATIENCE (a lot)
Software:
Arduino software 0023
NOTE: I rather use this version because the newer one gives me a lot of headaches and issues.
Step 2: Cutting & Assembling Part 1
There is not much to explain in this step. Just cut the foam board any way you want mine is: 6.5 X 1.5 inches and the other one is 4.5 X 1.5 inches. all you have to to is to cut and make holes to fit the servos. Remember the main purpose of this tutorial is to move the servos with the joysticks.
NOTE: Before cutting and putting everything together you need to test the movement of the servos and arrange them in the right place, for the robotic arm and its movements. (after steps 5-8 are complete)
Step 3: Cutting & Assembling Part 2
I have use school tape to hold everything in position. The base is made with recycle pieces of wood that I have found around the garage. Notice how the front servo for the claw rotation it is placed.
Step 4: Cutting & Assembling Part 3
Not much to explain in here, just putting everything together. And I will refer to each connection and servos with a number for your understanding.
EX: Servo 1 base ( body rotation)
Servo 2 arm_1 ( up/down)
Servo 3 arm_2 ( up/down)
Servo 4 claw ( claw rotation)
NOTE: The connections are WAYYY confusing and NOT clear but I will explain them in the next steps.
Step 5: Servos Connections 1 & 2
In here I will show how the connections for the servos 1 and 2.
SERVO 1 is the standard servo for the rotation of the base.
SERVO 2 is another standard servo for the up and down movements of what I refer as ARM_1 .
Servo 1 connections: Red wire: Arduino 5V
Black wire: Arduino GND
Yellow wire: Arduino Digital PWM 10
Servo 2 connections: Red wire: Arduino 5V
Black wire: Arduino GND
Yellow wire: Arduino Digital PWM 11
For more detail: How To Make A Arduino Robotic Arm
- What components are needed to build this robotic arm?
The project requires an Arduino UNO REV3, two bread boards, two Parallax servos, two eBay micro servos, two Parallax analog joysticks, jumper cables, masking tape, foam board, a utility knife, scissors, and patience. - Can I use newer versions of the Arduino software?
The author recommends using Arduino software version 0023 because newer versions cause them headaches and issues. - Where did the author purchase the electronic parts?
All electronic parts were bought at RADIOSHACK except for the micro servos, which were purchased from Ebay. - How many servos control the robotic arm?
The robotic arm is controlled by four servos: one for base rotation, two for arm up/down movement, and one for claw rotation. - What materials were used for the base construction?
The base is made with recycled pieces of wood found around the garage, while the main structure uses cut foam board held together with school tape or masking tape. - Which digital pins connect Servo 1?
Servo 1 connects to Arduino 5V for the red wire, GND for the black wire, and Digital PWM 10 for the yellow wire. - Which digital pins connect Servo 2?
Servo 2 connects to Arduino 5V for the red wire, GND for the black wire, and Digital PWM 11 for the yellow wire. - What is the function of Servo 4?
Servo 4 is responsible for the claw rotation movement.
