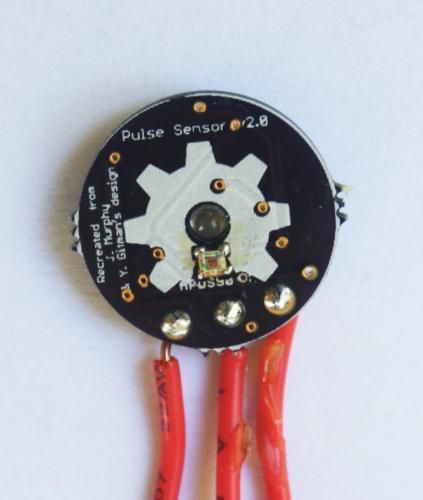
I saw the Open Hardware Pulse Sensor at thought I’d try to make it at home. Took me awhile, but here’s my bumbling process.
Step 1: Pulse Sensor — Overview
I’ve been working on re-making the the Open Hardware Pulse Sensor so it’d be “easy” to send off to OSHPark and make at home. I’m not sure but I think I started this project in March (2013) and I’ve just now finished it.
The bit of encouragement I needed was when hackaday.com put it up as their “Fail of the Week.” I thought I was going to be mature about it. But those four red letters started eating at me, so I gave it another go. Weirdly, I got it working.
I do want to take a moment and thank hackaday.com. I know not everyone is happy with them right now, but I firmly believe in their “Fail of the Week” article. It seems like we are all quick to cover projects that work, but that mentality leaves many committing the same mistakes over and over, without realizing there are thousands making that same mistake themselves. Excellent foresight and innovation, hackaday.com. Hats off.
Back to it, I believe there were three problems:
1. I had mixed up the op-amps again. In my defense, I’ve got 5 different ICs flying about in the same package as the op-amp.
2. The Arduino I’d been plugging into was sitting on a surface that provided enough conductivity to create noise between the 3.3v pin on the underside and A0, which I was using for the op-amp in.
3. Every time I touched the sensor the exposed vias were shorted through my own conductivity. Stupid mineral water.
Anyway, after finishing it and getting it to work, I thought I’d share what information I had gathered.
Here’s a video I put together about the fail and problem fixing.
Step 2: Pulse Sensor — Full Disclosure
As I’ve stated elsewhere, I’m not an engineer, I’m a pure hack. So, follow these instructions knowing I’ve probably made a mistake or missed something dire.
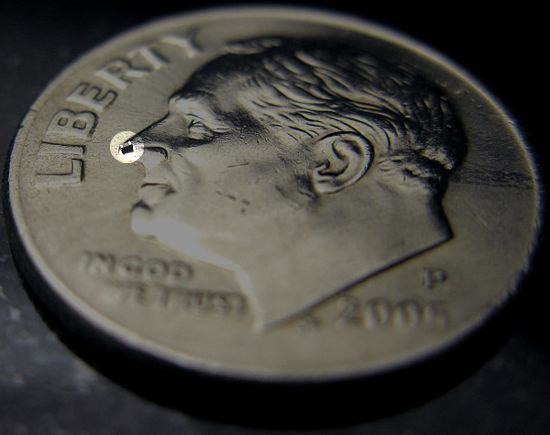
Also, if you watched the video from the previous step you’ll know we’re up against:0402 passives. That’s a 0402 on Frankie’s nose. I ask you not be scared, they are small, but aren’t many of them.
Step 3: Pulse Sensor — Parts
Alright, the bill-of-materials (BOM):
Op-amp: .29 (Digi-Key)
Light Photo Sensor: 1.23 (Digi-Key)
LED: .79 (Digi-Key)
0603 Schottky Diode: .50 (Digi-Key)
Passives: ~2.50 – Resistors: 1 x 470k, 1 x 12k, 2 x 100k, 1 x 10k, 1 x 3.3Meg – Capacitors: 3 x 4.7uF, 2 x 2.2uF
OSHPark Boards: $.67 (minimum 3 boards, costing $2.00. 3/2.00 = ~.67)
I figured the total for one board should be around $5.98. Of course, they get a lot cheaper if you buy your passives in bulk.
Step 4: Pulse Sensor — Tools
These are the tools I used:
1. Clothes-iron
2. Solder at least .022″
3. Flux
4. A soldering iron with a “precision” tip
5. Tacky-putty
6. Precision tweezers
7. Hakko FX-888 Solder Iron
Really, any comparable tools will do. Use my motto, buy cheap and make do.
Step 5: Pulse Sensor — Soldering the Front
It’s not as hard as you’d think.
The light sensor is the hardest bit, so take your time. I put a little bit of solder on each pad with my soldering-iron, then, cover the soldered pads in flux. Next, I attempt to align the light-sensor with the pads as close as possible. After, I put the board with the backside on an over-turned clothes iron. Let the iron heat up until the solder reflows and the sensor is attached.
Make sure to watch for solder reflow. As soon as the sensor stops moving, count to 5 (Mississippily) and pull the board off.
This prevents damage to the adherence of the copper traces to the fiberglass board; meaning, not overheating the board will help keep the delicate traces from pulling away when you go to solder the back.
The guide is: Very hot and very fast over kinda warm and fairly slow.
Step 6: Pulse Sensor — Soldering the Back
Flip the sensor and lock it to your surface with tacky-putty to solder the LED, passives, and op-amp. I won’t detail this, since my video shows the entire process.
A few notes though.
1. Make sure the main LED is face down in the hole, like shown in the above image. Notice the “L” shape points to the right.
2. The small little diode is tricky, since the pads are under it. Put some solder on the places where the diode will go, then, flux the mother out of the soldered pads. Next, place the diode on the pads with the rosin-flux holding it down. Tap the solder under the diode and see if it will suck the diode down onto the pad.
3. Make sure the diode is facing the correct direction. Either match the 2 lines on the diode with the white line on the board. Or just know the 2 lines on the diode should face to the left, given the above picture as reference.
4. I’d use the drag-to-solder method on everything but the 0603 diode and the light-sensor (which we used the clothes-iron for).
Yell if you have questions or gripes
For more detail: Homemade Arduino Friendly Pulse Sensor


