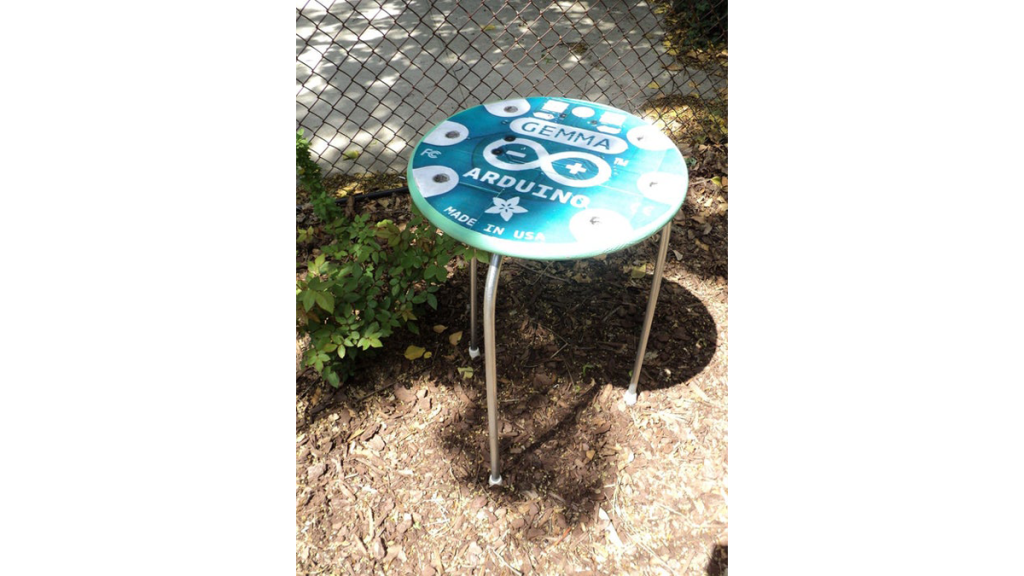
They’re always serving up something hot at Adafruit. Make this giant Arduino GEMMA side table to use as a platform for various purposes. I needed a small utility table next to my BBQ grill so I made this. Enjoy afternoon tea or cappuccino outdoors in the fresh air with Totoro under the big tree.
For all things geeky, this is fun to pair with a giant 555 timer bench.
As a bonus, I will show you what I did to stencil on a graphic logo to my BBQ grill.
Step 1: Get a Round to It..
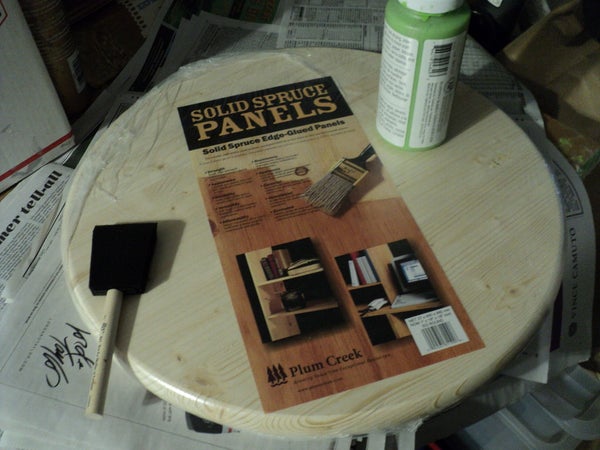
I used a preformed round tabletop wood blank 1″ thick x 18″ in diameter. The home center has these in different sizes. The edges are already rounded over and are made up of a glued compilation of smaller strips. More economical to buy and saves you the trouble to build, cut out and shape the tabletop yourself if you don’t have the time or tools.
For the legs I used 1/2 inch EMT electrical metal tube conduit. Since I also do some electrical work around the house, I have the EMT conduit bender tool which allows me to bend the conduit into the leg shape I need. Tubing is hard to bend without the right tools since it might kink or the walls will dent and fold without the proper support. Sure, you could try just by bending it without a form but you get that cheap lawn chair look.
You need some paint and some protective finish for your table.
I had lots of acrylic craft paint left over from other projects so I decided to paint the table top and table bottom in a bluish green used by Arduino in their packaging. I only had this bright green and pastel blue so it only ended up like a shade of Bianchi Celeste (signature minty green of a classic Italian racing bicycle). I gave it a few coats of green so no need to prime with primer paint. You could also do with an Adafruit black or clear coat and stain to preserve the natural wood look. It has the look of an outdoor patio cafe table. It just needs an umbrella.
Modpodge is used to adhere the reproduction image and to coat all over. The Modpodge product is a combination of white glue and some kind of varnish or acrylic sealer – a secret formula no one has really been able to duplicate. They have a special outdoor version for heavy duty use or else go with polyurethane or varnish.
Optionally you will need a drill and some large spade bits to drill out the circuit board thru holes if desired.
The legs are mounted with the EMT pipe straps and some 3/4 inch wood screws. You can not substitute cheaper 1/2 inch regular plumbing pipe straps as I found that the outer diameter of EMT pipe is smaller than regular iron pipe but slightly bigger than copper pipe.
You can put rubber tips on the ends of the legs to keep dirt out and improve the grip on slippery surfaces.
Step 2: You Need to Rasterbate More Often…
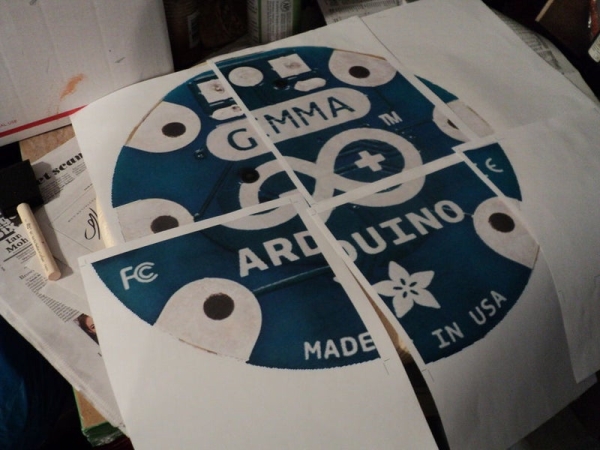
There are many ways to enlarge your image and print it out. No need to take it to the office supply place to print out a poster. It is a tedious task in GIMP.
I used rastebator.net online to enlarge my image, free but please donate to the author
You can upload your image and they will process it into a pdf you can download to print.
Choose file and upload.
Select Print yourself and adjust paper size US Letter, leave default margins
Adjust output size 2.25 Since my round tabletop flat was 17.5 inches, convert that to centimeters (44.45)
Play around to adjust the printout size. Watch the poster size change and get it close to the size you need. You can enter in fractional page widths so I ranged my number to 2.25. Use the field artillery method of estimating by taking your far and near measure. See where you are at. Use the halfway point between your estimated start points and see where to adjust up or down from there. Repeat the process. With a minimal amount of tries, you can home in on the target…
Once you have printed it out, carefully trim the excess paper off.
Dry fit on your tabletop.
You should now be ready to apply the Modpodge or thinned out glue to decoupage the image onto the surface.
I have found that you have to work fairly quick because the glue gets tacky and it is hard to reposition things if needed and the water in the glues will warp and bubble the paper. Things might be difficult to line up or match exactly like when you did the dry fit. Maybe that’s why they sell a special formulation of Modpodge for paper crafting.
You can then top coat everything and set aside to completely dry.
Step 3: Holey Moley…
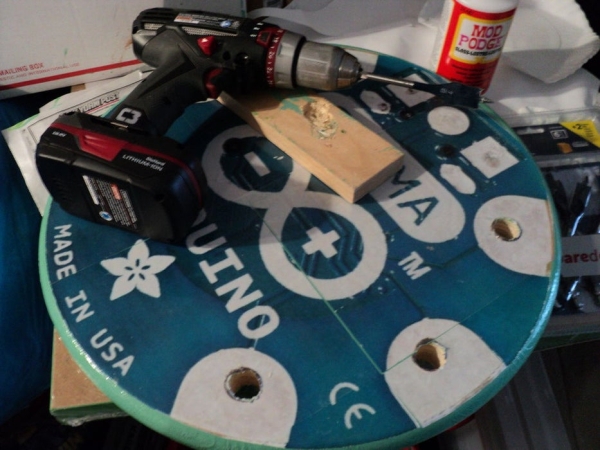
Take a spade bit to drill out the holes in the giant circuit board.
Drill over a scrap piece of wood under the hole to prevent the bit from tearing out the exit hole.
The holes with a large spade bit tend to be rough so you can sand smooth or just pick out the loose pieces.
Mine came out to 3/4 inch diameter with no known AWG size to fit that.
Make sure your plate the thru-holes with silver paint and a coating of Modpodge.
Step 4: Put Some Legs on It…

I had purchased my EMT conduit in 5 foot precut lengths. The standard 10 foot sections would have been difficult to get home with a small car.
I just halved two tubes to get 30 inch lengths. I used a tubing cutter but you can just hacksaw through the steel tubing.
I just bent a 90 degree turn in one end with the tubing bender. The short leg part of the turn will be mounted to the bottom of the table with the pipe straps. Three legs make a good all surface tripod. Four legs need some fine tuning for balance. Once the legs are attached, you need to drill a 1/8th inch pilot hole through one of the straps and the conduit. Drive in a #8 metal screw so it will prevent the leg from rotating.
It yielded a 26 1/2 inch high leg so it would work out well for my utility side table. Indoor side tables are 20-24 inches high and a regular dining table is 28-30 inches high. What can I say, I’m a big guy.
You can make your table shorter or taller and adjusting for how much pipe you’ll need.
Wrap some electrical tape around the ends to build up the diameter so that a 3/4 inch rubber endcap will fit snugly without falling off.
Turn the table over and make any adjustments to the legs while the table is standing up. I think if I made this again, I would flare out the legs a little bit and make the L portion of the mounting tube a bit longer. 3/4 inch EMT or 1/2 rigid pipe would have made stiffer legs. You can position the legs beyond the edge of the tabletop so you can make a set of stacking tables. You can even make matching barstools with a counter height set of tabletops.
Go ahead, someone needs that Fender, Gibson or Harley-Davidson tabletop or leather barstool. Add a footring, bolted or welded and upholster the seating area.
Read more: Giant Arduino GEMMA Side Table