
Summary of Flora- an interactive flower
Flora is an interactive flower project built with Arduino that mimics life by opening and closing petals, waving leaves, and responding to light. It uses a mechanical system of sliding cylinders and paper hinges controlled by multiple servos to create dynamic movement, bringing a unique blend of nature and technology to the user's desk.
Parts used in Flora:
- Hard Cardboards
- 5 Micro Servos
- Arduino UNO or compatible clone
- 1 Standard Servo
- Suitable power supply for the Servos
- Suitable supply for the atmega board
- TCRT 5000 modules (2 pieces)
- 10Kohm Resistances (2 pieces)
- 220 Ohm Resistances (2 pieces)
- LDR (1 piece)
- 10K resistance (1 piece)
- Small breadboard, PCB, or veroboard
- Ply-wood sticks
- Hot glue
- Empty pen refills
- Pop-sickle sticks
- Paper for petals and face
Hello everyone…..Today I have taken something out of my flower garden….We all know,plants have their own lives,they can feel just as we feel..but they can’t express it…But what happens if a flower gains the ability to interact with you? Imagine a flower sitting at your desk looking at you,waiving it’s leaves,saying hello and bye….sleeping and waking up….wouldn’t it be fun? While Arduino and Arduino clones are here,why not build something similar ??
Presenting Flora -an interactive flower straight from my Arduino Garden….
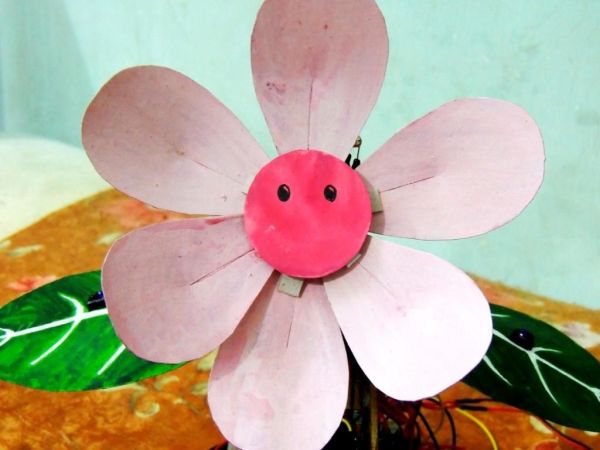 Please,before proceeding further,kindly have a look at the video…….
http://www.youtube.com/watch?v=BxOA7IA8O6A
Step 1: Necessary ingredients !
Oh,well,so I built this using-
1. Hard Cardboards
2. 5 Micro Servos
3. Arduino UNO or compatible clone
4. 1 Standard Servo
5. Suitable power supply for the Servos (I had some trouble regarding this)
6. Suitable supply for the atmega board
7. TCRT 5000 modules – 2 pieces, 10Kohm Resistances-2 pieces, 220 Ohm Resistances -2 pieces
8. LDR – 1 piece, 10K resistance-1 piece.
9. A small breadboard for easy connection…..you can also use a PCB if you want,or a veroboard………anything you want.
10. Lots of time to waste….
Step 2: The head…..
Ok,this is the most complex and most funny part of the whole flower……as you have already seen,it auto closes,opens……so lets take a look at the structure of it…….
1. Draw,cut and colour a circular face like the one in the pic…….I didn’t draw any smile,cause I thought it wouldn’t suit Flora……your choice..
2 make Two hexagonal Cylinders ,such that one can slide inside the other…..it should be hexagon cause there are six petals of Flora…these two would be neck of flora….
3. make the petals out of paper and stick them to the bigger cylinder with small patches of paper,so that they can open and close….se the picture….I have given the pic for three petals,first attach three,when they have dried ,attach three others…
4 Stick the face to the inner cylinder…..see picture
5. Now,slide the small cylinder into the big one….
6. Here comes the Tricky part…..using small patches of paper,attach the petals to the back of the face….just like hinges in an umbrella…..I have given two pics,one with petals closed,one with opened…..study the pics to realize what i am talking about….this part is really tricky….it took me sometime to get it done properly….
7. Now the petals should open and close as the cylinders slide……..if it doesn’t then you must have done something wrong…
8. Cut the backside of the larger cylinder so that we get some paper fringes like those in the picture…..
Step 3:
IMPORTANT– before using any servo,center all of them…….
Stick the head to a micro servo as shown in picture with hot glue…….
And then take two pieces of hard cardboard,stick one to the bigger cylinder and other to the servo horn………..see the position of the screws…..PLEASE see the pictures carefully………
And then attach two more servos to the first one in the way I have shown in the picture……follow these steps exactly…these are quite vital steps.
I don’t have any servo brackets,so I used empty pen refills with some hot glue to make another shaft opposite to the Servo shaft…..see the pictures……And then used pop-sickle sticks to stick the servo horn to the body of the next servo……I will be doing this throughout this tutorial……kindly try to understand it as clearly as possible….
Step 4:
then I used some Ply-wood sticks to make a Servo bracket that would hold the last servo….see pictures.
the shaft opposite to the servo shaft is the empty refill I told about previously……..
For more detail: Flora- an interactive flower
-
What is Flora?
Flora is an interactive flower straight from an Arduino Garden that can open, close, wave, sleep, and wake up. -
How many micro servos are required for the project?
The project requires five micro servos along with one standard servo. -
What components are needed for the sensor setup?
You need two TCRT 5000 modules, two 10Kohm resistors, two 220 Ohm resistors, one LDR, and one 10K resistor. -
Can I use a PCB instead of a breadboard?
Yes, you can use a PCB or a veroboard if you prefer them over a small breadboard. -
How are the petals attached to the face?
Petals are attached to the back of the face using small patches of paper like hinges in an umbrella. -
What material is used to make the neck cylinders?
Two hexagonal cylinders are made such that one can slide inside the other to act as the neck. -
What should be done before using any servo?
You must center all servos before using them in the assembly process. -
How are extra shafts created without servo brackets?
Empty pen refills with hot glue are used to make another shaft opposite to the Servo shaft.
