Summary of How to Build a Finger Scanner Using Arduino
The article discusses a Finger Scanner Arduino project that enables users to register and delete fingerprints for secure authentication. Utilizing components like Arduino UNO, the R307 fingerprint module, 16x2 LCD, RTC module, and others, the project provides practical insight into biometric security applications common in industries such as law enforcement, finance, technology, and access control. The system captures and compares fingerprint data, providing visual and audio feedback and logging timestamps for access events. Despite challenges like sensor sensitivity and limited storage, the project offers valuable hands-on experience integrating hardware and software in biometric systems.
Parts used in the Finger Scanner Arduino project:
- Arduino UNO (ATmega328P microcontroller board)
- R307 Fingerprint Module (optical fingerprint sensor)
- 16x2 LCD Display
- Push Buttons (for enrollment, deletion, navigation)
- LED (status indicator)
- Resistors (1kΩ and 2.2kΩ)
- Buzzer (audio feedback)
- Real-Time Clock (RTC) Module (e.g., DS3231)
- Breadboard or PCB (for prototyping or final assembly)
- Connecting wires
Biometric technologies have materially grown broader within the community of secure identity verification. Among these, Finger Scanner Arduino attracts attention on grounds of accuracy and uniqueness with a wide spectrum of applications. The crux of finger scanner Arduino project is that the user can register and delete fingerprints, thereby simulating the real-world applications for security and authentication purposes.
This means that students not only get to create a functional fingerprint-based system but also gain a hands-on experience with biometrics devices used in various sectors. Through study and application in a mixture of components, including Arduino UNO, R307 fingerprint module, LCD display, RTC module, and others, learners will develop an understanding of hardware and software interplay in a conventional biometric setup.
Fingerprint scanners have recently found their way into smartphones, laptops, secure areas, and even theme parks. This introductory finger scanner Arduino project affords students some insight into the fundamental workings of these technologies, laying the foundation for learning to design and develop biometric security systems.
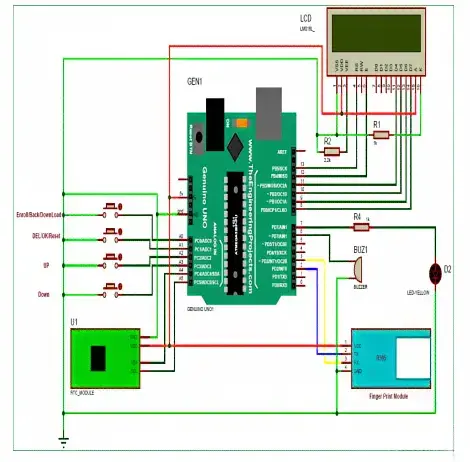
Getting Started with the Finger Scanner Arduino:
The biometrics with embedded systems “Finger Scanner Arduino” project is based on security and identity verification processes. The main arrangement consists of a fingerprint scanner module interfaced with an Arduino microcontroller module for scanning, analyzing, and authenticating a user’s fingerprint. This particular biometric identification technique offers some of the strongest identification protection.
People generally accept fingerprint scanning technology in practical applications, though it differs in efficiency and accuracy from some other methods. The system under consideration interfaces with an employee attendance program in a campus environment, ID checks in governmental institutions, and secure access of confidential data or money transaction facilities.
Arduino allows interfacing convenience, with customization and scalability tailored by application requirements. In conclusion, the finger scanner Arduino project presents a convenient and cost-effective alternative to a biometric security application with real-life scenarios, showcasing the actual crossover between electronics and the biometrical sciences.
Working Principle of the Fingerprint Scanner System:
The whole Fingerprint Scanner system captures and analyzes the fingerprint pattern of a user to match it with stored fingerprints to identify that user. Working on an Arduino UNO as a controller, the fingerprint scanner uses the R307 fingerprint module as a digital scanner for capturing fingerprints. The system compares the obtained template against the stored fingerprint data to grant or deny access.
The system is open to saving new fingerprints and deleting any existing fingerprints, essentially providing dynamic user access management. A 16×2 display will continuously give feedback and status messages. An LED indication will show when the sensor is ready to take in a scan. The system can also include buttons to give user action for registration and deletion, while the buzzer will alert the user in audio during different stages of the system. The Real-Time Clock (RTC) module in this circuit will timestamp different events for better keeping and monitoring.
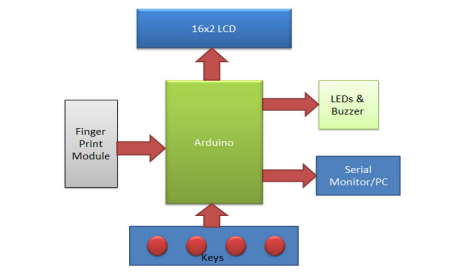
Objective of this project:
With two main educational and technical objectives in mind—both intended to improve practical knowledge and industry relevance—this project is designed:
- To build an efficient fingerprint recognition system: Utilizing a finger scanner configured with Arduino, allowing users to store and delete fingerprint data, develop an intelligent fingerprint recognition system. This scenario would imitate actual use in biometric authentication and access control where secure management of user credentials is very important.
- To provide preliminary student’s knowledge: To give pupils a brief clearness about modern-day business applications of fingerprint readers. Students learn practically how those systems are used in various sectors by engaging with biometric hardware and microcontroller programming, like security, law enforcement, and identification.
These objectives ensure that learners understand the extensive practical applications and vast importance of biometric technologies in today’s technological world, as well as developing a working prototype.
Components Used:
Electronic components necessary for this project passed through a well-defined step-by-step connection procedure to achieve a fully functional finger scanner Arduino system. Below are some key components and the procedure employed in the project.
Arduino UNO:
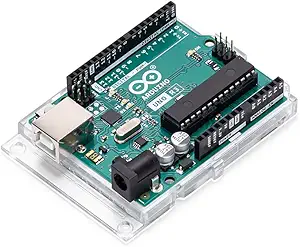
The ATmega328P is the core of the popular Arduino UNO, a microcontroller board with a power jack, USB port and two digital and analog input/output pins. It is used in power, plug and play electronics projects, due to its ease of use and versatility.
Use in Project:
In the fingerprint scanner project, an Arduino UNO is used as the central controller. This program initiates the main window, reads buttons input data from the fingerprint module and RTC, then sends messages to the LCD. It handles authentication requests for fingerprints and monitors the activities of all associated components.
Fingerprint Module (R307):
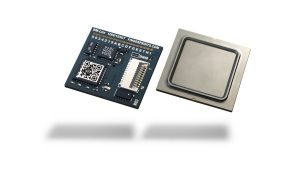
The R307, an optical fingerprint sensor, is a popular choice for taking, storing and matching photos of fingerprints. The device has built-in memory to store templates and provides serial communication with microcontrollers, such as Arduino.
Use in Project:
When the user presses a button on the sensor, the module captures their fingerprint. The system then verifies the identity by comparing the fingerprint to previously saved templates. The purpose of this is to register fresh fingerprints, validate them during access attempts, and eliminate them as required.
Push Buttons:
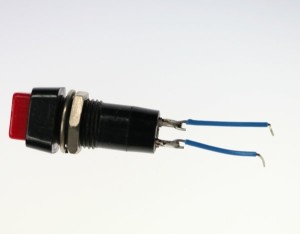
Simple mechanical switches initiate events when pressed. The majority of electronic systems use them for user inputs.
Use in Project:
In this project, users access the system through push-button interaction. For example, they can add a new fingerprint by pressing a single button or use a different button to delete an existing fingerprint. They manage the fingerprint database directly, without needing a computer.
16×2. LCD Display:
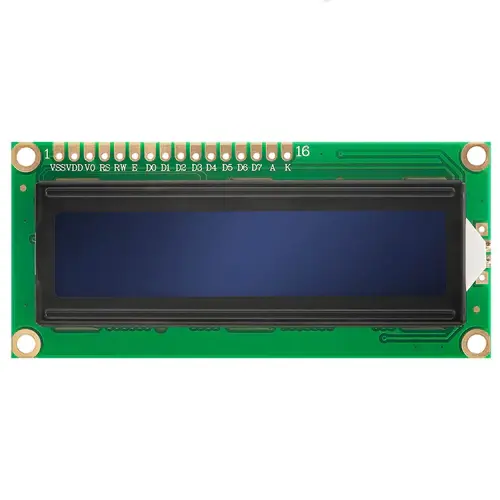
A 16×2. On 2 lines, an LCD screen can accommodate 16 characters each. Typically, it operates with an I2C or parallel interface and is ideal for displaying real-time text output from the Arduino.
Use in Project:
The LCD displays system messages such as instructions, status updates, fingerprint operations, and the current time and date. By providing visual feedback, it makes the system more user-friendly.
Breadboard or PCB:
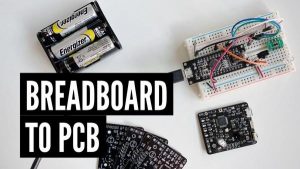
Electronics can be prototypically produced using a plastic board with drilled holes, which is commonly referred to as breadboard. PCB is a professional and permanent solution for connecting components through copper tracks.
Use in Project:
The development phase involves testing the circuit using a breadboard. A PCB can be utilized to make the system more dependable and compact once the design is concluded. These two platforms facilitate the connection of all electronic elements.
Connecting Wires:

The connections between components are made possible through the use of insulated wires that have solid or stranded copper conductors.
Use in Project:
Signals and power are conveyed through wires that connect the Arduino, sensor, LCD, buttons, buzzer, and other components. They maintain communication and ensure electrical continuity throughout the circuit.
LED:
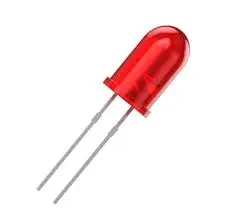
LEDs are designed to emit light when an electric current flows through them. Numerous electronic projects make use of it as a marker.
Use in Project:
The LED serves as a status indicator. Depending on the situation, it may illuminate when the system is ready to scan a fingerprint, blink when scanned, or alter color (if RGB) to indicate progress or failure.
Resistors (1kΩ & 2.2kΩ):

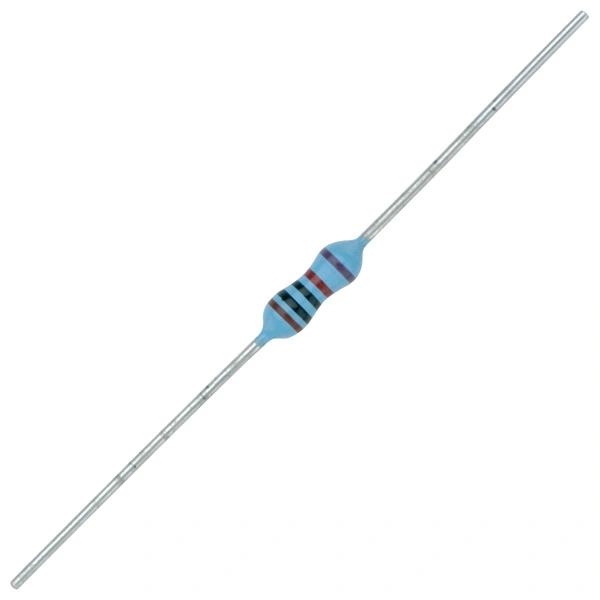
These are electronic components that allow for the flow of current while maintaining a voltage. Other components are safeguarded against excessive current discharge..
Use in Project:
This system typically employs resistors as the primary component. In order to keep LEDs from burning. Rather than using floating inputs, these are employed as pull-up or pulldown resistors in button circuits to ensure accurate signal reading.
Buzzer:

An audio signaling device known as a buzzer. The tones produced by it are contingent on the direction they are driven.
Use in Project:
Buzzer emits sound to indicate actions.. For instance When a short beep indicates success in the fingerprint scan, it is usually considered to be accurate. A longer or double beep can indicate an error or access denied.. The inclusion of sound-based cues enhances user engagement.
Real-Time Clock (RTC) Module:
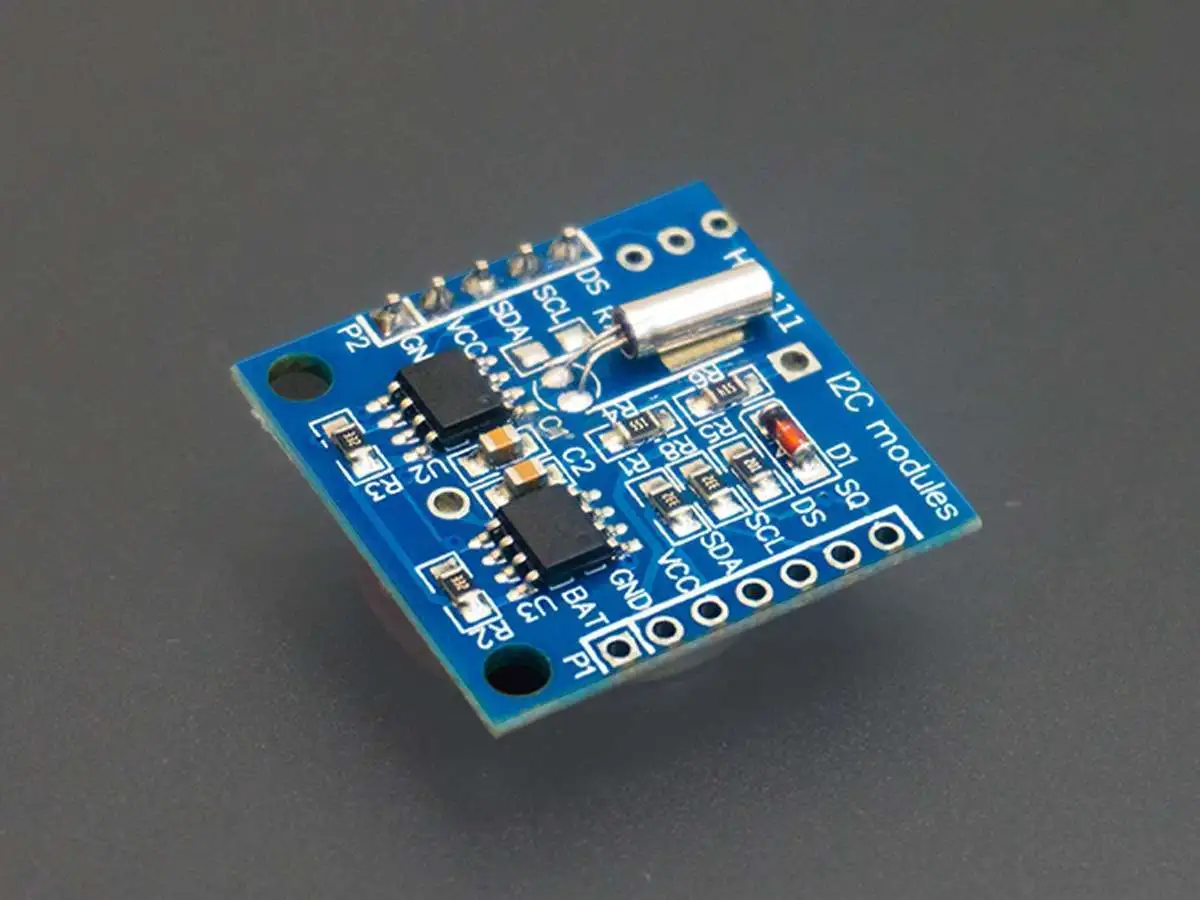
RTC modules like the DS3231 are timing keeping devices that can keep track of date and time, unaffected by a battery.
Use in Project:
The RTC monitors date and time when fingerprints are accessed to record attendance/access to events.
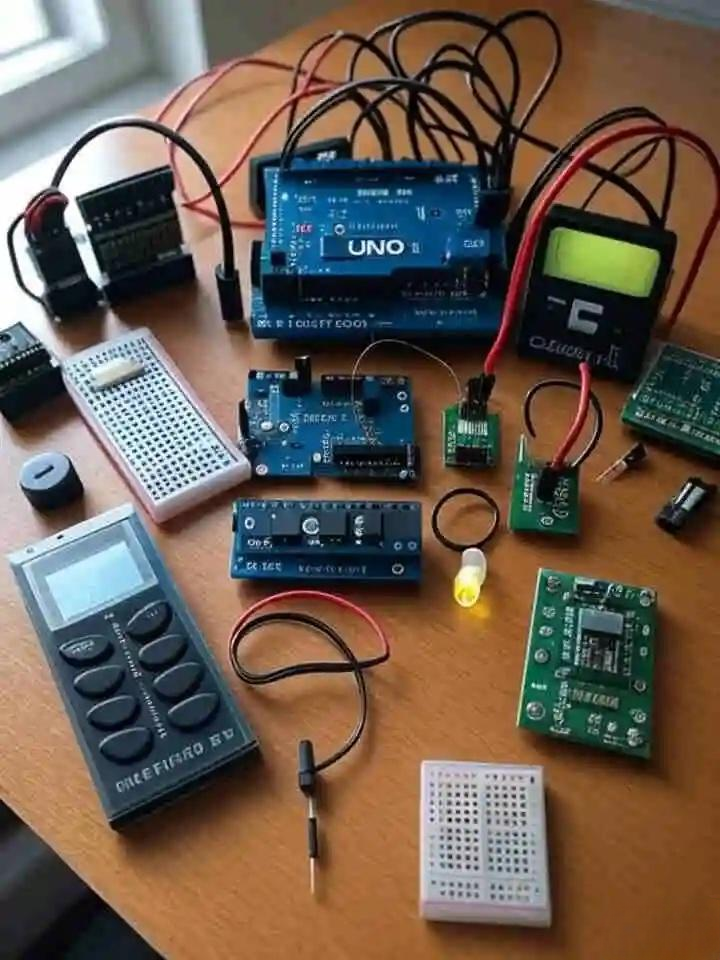
Step-by-Step Procedure:
Here’s step-by-step procedure you have to follow to build Fingerprint Scanner Arduino Project:
Connecting Push Buttons (A0–A3)
Four push buttons are connected to analog pins A0, A1, A2, and A3. These buttons allow the user to perform key actions such as saving or deleting fingerprints.Connect LED (D7)
An LED is connected to digital pin D7 of the Arduino through a 1kΩ resistor. It indicates the operational status of the fingerprint sensor (e.g., ready for scanning).Connect Fingerprint Module (Rx → D2, Tx → D3)
Rx of the fingerprint module → Arduino pin D2
Tx of the fingerprint module → Arduino pin D3
This establishes serial communication between the module and Arduino.
Power the Modules (5V)
Connect the Vcc pins of both the R307 fingerprint module and the RTC module to the Arduino’s 5V output pin to supply power.Connect LCD Display (RS, EN, D4–D7)
RS → D13
EN → D11
D4 → D10
D5 → D9
D6 → D8
This allows the LCD to display real-time system messages and status feedback to the user.
Connect Buzzer (A5)
Connect the buzzer to analog pin A5. It provides audio feedback (e.g., beep on successful scan or error).Upload Arduino Code
Upload the final code to the Arduino board. This code controls the entire system including fingerprint scanning, user interactions, LCD messages, and buzzer alerts.
Code:
#include
#include
LiquidCrystal lcd(13,12,11,10,9,8);
#include
SoftwareSerial fingerPrint(2, 3);
#include
#include "RTClib.h"
RTC_DS1307 rtc;
#include "Adafruit_Fingerprint.h"
uint8_t id;
Adafruit_Fingerprint finger = Adafruit_Fingerprint(&fingerPrint);
#define enroll 14
#define del 15
#define up 16
#define down 17
#define match 5
#define indFinger 7
#define buzzer 5
#define records 4 // 5 for 5 user
int user1,user2,user3,user4,user5;
DateTime now;
void setup()
{
 delay(1000);
 lcd.begin(16,2);
 Serial.begin(9600);
 pinMode(enroll, INPUT_PULLUP);
 pinMode(up, INPUT_PULLUP);
 pinMode(down, INPUT_PULLUP);
 pinMode(del, INPUT_PULLUP);
 pinMode(match, INPUT_PULLUP);
 pinMode(buzzer, OUTPUT);
 pinMode(indFinger, OUTPUT);
 digitalWrite(buzzer, LOW);
 if(digitalRead(enroll) == 0)
 {
 digitalWrite(buzzer, HIGH);
 delay(500);
 digitalWrite(buzzer, LOW);
 lcd.clear();
 lcd.print("Please wait");
 lcd.setCursor(0,1);
 lcd.print("Downloding Data");
 Serial.println("Please wait");
 Serial.println("Downloding Data..");
 Serial.println();
 Serial.print("S.No. ");
 for(int i=0;i<records;i++)
 {
 digitalWrite(buzzer, HIGH);
 delay(500);
 digitalWrite(buzzer, LOW);
 Serial.print(" User ID");
 Serial.print(i+1);
 Serial.print(" ");
 }
 Serial.println();
 int eepIndex=0;
 for(int i=0;i<30;i++)
 {
 if(i+1<10)
 Serial.print('0');
 Serial.print(i+1);
 Serial.print(" ");
 eepIndex=(i*7);
 download(eepIndex);
 eepIndex=(i*7)+210;
 download(eepIndex);
 eepIndex=(i*7)+420;
 download(eepIndex);
 eepIndex=(i*7)+630;
 download(eepIndex);
 // eepIndex=(i*7)+840; // 5th user
 // download(eepIndex);
 Serial.println();
 }
 }
 if(digitalRead(del) == 0)
 {
 lcd.clear();
 lcd.print("Please Wait");
 lcd.setCursor(0,1);
 lcd.print("Reseting.....");
 for(int i=1000;i<1005;i++)
 EEPROM.write(i,0);
 for(int i=0;i<841;i++)
 EEPROM.write(i, 0xff);
 lcd.clear();
 lcd.print("System Reset");
 delay(1000);
 }

 lcd.clear();
 lcd.print(" Attendance ");
 lcd.setCursor(0,1);
 lcd.print(" System ");
 delay(2000);
 lcd.clear();
 lcd.print("Circuit Digest");
 lcd.setCursor(0,1);
 lcd.print("Saddam Khan");
 delay(2000);
 digitalWrite(buzzer, HIGH);
 delay(500);
 digitalWrite(buzzer, LOW);
 for(int i=1000;i");
 lcd.print(now.hour(), DEC);
 lcd.print(':');
 lcd.print(now.minute(), DEC);
 lcd.print(':');
 lcd.print(now.second(), DEC);
 lcd.print(" ");
 lcd.setCursor(0,1);
 lcd.print("Date->");
 lcd.print(now.day(), DEC);
 lcd.print('/');
 lcd.print(now.month(), DEC);
 lcd.print('/');
 lcd.print(now.year(), DEC);
 lcd.print(" ");
 delay(500);
 int result=getFingerprintIDez();
 if(result>0)
 {
 digitalWrite(indFinger, LOW);
 digitalWrite(buzzer, HIGH);
 delay(100);
 digitalWrite(buzzer, LOW);
 lcd.clear();
 lcd.print("ID:");
 lcd.print(result);
 lcd.setCursor(0,1);
 lcd.print("Please Wait....");
 delay(1000);
 attendance(result);
 lcd.clear();
 lcd.print("Attendance ");
 lcd.setCursor(0,1);
 lcd.print("Registed");
 delay(1000);
 digitalWrite(indFinger, HIGH);
 return;
}
checkKeys();
delay(300);
}
// dmyyhms - 7 bytes
void attendance(int id)
{
 int user=0,eepLoc=0;
 if(id == 1)
 {
 eepLoc=0;
 user=user1++;
 }
 else if(id == 2)
 {
 eepLoc=210;
 user=user2++;
 }
 else if(id == 3)
 {
 eepLoc=420;
 user=user3++;
 }
 else if(id == 4)
 {
 eepLoc=630;
 user=user4++;
 }
 /*else if(id == 5) // fifth user
 {
 eepLoc=840;
 user=user5++;
 }*/
 else
 return;

 int eepIndex=(user*7)+eepLoc;
 EEPROM.write(eepIndex++, now.hour());
 EEPROM.write(eepIndex++, now.minute());
 EEPROM.write(eepIndex++, now.second());
 EEPROM.write(eepIndex++, now.day());
 EEPROM.write(eepIndex++, now.month());
 EEPROM.write(eepIndex++, now.year()>>8 );
 EEPROM.write(eepIndex++, now.year());
 EEPROM.write(1000,user1);
 EEPROM.write(1001,user2);
 EEPROM.write(1002,user3);
 EEPROM.write(1003,user4);
 // EEPROM.write(4,user5); // figth user
}
void checkKeys()
{
 if(digitalRead(enroll) == 0)
 {
 lcd.clear();
 lcd.print("Please Wait");
 delay(1000);
 while(digitalRead(enroll) == 0);
 Enroll();
 }
 else if(digitalRead(del) == 0)
 {
 lcd.clear();
 lcd.print("Please Wait");
 delay(1000);
 delet();
 }
}
void Enroll()
{
 int count=1;
 lcd.clear();
 lcd.print("Enter Finger ID:");
 while(1)
 {
 lcd.setCursor(0,1);
 lcd.print(count);
 if(digitalRead(up) == 0)
 {
 count++;
 if(count>records)
 count=1;
 delay(500);
 }
 else if(digitalRead(down) == 0)
 {
 count--;
 if(count<1)
 count=records;
 delay(500);
 }
 else if(digitalRead(del) == 0)
 {
 id=count;
 getFingerprintEnroll();
 for(int i=0;irecords)
 count=1;
 delay(500);
 }
 else if(digitalRead(down) == 0)
 {
 count--;
 if(count<1)
 count=records;
 delay(500);
 }
 else if(digitalRead(del) == 0)
 {
 id=count;
 deleteFingerprint(id);
 for(int i=0;i");
 if(EEPROM.read(eepIndex)<10)
 Serial.print('0');
 Serial.print(EEPROM.read(eepIndex++));
 Serial.print(':');
 if(EEPROM.read(eepIndex)<10)
 Serial.print('0');
 Serial.print(EEPROM.read(eepIndex++));
 Serial.print(':');
 if(EEPROM.read(eepIndex)");
 if(EEPROM.read(eepIndex)<10)
 Serial.print('0');
 Serial.print(EEPROM.read(eepIndex++));
 Serial.print('/');
 if(EEPROM.read(eepIndex)<10)
 Serial.print('0');
 Serial.print(EEPROM.read(eepIndex++));
 Serial.print('/');
 Serial.print(EEPROM.read(eepIndex++)<<8 | EEPROM.read(eepIndex++));
 }
 else
 {
 Serial.print("---------------------------");
 }
 Serial.print(" ");
}
Here the link of the code
Industry-Based Applications :
Fingerprint scanner technology has become a vital component of current electronic security systems. Fingerprint and biometric authentication became a wide-spread phenomenon due to their prominence in movies and on television. People commonly use biometric identification methods in a variety of real-world applications across various industries. Advanced systems and technology utilize human fingerprints as unique, unchangeable and safe keys to access devices, doors, secure data, and many more.
In real-world applications, fingerprint scanners are now an integral part of various sectors:
Visit blotter:
Law enforcement agencies use fingerprints to confirm identities and advance their investigations. They have relied on fingerprint databases for decades to support identification efforts. This method remains one of the most reliable forms of forensic identification and continues to play a key role today.
Employers in the finance :
educational, security, and construction industries often require fingerprinting as part of their hiring, licensing, and background check processes. This makes the identification process in the ever-evolving workplace a little more secure for shared identities.
Fingerprint Authentication in the Technology Industry:
Motorola launched the Atrix in 2011, the first smartphone with fingerprint scanning capabilities.
Apple has integrated fingerprint scanning mechanisms in many of its devices, including the iPhone 5s, iPhone 7, and iPads (5th and 6th generation). People commonly use these biometrics to unlock devices and authorize secure payments.
Laptop manufacturers have adopted fingerprint readers and scanners to enhance security for logging in and protecting files.
Biometric Door Locks:
Biometric door locks now often incorporate fingerprint scanning as part of a biometric lock that includes the ability to use a touchscreen keypad to further secure home and commercial spaces. As a result, businesses no longer need to use steel doors as a method of access control for their buildings.
Theme parks and amusement venues and resorts:
Amusement parks such as Walt Disney World use fingerprint scanning for validating tickets. This process protects against fraud in ticket sales and creates a secure and user-friendly entry experience for guests.
These typical usages demonstrate how fingerprint recognition has evolved from a science fiction concept to a tangible and everyday safety feature. This project aims to simulate these real world usages by means of a Fingerprint Scanner Arduino system to give students the opportunity to engage first hand with a service that is shaping the future of safe identification.
Technical Challenges and Solutions:
This section outlines the key technical difficulties encountered during the project and explains the practical solutions implemented to overcome them.
- Enrollment Issues:
Finger is not placed properly → Code retry mechanism; ensure a clean sensor/finger. - Environmental Susceptibility:
Dust/light impacts accuracy → Use barricades; clean sensors regularly. - Power Drain:
Sensor + LCD draws too much current → Use an external 5V power source. - Low Storage Capacity:
UNO stores only a few fingerprints → Upgrade to ESP32 or limit the number of users allowed. - Serial Port Conflicts:
Multiple serial devices are conflicting → Use SoftwareSerial on different pins, etc. - Poor User Feedback:
Users do not know what the status of the device is → Information on the LCD; buzzer to indicate status. - Loose Connections:
Wires from the breadboard become disconnected sometimes → Use a PCB soldered connection or a solid connection. - RTC Power Loss:
RTC loses time on power loss → Add coin cell battery to your RTC.
Final Thoughts:
The practical implementation of fingerprint scanner-based systems using Arduino is successful. This allows users to enroll fingerprints and keeps the option of storing or deleting fingerprints, adding flexibility and user-friendliness. There are several technical snags, such as the low sensitivity of the sensor and various hardware limitations. Nevertheless, the project still provides ample hands-on exposure in hardware interfacing as well as biometric security-related concepts. Moreover, it helps learners understand the integration of hardware and software in practical scenarios. Ultimately, the Fingerprint Scanner Arduino project effectively demonstrates how simple microcontroller-based systems can nevertheless support advanced security solutions. In conclusion, despite minor drawbacks, the project offers valuable insights and serves as a stepping stone toward mastering embedded systems and biometric technologies.
