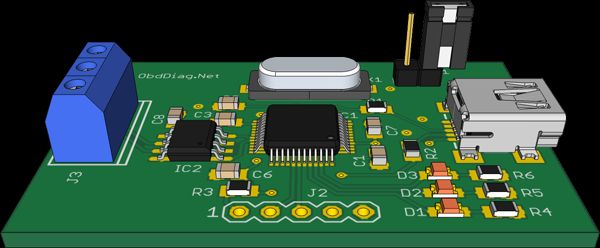
This project started out from a need to build a simple device for monitoring the CAN bus. I choose the NUC140LC1CN 32K Cortex-M0 microprocessor from Nuvoton for major reason – it has both USB and CAN peripherals.
Features
Simple design
– Compatible with the LAWICEL CANUSB protocol
– Exposing itself as USB FTDI device
– Supporting CAN 2.0A 11-bit and CAN 2.0B 29-bit frames
– Has internal FIFO CAN message buffer
– Self powered from USB port
– Flash-resident USB mass-storage device (MSD) bootloader for firmware updates
– Firmware is available for download
Schematic
To enable the NUC140 CAN peripheral to communicate with CAN bus a CAN transceiver is required. The TJA1051T chip from NXP solves the purpose. The NUC140 device is capable operating from 5V power supply, there is no need for additional 3.3V voltage regulator. This handy combination makes a simple task implementing the CAN bus interface. There are three status LEDs:
– D1 is the status of USB connectivity to the host
– D2 shows the CAN bus activity
– D3 indicates CAN errors
The NUC140 doesn’t have built-in bootloader and the only way to program it is using ARM Serial Wire Debug (SWD) interface (J2 connector) and Nuvoton ICP programmer. And yes, if bootloader is already pre-programmed it could be activated. That is the purpose of JP1 jumper. Connecting the JP1 before powering the interface will trigger the bootloader.
Bootloader
The NUC140LC1 flash memory is divided to two sections, one is for executing user program code (APROM) with the size of 32K and another one for bootloader (LDROM). The LDROM size is only 4K, making a challenge to build a fully-functional USB bootloader. I have used the mass-storage device (MSD) bootloader provided by Nuvoton. Connecting jumper JP1 will start it . As the result a removable drive should be visible in the host file system with a size 32KB. Just copy and paste or drag and drop the CAN-USB firmware update to the bootloader drive. Unplug the USB cable, remove the jumper and plug it in again. The new firmware update should now be running.
For more detail: CAN to USB Interface

