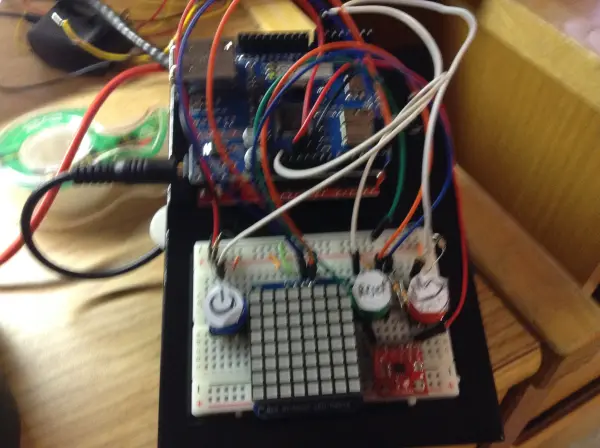
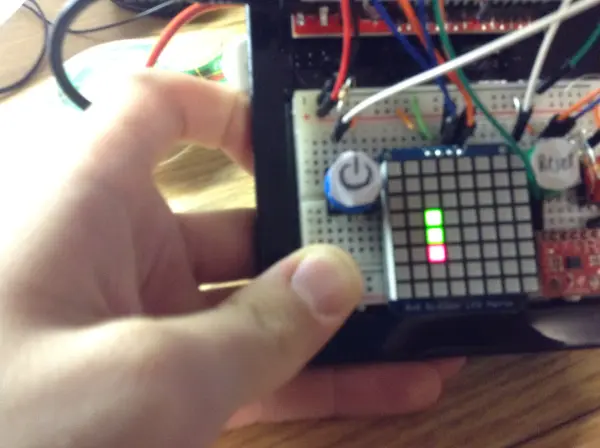
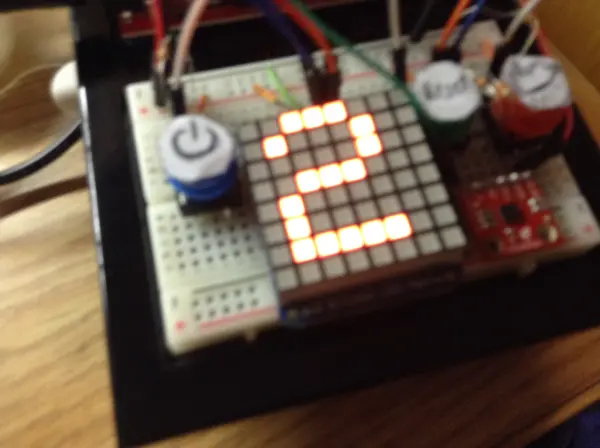
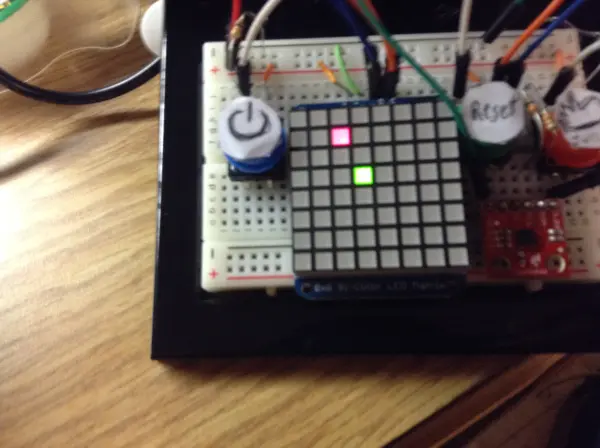
For my physical computing class, I completed a final project using the SparkFun Redboard. I named it “Gameduino Snake” because it is a compact, handheld device that enables users to play a Snake game on an LED matrix.
Project Overview: Gameduino Snake
The game features a simple bi-color 8×8 LED matrix that serves as both the game display and the scoreboard after the game concludes. A triple-axis accelerometer, placed on the breadboard next to the LED matrix, detects the movement of the device, allowing the snake to move in the direction the device is tilted. For example, tilting the device forward moves the snake up.
Additionally, an Ethernet shield on the Arduino enables the player to Tweet their score after finishing the game. The Gameduino includes three buttons: a blue button to power on the device and start the game, a green button to reset the game to the start screen after a game over, and a red button to Tweet the player’s score, which is stored in the RedBoard’s EEPROM memory. To avoid duplicate Tweets, the red button also sends the number of seconds since the last reset. The Tweet button must be pressed at the main screen, meaning the device must be reset beforehand.
The game is easier to play than it appears in the video. It was challenging to play with one hand while filming with the other. I apologize for the difficulty in reading the computer screen. It displays “Snake Score” followed by my score, which was 3, and then “Time Since the Last Reset,” which was 14 seconds.
Project Genesis: Creating Gameduino Snake
At the start of the term, I knew I wanted my final project to involve a game. After researching online, I discovered a project where someone had recreated Super Mario Bros. on an LED matrix using an Arduino. Inspired by this, I decided to use an LED matrix to create a game, but given my beginner coding skills, I aimed for something simpler. Eventually, I settled on making the classic game Snake, believing it would be easier to code and develop.
I thought it would be a neat idea to use an Ethernet shield to allow players to Tweet their scores after the game. Initially, I also considered adding a GPS module to include the time and date in the Tweet. However, after realizing how much memory the GPS module consumed during an intermediate project, I decided against it for the final project.
Originally, I planned to control the snake using four push buttons. My teacher suggested using an accelerometer instead to make the project more interesting and interactive. This turned out to be a fun and unique way to control the game. I also intended to incorporate a Piezo buzzer to play a tune during the game. Unfortunately, I couldn’t find a way to integrate it properly. Coding music with the Piezo using delays made the game unplayable, as it would alternately play the tune and display the game over screen, rather than doing both simultaneously. Due to time constraints, I decided to leave this feature out, as it didn’t significantly enhance the overall experience.
Challenges Faced in Creating Gameduino Snake
I encountered several challenges while developing this project. One of the initial major issues was getting the snake to move correctly. Initially, I programmed the RedBoard to respond to the general orientation of the accelerometer rather than the specific x and y values. After adapting some online code, this setup worked but required extreme tilting of the board to move the snake, which wasn’t ideal for gameplay.
To improve this, I adjusted the code to read the accelerometer’s position and move the snake if the x and y values exceeded certain thresholds. This worked well, especially after assistance from my instructor, who helped make the snake continuously move. However, a new issue arose where tilting the device at diagonal angles, particularly to the lower right, caused the snake to move diagonally, breaking the game’s functionality.
After consulting with my professor, we resolved this by calibrating the accelerometer values when the device was flat and setting this as the baseline position. We then established a threshold around this point. When the accelerometer’s values exceeded this threshold, the snake would move in the direction of the tilt. This adjustment fixed the diagonal movement issue and improved the game’s playability.
Additional Issues Faced
I encountered several other challenges during the project. Initially, I intended for the blue button to function as both the power and reset button. However, after struggling with the coding for this and realizing I had space for an additional button, I decided to add a separate button for resetting.
The Tweet function also presented problems. Originally, it was set up to send the tweet from the game over screen, but it only worked at a specific moment. To resolve this, I modified the setup to store the score in the EEPROM memory and send it from the start screen instead. Deciding what additional information to send to avoid duplicate messages took some time. Eventually, I included the number of seconds since the last reset.
Another issue was the game crashing when powered by a 9-volt battery. While the game played fine, it would freeze on the game over screen. Retesting showed it sometimes worked, but to avoid potential glitches, I preferred powering it via a computer. The crash might be due to low battery power or insufficient power for all game features. Additionally, the battery’s weight made gameplay difficult, as it required more force to tilt and register movements. Adjusting the code thresholds or securing the battery to the board might help, but it’s not a definite solution. The reason for the frequent crashes during initial tests remains unclear.
Build Your Own Gameduino
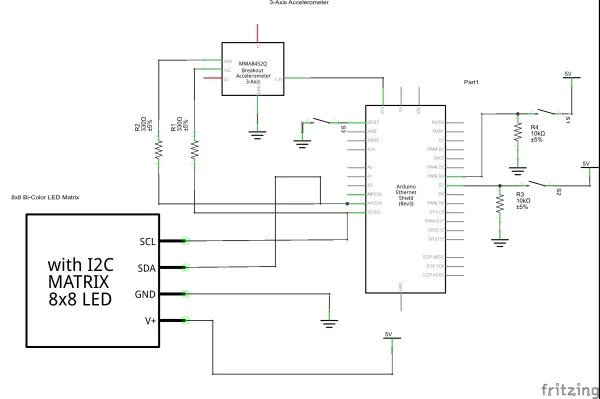
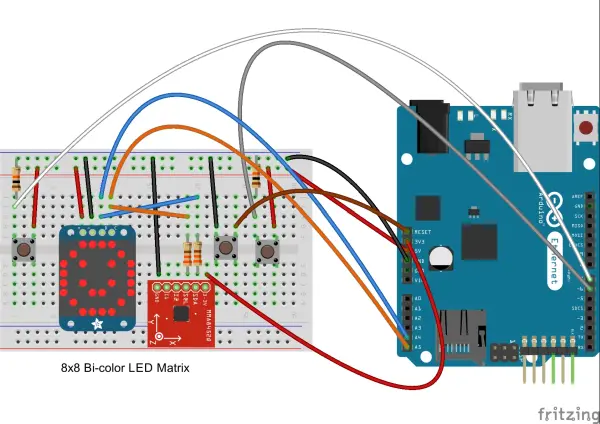
If you’re interested in creating your own version of the Gameduino, below you’ll find the sketch, schematic, parts list, and code to get started.
Parts List:
- SparkFun Redboard/Arduino Uno (1)
- MMA8452Q Triple-Axis Accelerometer (1)
- 8×8 Bi-Color LED Matrix with I2C backpack (1) (Note: You can use a single-color matrix or omit the I2C backpack, but different code will be required)
- Push Buttons (3)
- 10K Ohm Resistors (2)
- 330 Ohm Resistors (2)
- Arduino Ethernet Shield (1)
- Several Wires
Optional:
- 9-volt battery (1)
- Battery holder (1)
Refer to the following sections for detailed instructions on assembling and programming your Gameduino.
The schematic and sketch can be viewed below:
Connecting Buttons and Components for the Gameduino
Power and Tweet Buttons
- Power Button (Digital Pin 7)
- Connect one side of the power button to 5 volts.
- On the other side, run a 10K ohm resistor to ground.
- From the same side, run a wire to digital pin 7.
- Tweet Button (Digital Pin 6)
- Connect one side of the Tweet button to 5 volts.
- On the other side, run a 10K ohm resistor to ground.
- From the same side, run a wire to digital pin 6.
This configuration ensures that when the buttons are not pressed, they read a normal HIGH state. When pressed, they connect to ground, producing a LOW state.
Reset Button
- Run a wire from the reset pin on the Redboard to one end of the reset button.
- Connect the other end of the button directly to ground.
This setup works because the reset pin will reset the Redboard when it receives a LOW signal, which is achieved by connecting it to ground through the button.
LED Matrix with I2C Backpack
- Connect the 5V pin to the pin marked with a plus sign (+) on the LED matrix to provide power.
- Connect the ground pin to the minus sign (-) pin on the LED matrix.
- Since the I2C backpack uses I2C communication, connect the SDA and SCL pins on the backpack to the corresponding pins on the Redboard. You can use either the SDA and SCL pins or the A4 and A5 analog pins (A4 for SDA and A5 for SCL).
Triple-Axis Accelerometer
- Connect the 3.3V pin on the accelerometer to the 3.3V pin on the Redboard.
- Connect the ground pin on the accelerometer to ground.
- As the accelerometer uses I2C communication:
- Run the SDA pin on the accelerometer through a 330-ohm resistor to the SDA (A4) pin on the Redboard.
- Run the SCL pin on the accelerometer through a 330-ohm resistor to the SCL (A5) pin on the Redboard.
By following these connections, you’ll ensure all components are correctly powered and can communicate with the Redboard, enabling the Gameduino functionality.
The code I used can be found here:
Code Explanation for the Gameduino
The comments within the code provide detailed explanations, but here is a high-level overview of its functionality:
- Initialization: The Redboard initializes its values during the setup phase.
- Button Press Detection: When the blue button is pressed, the Redboard draws the target and the snake based on the setup information.
- Game Monitoring: The Redboard continuously checks to ensure the snake remains within the playing area and hasn’t collided with itself.
- Movement Detection: If the snake is in a valid state, the Redboard calls a function to read the accelerometer’s position and moves the snake accordingly.
- Game Over: If the snake either exits the playing area or hits itself, the game over sequence is triggered.
This logic ensures smooth gameplay and proper handling of game events.
void moveSnake() { // this function will move the snake according to the accelerometer if (accel.available()) { accel.read(); //this will read the values of the accelerometer Serial.print("x: "); Serial.print(accel.cx, 3); Serial.print("\t"); Serial.print("y: "); Serial.print(accel.cy, 3); Serial.print("\t"); Serial.print("z: "); Serial.print(accel.cz, 3); Serial.print("\t"); Serial.println(prevDirection); float restingX = 0; //the accelerometer at rest float restingY = 0; float threshold = 0.350; //how much it should be tilted to move the snake. Serial.println(accel.cy - restingY); Serial.println(accel.cx - restingX); Serial.println(abs(accel.cx - restingX)); if (((accel.cy - restingY) > threshold) && (abs(accel.cx - restingX) < threshold)) { //if the accelerometer is tilted left Serial.println("Left"); snakeY[0] = snakeY[0] + 1; // the snake will move to the left. prevDirection = 1; } if (((accel.cy - restingY) < -threshold) && (abs(accel.cx - restingX) < threshold)) { //if the accelerometer is tilted right Serial.println("Right"); snakeY[0] = snakeY[0] - 1; // snake will move to the right prevDirection = 2; } if (((accel.cx - restingX) > threshold) && (abs(accel.cy - restingY) < threshold)) { //if the accelerometer is tilted up Serial.println("Up"); snakeX[0] = snakeX[0] - 1; // the snake will move up prevDirection = 3; } if (((accel.cx - restingX) < -threshold) && (abs(accel.cy - restingY) < threshold)) { //if the accelerometer is tilted down Serial.println("Down"); snakeX[0] = snakeX[0] + 1; // it will move the snake down prevDirection = 4; } if ((-threshold < accel.cx) && (accel.cx < threshold) && (-threshold < accel.cy) && (accel.cy < threshold)) { if (prevDirection == 1) { snakeY[0] = snakeY[0] + 1; } if (prevDirection == 2) { snakeY[0] = snakeY[0] - 1; } if (prevDirection == 3) { snakeX[0] = snakeX[0] - 1; } if (prevDirection == 4) { snakeX[0] = snakeX[0] + 1; } } }}Function Explanation for Movement and Scoring
This function starts by setting baseline x and y values for the accelerometer and board when they are held flat. Next, it establishes a threshold for detecting tilt and corresponding movement. For instance, to move left, the y value (representing the horizontal axis) minus the resting value must exceed the defined threshold. To avoid the diagonal movement glitch encountered earlier, the absolute value of the current x reading minus the resting x must be less than the threshold, ensuring that the x value stays between the positive and negative threshold, thus preventing dual-direction readings. This setup allows for easy adjustment of the neutral position by changing the resting values.
The logic for the other three directions follows a similar pattern. Each direction’s movement is stored in a variable, so when the accelerometer returns to a flat state, the snake continues in its last direction until a new tilt is detected.
While the snake is active, in motion, and hasn’t collided with itself, the game monitors the snake’s position relative to the target to determine if the player scores.
if ((snakeX[0] == targetX) && (snakeY[0] == targetY)) { //this will read if the snake is on the target snakeLength++; //if it is it will gain a length of one score++; // and the score will increase by one Serial.print("Score: "); // the score will then be written on the serial monitor Serial.println(score); if (snakeLength < maxSnake) { // if the snake is less than the maxium length makeTarget(); //then we will make a new target to go after } else { targetX = targetY = -1; //if it is not less than the max, then we will not //make any more targets }}Checking and Growing the Snake
This section of the code checks if the snake’s head (represented by snakeX[0] and snakeY[0]) matches the target’s coordinates. If the coordinates don’t match, the target remains in place, and the snake’s length stays the same. If the coordinates do match, the snake grows by one pixel, and the score increases by one point.
The code then checks the current length of the snake. If the snake’s length is less than the maximum allowed length, it calls a function to generate a new target for the snake to pursue. If the snake has reached its maximum length, the code stops generating new targets. In this implementation, the maximum snake length is set to 64, which corresponds to the entire LED matrix. This ensures the game only ends if the snake “dies” and not by reaching a certain length. To change this, you simply need to adjust the maxSnake variable in the code.
Reflections and Future Improvements
I’m pleased with how the Gameduino turned out, though there are several areas for potential improvements and modifications. One issue is its behavior when powered by a battery. I’m unsure if this is due to the code, hardware, or simply the added weight of the battery. A significant upgrade would be integrating a WiFi shield, allowing for Tweets to be sent without needing an Ethernet cable, which would be particularly useful if the battery issue is resolved.
The device could also be expanded to include other games, such as Breakout or even Super Mario Bros. With an Arduino that has more memory, it would be possible to store multiple games at once. Additionally, using a larger Arduino would allow for incorporating the GPS module as initially planned.
Further improvements could include adding the game duration to the Tweet, not just the time since the last reset. Finally, finding a way to code the Piezo buzzer without delays would be a great enhancement to the overall setup.
Follow this link for complete project: Building and Programming a Snake Game with Gameduino

