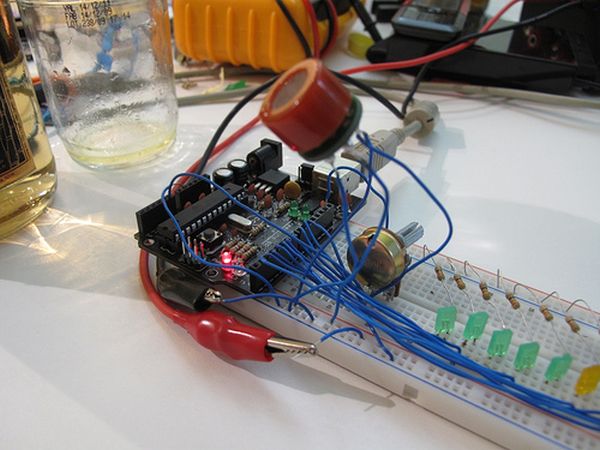
During the First Meeting of Electronic Arts in Florianópolis, we built a Breathalyzer using the Alcohol Gas Sensor MQ-3 and a Arduino Board to use in the last day of the meeting, in which we gave a party. You can see a quick video two posts below. Last days I received many emails asking for the code or how to make one, so I decided to build the sensor again, take pictures/videos and make a tutorial showing how you can make one, so here it is.
Parts Needed:
- Arduino Board
- 10x 5mm LEDs (Green, Yellow and Red)
- 100KΩ Potentiometer (to calibrate the sensor)
- 10x ≈ 220Ω Resistor (anything between 220Ω and 470Ω is OK)
- BreadBoard
- MQ-3 Sensor from Sparkfun
Here are some pictures from the building process:
To make the LEDs work, I have connected them in sequence using the Digital Pins 2 till 11 (ten LEDs total). Remember to use a resistor between 220Ω and 470Ω for each LED, like shown on the picture below:
To connect the sensor, you have to connect one of the H pin to +5V Supply (use an external power supply for that, it may be too much current for the arduino) and the other one to Ground.
Pin B (any of them) you connect to Ground. And the A pin (also any of them) you connect to the 100KΩ potentiometer as shown on the picture below. In the same pin where you are connecting the pin A, you need to connect a wire to the Analog/Digital Converter in Arduino, that is where you are going to read the Alcohol information.
- Arduino Board
- 10x 5mm LEDs (Green, Yellow and Red)
- 100KΩ Potentiometer (to calibrate the sensor)
- 10x ≈ 220Ω Resistor (anything between 220Ω and 470Ω is OK)
- BreadBoard
- MQ-3 Sensor from Sparkfun
For more detail: Building an Breathalyzer with MQ-3 and Arduino

