Sometimes you need to throw something away, but your hands are either full of garbage, or they’re contaminated with raw chicken or meat. I was able to make this automatic opening garbage bin with an Arduino Uno, and some supplies from Amazon, Ace Hardware and a few spare parts around the house. The prices were as of the time I made this project. It’s pretty easy to make, and so easy to use. Just sweep your foot from left to right under the cabinet door and the door opens! This works even if the garbage can is full. Let’s get going!
Supplies
Get your supplies together…
Step 1: Arduino Uno and Servo
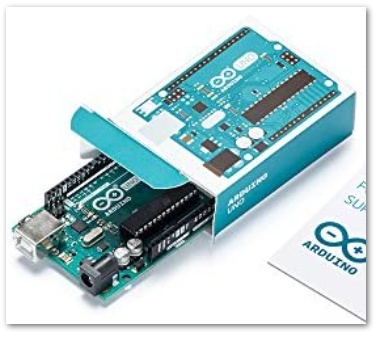
Arduino Uno
You can purchase the Arduino Uno through the Arduino Official Store or Amazon, Sparkfun, etc. Cost: $20 on Amazon. Power: It can run on 7 to 12 volts DC.
Servo -25KG Digital Servo Full Metal Gear High Torque Waterproof. Cost: $19.77 From: https://www.amazon.com/gp/product/B0882W5P22 Power: can operate from 4.8v to 6.8v. 5 volts worked for me. It can draw from 1.8 amps to 2.2 amps.
After tweaking the swing arm and removing one “soft close” cabinet attachment, this servo was powerful enough to push our garbage can bin open more than half way open.
Step 2: Adjustable Power Supply and Buck Converter
Power Supply
I used a Belker 36W Universal Power Supply up to 2500 mA. It needs to be powerful enough to drive both the Arduino and the Servo motor. Cost: $14.90 From: Amazon:
This power supply was perfect. I was able to set the voltage to an efficient level – 7.5 volts. It also came with different tips – one of which was perfect for the Arduino.
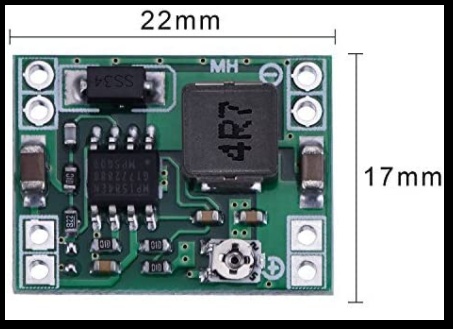
DC Buck Converter
eBoot Mini DC-DC Buck Converter adjustable:
This device is used to supply 5.8 volts DC to the Servo motor from the 7.5 volts coming from the power supply. Cost: $8.99 From: Amazon: https://www.amazon.com/gp/product/B01MQGMOKI
The first version of our opener had the servo powered by rechargeable C batteries. They only lasted a couple months. So I opted for this converter which allows the servo and the Arduino to be powered by a single power supply.
Step 3: IR Sensor Module, Breadboards and Perfboards
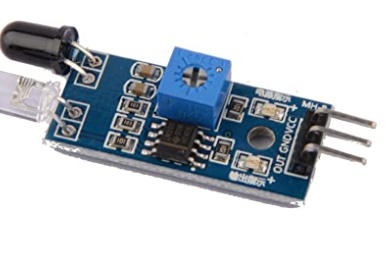
IR Sensors
These are the 2 sensors used to trigger the door to open. Cost: $5.29 for pack of 5 from: Amazon:
Breadboards and Perfboards
It’s always good to keep some of these around. The breadboards are great for prototyping your circuits. Cost: 4 Pack for $5.99 From: Amazon, Sparkfun, Adafruit, etc.
I started out this project using a breadboard. I even mounted the breadboard circuit in the cabinet to test everything out. Eventually I soldered the circuit onto a perfboard.
Perfboards can be found here:
https://www.amazon.com/Nanlaohu-Perfboard-Breadboa…
Step 4: Screws, PC Card Slot Cover, Ball Bearing, Nuts, Soldering Gun and Solder
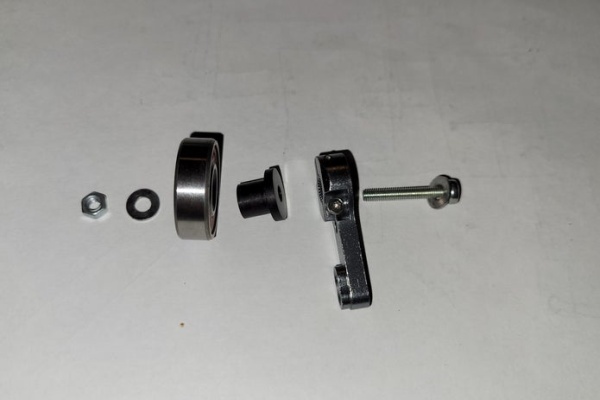
Screws, PC card slot cover, ball bearing, nuts
You’re going to need some supplies to make the arm that’s attached to the servo. I scrounged up some supplies around the house as well as a trip to Ace Hardware. Love that store! Cost: Around $5
Take the servo arms with you to a hardware store, and ask them for help finding the necessary parts to construct the sweep arm. They’re very helpful there. I basically constructed the arm in the store.
You’ll need a soldering gun or pen and some solder.
Step 5: Wire Up the Power Supply, DC Buck Converter, Arduino, Servo and Sensors

The first step would be wiring up all the basic components (things you don’t have to build). You’re going to need:
- The adjustable power supply
- DC Buck converter
- Arduino
- The 25kg Servo
- 2 Sensors
Refer to the wiring diagram above.
Set the adjustable power supply to 7.5 volts. Seven volts is the minimum amount for the Arduino so 7.5 is enough, but not too much that we are wasting power. It’s also more than enough for the servo. It’s actually too much for the servo so we use the DC buck converter to lower the voltage to 5.8 volts for that component. When idle, the entire project consumes around 10 milliamps, so you don’t have to be concerned about your electric bill going up.
Use a breadboard when wiring it up for the first time.
Be careful working with the DC power supply. Don’t get shocked!
You’re going to need to cut the end of the power supply so you can attach the wires to the buck converter. Keep the plug end that’s cut off. You’ll need to connect that to the Arduino’s power jack. There are some pics above showing how I wired it to the perfboard.
After uploading the code through the Arduino Programming IDE test out all the components. The sensors should trigger the servo to turn 180 degrees. The code is written so that you must trigger the sensors in a specific order – ie. left to right or right to left depending on where you place the sensors. I did it that way to help avoid false triggering of the opener. Even though I did this, you sometimes will get false triggers when vacuuming near the sensors. No worries. The door doesn’t open with enough force to break anything.
Test it out! Later on, after installing everything you can tweak the sensitivity of the IR sensors. There is a little adjustment screw for that.
I would suggest using machine screws and nuts to attach the power and ground wires from the IR sensors. This way you can feed the wires underneath the cabinet and attach them inside the cabinet. You can also use this technique for attaching the power supply power and ground wires.
Step 6: Make the Servo Swing Arm
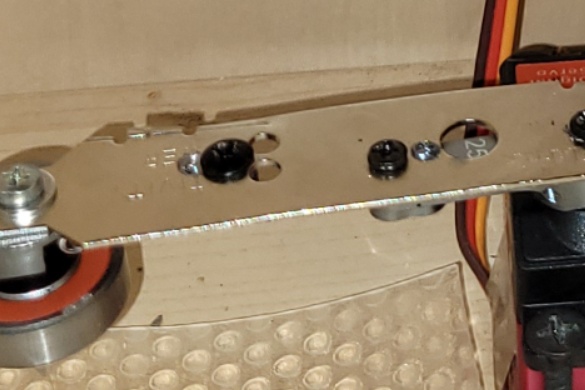
I took the two servo “horns” that came with the servo, and attached them to a PC Slot Cover, and trimmed the metal as seen above. At the end, I attached a cylindrical roller bearing with a bushing and some screws as shown above. The roller bearing cuts down on friction as it sweeps the back of the cabinet drawer.
Step 7: Review the Arduino Code
I attached the code for this project. In case that’s not working the code is on GitHub here:
https://github.com/michaelrstein/garbage-cabinet-o…
The sensors are wired to pins 11 and 12.
The servo is wired to pin 9.
There’s a function “openDoor()” that… you guessed it, swings the servo – 180 degrees which pushes the door open.
The loop runs checking to see if the first sensor has been triggered by looking for a LOW value. If it detects the LOW value, then it checks to see if the second sensor has been triggered within 1 second. If the second sensor was triggered, then it calls the openDoor function.
Step 8: Place the Servo
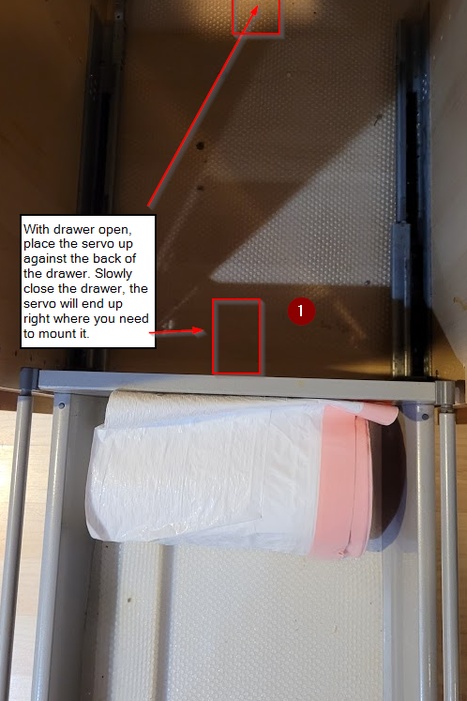
Follow these steps to easily line up where the servo needs to be mounted:
- Open your cabinet drawer, the place the servo up against the back of the drawer.
- The servo should be positioned such that the arm is pointing to your left, and can swing 180 degrees towards your right.
- Slowly slide the drawer all the way closed
- Open the drawer and use a pen to mark the locations where you will screw in the servo to the bottom of the cabinet.
- Pre-drill holes if needed,
- Screw in the servo.
- In the second image above, you can see one of those “soft close” attachments on one of the drawer rails. When your cabinet was installed, two of these may have been used. They’re great for making drawer slow down and not slam. However, two of them create a fair amount of friction when opening drawer. I found that removing one, did not affect the “soft close” feature and helped reduce the friction so the servo can properly open the drawer wide enough. You’ll have to figure out how to remove your soft close attachment. My cabinets came from IKEA. The soft close attachments came off fairly easily.
Step 9: Mount the Arduino Controller and Run the Wires for the Sensors and Power
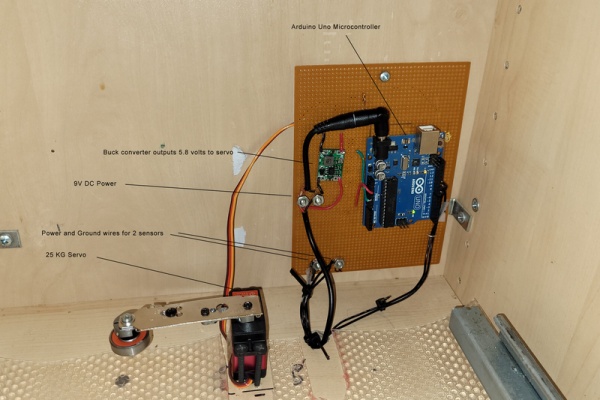
Pictured above is the Arduino and DC converter mounted on a perfboard. The wires for the sensors run down underneath the cabinet. The power also runs down underneath the cabinet to the power supply plugged in nearby. You could run the entire unit by batteries, but you’ll be replacing the batteries way too often. This way – you can set it… and forget it. If you do not have power nearby, you may be able to modify this project to run off of a rechargeable battery pack.
I used super glue to mount a small magnet to back of each sensor. Then I used two metal, adhesive backed mounting plates to mount the sensors. This way, in case someone accidently hits the sensor with their foot, the sensor will break free easily, but can be mounted back without any trouble. It just snaps back into place.
Take a look at the sensor pictured above. Notice the LED and sensor are at a 45 degree angle. I suggest carefully bending the LED’s that way to point down where your feet would sweep by. They are fairly flexible.
The green lights look nice at night. They help illuminate the floor a little.
Step 10: Test It Out
Here’s what ours looks like from the inside, when you trigger the sensors. The arm sweeps from your left to the right. If you got it working, congratulations! If not, move onto the next step – troubleshooting.
Step 11: Troubleshooting Issues
You should always test out the entire unit before installing it. If it doesn’t work, then break it down into separate “modules” and test each one out. That’s where the breadboard comes in handy. You can wire each section of the project separately to figure out where things are not working. No soldering necessary with the breadboards.
Break it down into these three circuits:
- IR Sensors (two circuits). See if you get these working first.
- Servo
Use the command “Serial.println(“put some text here”) in your code when running the script in the Arduino IDE. This will help debug issues. The text will appear in the Serial Monitor at the bottom of the page – as long as you turn the Serial monitor on by issuing the command: Serial.begin(9600); in the setup() section.
Hope you find this Instructable helpful. I enjoyed working on this project, and our garbage can opener has been working great for over six months now.
Source: Automatic Opening Garbage Can Cabinet
