
Summary of Arduino TFT Color Clock
This article describes recreating the "Colour Clock" concept using an Arduino Uno R3 and an Adafruit 1.8" Color TFT Shield to display time-based background colors. The project incorporates a DS3231 Real Time Clock module for accurate timekeeping without manual sync and utilizes the Adafruit GFX Library. The author notes that while the original used specific hardware, the design can be adapted with smaller components like a Beetle microcontroller for portability.
Parts used in the Arduino TFT Color Clock:
- Arduino UNO R3
- Adafruit 1.8" Color TFT Shield w/microSD
- DS3231 RTC (Real Time Clock) module
- Jumper wire
- Soldering Iron
- Solder
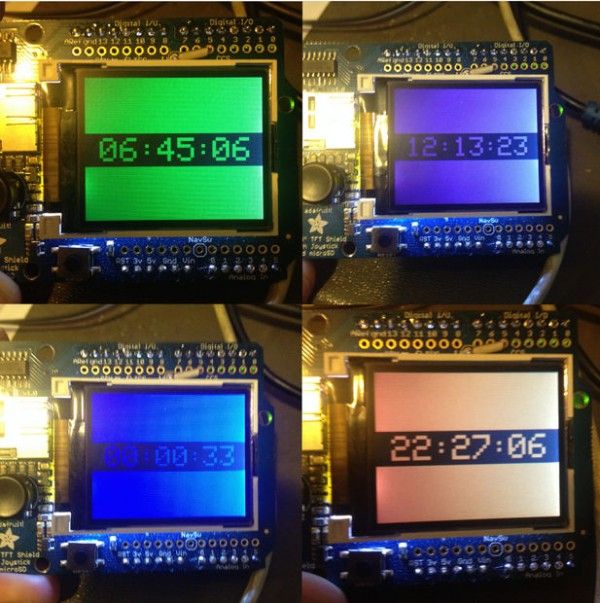
You may be familiar with a website in the UK called Colour Clock (http://thecolourclock.co.uk/) which converts the time into a hex value and then uses that value to update the background color. It’s very hypnotic and once you get used to how it works you can actually tell where you are in the day just by glancing at the screen from across the room.
I had an Arduino Uno R3 and an Adafruit 1.8″ Color TFT Shield w/microSD and Joystick that I was trying to use for another project that kept stalling out. One night just for fun I decided to see if I could recreate the Colour Clock and it only took a couple hours. If you’re familiar with Arduino you could easily swap parts out for a simple TFT breakout board and something tiny like a Beetle and make a very compact unit. You could even wear it as a badge.
I made use of the Adafruit GFX Library which made getting things set up a breeze. I already had mine working and understood how to use the library a little so your results may vary depending on your experience. At first I would just type the current time into the code and sync, but with the addition of a real time clock the project will remember what time it is and spring to life every time you power it up.
- Materials
- Arduino UNO R3 (or clone, or something similar if you’re crafty)
- Adafruit 1.8″ Color TFT Shield w/microSD (or compatible, the larger the better!)
- DS3231 RTC (Real Time Clock) module (more accurate than DS1307
- Jumper wire (or jumpers with Dupont connectors)
- Soldering Iron
- Solder
Step 1: The Hardware
The TFT shield comes with some assembly required. You need to attach the header pins which I usually do by first inserting them in the corresponding holes on the Arduino, then setting the shield in place and flowing with solder. Use a fine tip soldering iron and fine filament solder for best results. Apply just a little heat to the top of the pin and gently touch the solder to the pin (not the iron) until it starts to flow. Very quickly you’ll have a tiny pool of solder around the pin. Lift the solder and iron and let it cool. Repeat until all the pins are done.
With that out of the way your shield is already installed on your UNO. Click through to attach the RTC and add a jumper to be able to adjust brightness.
For more detail: Arduino TFT Color Clock
- Can I use a different microcontroller instead of the Arduino Uno?
Yes, you could swap parts out for something tiny like a Beetle to make a very compact unit. - What library was used to set up the display?
The project made use of the Adafruit GFX Library which made getting things set up a breeze. - Does the project require manual time synchronization every time it powers on?
No, with the addition of a real time clock the project will remember what time it is and spring to life every time you power it up. - Which RTC module is recommended for better accuracy?
The DS3231 RTC module is recommended as it is more accurate than the DS1307. - How should header pins be attached to the TFT shield?
You need to attach the header pins by first inserting them in the corresponding holes on the Arduino, then setting the shield in place and flowing with solder. - What type of soldering iron is best for this assembly?
A fine tip soldering iron and fine filament solder are suggested for best results. - Is it possible to wear this device?
Yes, you could even wear it as a badge if you swap parts for a simple TFT breakout board and a tiny microcontroller.