Summary of Arduino powered Solar Battery Charger
This article details a 12V solar battery charger using an Arduino Nano with MPPT tracking. The system employs a buck converter to charge lead-acid batteries efficiently, handling up to 20V input and operating at 90% efficiency below 70°C. It features voltage and current monitoring via dividers and amplifiers, with MOSFETs driven by an IR2104 driver. While the original design used an AD8212 op-amp for current sensing, the author recommends replacing it with an ACS712 breakout board for better reliability. Visual status is provided by LEDs or an optional I2C display.
Parts used in the Solar Battery Charger:
- Arduino Nano
- Lead acid 12V battery
- Solar panel (up to 20V input)
- Buck converter circuit
- AD8212 current sensing OP-AMP (recommended replacement)
- ACS712 breakout board
- IR2104 MOSFET driver
- MOSFETs Q2 and Q3
- Fast switching diode D3
- Main inductor L1
- Voltage divider resistors R2, R3, R6, R7
- Shunt resistor Rshunt
- Four status LEDs
- Reset button
- I2C 16x2 line display (optional V2)
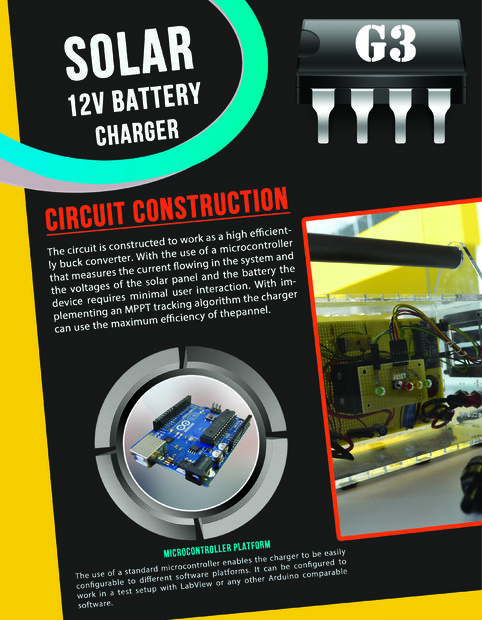
The following design is for a Solar battery charger ran by an Arduino Nano. It can handle a standard lead acid 12V battery, like for a scooter or a car. Furthermore the design has been tested and runs with 90% efficiency under 70ᵒC (158ᵒF). It can take up to 20V on the input site of the charger. Also in order to improve the efficiency a MPPT tracker is implemented in the code to ensure that the maximum power of the panel is being used.
Step 1: Basic principle of operation
The basic operation of our selected circuit can be represented by the block diagram. The design consists of a buck converter regulated by the Arduino that measures voltage and current in the system and the voltage of the battery. Based on the measurements the Arduino controls the duty cycle with which the buck converter is driven and so it calculates the current output to the battery.
Step 2: Circuit
Circuit (intro)
The indication is done by 4 LEDs as visible on the circuit schematics. Also there is a reset button pulled onto the front board for easy access, if the code gets stuck. This button was very useful during initial testing.
Also in this build for the current measurement an AD8212 current sensing OP-AMP is used. This device proved to be unreliable for the application and is recommended to be replaced with an ACS712 breakout board.
Description of circuit operation (refer to Charger circuit V1.pdf)
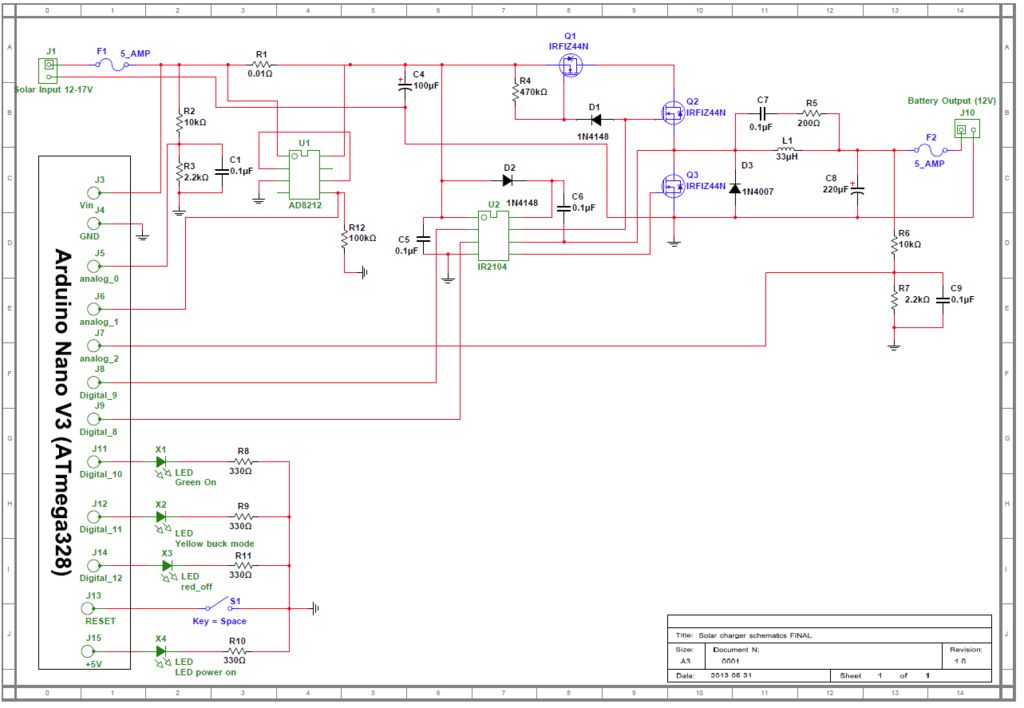
Q2 is the main switching MOSFET for the buck converter and Q3 is the synchronous switching MOSFET. The MOSFET are driven by U2 which is an IR2104 MOSFET driver. The IR2104 takes the PWM signal (Digital_pin_9) from the Arduino input on pin 2 and uses it to drive the switching MOSFETs. The IR2104 can also be shut down with setting pin 3 to low. Since Q2 is an NFET it needs a gate drive voltage that is 10V higher than the source voltage which is the solar input. So the IR2104 uses a charge pump circuit made of D2 and C6 to boost the gate drive voltage to turn on the high side MOSFET. D3 is a fast switching diode that should start conducting before Q3 and in that way increase the efficiency (Increase of 1-2%).
Q1 keeps the battery from being discharged at night. Q1 turns on when Q2 is on from voltage through D1. R4 drains the voltage off the gate of Q1 so it turns off when Q2 turns off.
L1 is the main inductor that smooth’s the switching current and along with C8 smooth’s the output voltage.
In order to measure the battery and solar panel voltages R2, R3, C1 and R6, R7, C9 are set as voltage dividers. In this case the capacitors C1 and C9 smooth any pulses in the signal and give a clean measurement to the ADC. C4 is the input filter capacitor that smooth’s any input current pulses.
In order to read the current in the system there is an Rshunt resistor. The voltage drop across is amplified 100 times by U1 and fed to the ADC of the Arduino.
The 3 LEDs are connected to the digital pins of the microcontroller and serve as an output interface to display the charging state.
Charging Data Serial Monitor
The current code is designed so it can display the data on to the Arduinon serial monitor. It will display the input voltage of the panel the current voltage of the battery and the Current that the charger is currently drawing.
In V2 a I2C 16×2 line display is added to display the data.
For more detail: Arduino powered Solar Battery Charger
- What type of battery does this charger support?
The design handles a standard lead acid 12V battery, such as those used for scooters or cars. - How can efficiency be improved in this project?
An MPPT tracker is implemented in the code to ensure the maximum power of the panel is used. - Which component is recommended to replace the AD8212?
The AD8212 current sensing OP-AMP is recommended to be replaced with an ACS712 breakout board. - Can this charger accept more than 12V on the input?
Yes, the design can take up to 20V on the input site of the charger. - How does the system prevent battery discharge at night?
Q1 keeps the battery from being discharged at night by turning off when Q2 turns off. - What function does the reset button serve?
The reset button is pulled onto the front board for easy access if the code gets stuck. - How is the charging data displayed in version 2?
In V2, an I2C 16x2 line display is added to show the data instead of just the serial monitor. - Does the IR2104 driver require a specific shutdown method?
The IR2104 can be shut down by setting pin 3 to low.