Summary of Meter Clock: Keeping “Current” Time
Summary: The author built a meter clock using inexpensive 0–100 mA panel meters driven by an Arduino Pro Mini. PWM from the Arduino varies current through resistors to position the needles; NPN transistors switch the higher currents for minute and second meters because GPIO pins cannot safely source 60 mA. Two 1/4 W 100 Ω resistors are paralleled to make a 50 Ω, 1/2 W equivalent resistor to safely dissipate meter current.
Parts used in the Meter Clock:
- Arduino Pro Mini
- 0–100 mA panel meters (used for hours, minutes, seconds)
- NPN transistors (for switching minute and second meters)
- Two 1/4 watt 100 Ω resistors (paralleled to form 50 Ω)
- 5V power supply
I’ve seen a few meter clocks in my travels of the web, and I love the idea. A few days ago, I decided that I must have one of my own. Such began the “How to do it” pondering cycle. I had seen builds where the face plate of the meter is replaced. This works, but I wanted to try and find a way to do it without modifying the meter, if possible. After some more ponderation, I came up with what I think is a serviceable idea.
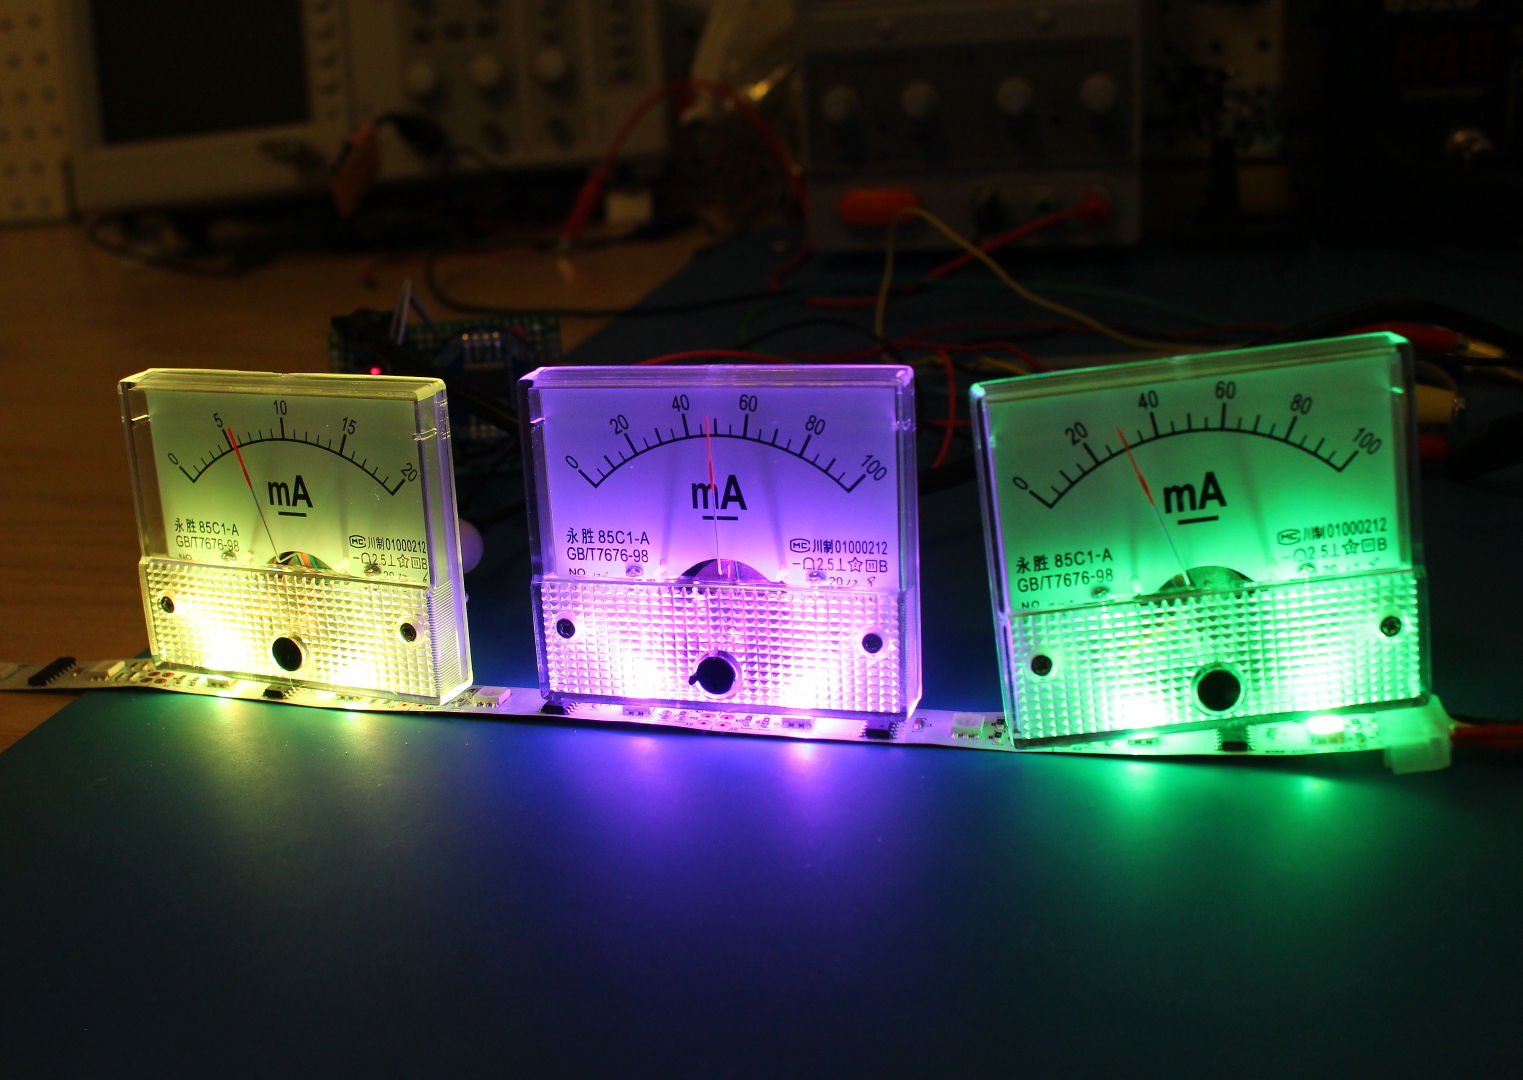
I came across this style of milliamp meter on Amazon. They’re not quite 0-60 mA, but the 0-100 mA (a 0-20mA meter for the hours) is close enough. And they were cheap. So yay.
Part of my requirements were that the clock run off of an Arduino Pro Mini I had lying around, and with minimal additional parts. In order to drive the meters with some degree of precision, I would use the PWM pins to vary the effective voltage across a resistor in series with the meter. This would, by the grace of Ohm’s Law, induce a current that, based on the PWM duty cycle, would be scaled in such a way as to move the needle on the meter to the corresponding hour, minute, or second.
One minor issue came up in the form of the max current the GPIO pins on the ATMega328 chip can source/sink. The pins can source/sink a maximum of 40mA, a bit far from the 60mA needed for the minutes and seconds meters. Enter the transistor.
Using a simple NPN transistor switch circuit, I was able to provide the current for the minute and second meters from the 5V supply. The PWM signals switch the respective transistors on and off, effectively varying the voltage across the resistors in series with the meters.
The resistor between 5V and the meter is actually 2 1/4 watt 100 Ohm resistors in parallel for an effective resistance of 50 Ohms. The two in parallel was necessary as 5V x 0.06A = 0.3W (more than 0.25 that a single 1/4W resistor can handle safely).
For more detail: Meter Clock: Keeping “Current” Time
- Can the meter face be replaced without modifying the meter?
The author preferred not to modify the meter and designed the clock to avoid changing the meter face. - What style of meters were used?
Inexpensive 0–100 mA panel meters were used (a 0–20 mA meter for hours was noted as close enough). - How is the meter needle controlled by the Arduino?
PWM pins vary the effective voltage across a resistor in series with the meter to induce the corresponding current and move the needle. - Why are transistors used in the design?
NPN transistors are used to provide the higher current for minute and second meters because the Arduino GPIO cannot safely source the required current. - What is the maximum current the ATMega328 GPIO can source or sink?
The pins can source/sink a maximum of 40 mA, which is less than the roughly 60 mA needed for the minutes and seconds meters. - How were resistors chosen to handle power dissipation?
Two 1/4 watt 100 Ω resistors were put in parallel to yield 50 Ω and share dissipation, because a single 1/4 W resistor could not safely handle the required 0.3 W. - What supply voltage is used for the meters?
The meters and transistors are powered from a 5V supply. - Does the design use many additional parts beyond the Arduino and meters?
The goal was minimal additional parts; the main extras were NPN transistors and the parallel resistors.