
Summary of Homemade Lightbulb
This article guides readers on constructing a functional carbon filament lightbulb using common household items. The device mimics early Edison bulbs by utilizing a glass jar filled with CO2 and a graphite pencil lead filament. The process involves drilling screws, preparing the lid, creating wire hangers, and assembling the components to create a safe, DIY lighting solution without specialized equipment.
Parts used in the Homemade Lightbulb:
- Jar and Lid
- Pencil Lead
- Malleable Wire
- Heat-Shrink Tubing
- 4 Machine Screws (10-32 1/2")
- 4 Nuts
- 2 Acorn Nuts
- JB Weld
- Silicone
- CO2 Canister
- Short Length of Piano Wire
- Drill and Bits
- Wire Cutters
- Needle-Nose Pliers
- Vise-Grips
- Scissors
- Penknife
- Screw Driver
- Candle/Matches/Lighter
- Air Nozzle
- Oven
- Voltage Source
- Wire Leads
- Multimeter
Ever looked at a lightbulb and thought that doesn’t look too complicated, I bet I could make one? With this Instructable you can!
This lightbulb is made entirely out of simple, mostly household materials requiring very little in special equipment. The basic construction includes a glass jar filled with CO2 and a graphite filament(Pencil Lead). This makes it a carbon filament bulb analogous to those made by Edison before tungsten became the norm.
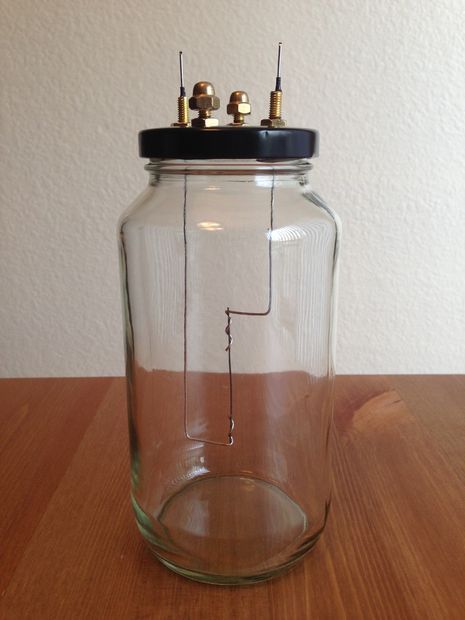
Step 1: Supplies
Materials Needed:
- Jar and Lid
- Pencil Lead
- Maleable Wire
- Heat-Shrink Tubing
- 4 Machine Screws(I used 10-32 1/2″)
- 4 Nuts
- 2 Acorn Nuts
- JB Weld
- Silicone
- CO2 Canister
- Short Length of Piano Wire
Tools Needed:
- Drill and Bits
- Wire Cutters
- Needle-Nose Pliers
- Vise-Grips
- Scissors
- Penknife
- Screw Driver
- Candle/Matches/Lighter
- Air Nozzle(Only Unusual Tool Needed)
- Oven
- Voltage Source
- Wire Leads
- Multimeter(Optional)
Step 2: Hollow-Out The Screws
Drill a 3/32″ hole through the center of each screw.
Two of these will become vents for filling the jar with CO2 and two will be for holding the wire hangers.
This is much easier if you first drill a hole in a piece of scrap wood to hold the screw in place. You may want to purchase extra screws because keeping the drill straight and centered is difficult and you will mess up at least once.
Step 3: Prepare The Lid
Drill 4 holes in the lid arranged with equal spacing as in the photo.
Use a penknife to score the area around each hole on both sides of the lid. This will allow the epoxy to adhere better.
Step 4: The Hangers
Cut two lengths of wire approximately 10″ long.
Clamp the wire in the vise grips with about 1.5″ sticking out on one side.
Hold the length of piano wire against the vise grips such that it is perpendicular to the wire.
Use the needle-nose pliers to twist the wire around the piano wire.
Repeat for the second hanger.
Note: For my malleable wire I used 19 gauge stainless steel, though any solid core wire of similar gauge should work.
For more detail: Homemade Lightbulb
- What materials are needed to build this lightbulb?
The project requires a jar and lid, pencil lead, malleable wire, heat-shrink tubing, machine screws, nuts, JB Weld, silicone, a CO2 canister, and piano wire. - How do you prepare the screws for the lightbulb?
You must drill a 3/32 inch hole through the center of each screw to serve as vents or holders for the wire hangers. - Can I use any type of wire for the hangers?
You should use solid core wire of similar gauge to the 19 gauge stainless steel mentioned, such as malleable wire. - Does the article mention a specific gas to fill the jar?
Yes, the basic construction includes filling the glass jar with CO2 from a canister. - What tools are required to score the lid?
A penknife is used to score the area around each hole on both sides of the lid to help epoxy adhere better. - Is a multimeter necessary for this project?
No, a multimeter is listed as an optional tool for the build. - How long should the wire lengths be for the hangers?
You should cut two lengths of wire approximately 10 inches long. - What is the purpose of the oven in this project?
The oven is listed under tools needed, implying it is used during the assembly or curing process, though specific usage details are not elaborated in the text.
