
Summary of Capacitive-Touch Arduino Keyboard Piano
This article details a DIY touch-sensor piano keyboard using an Arduino microcontroller. By cutting aluminum foil into keys and connecting them with resistors to the Arduino, users can create a musical instrument that detects touch via body capacitance changes. The project supports up to 18 keys on an Uno or over 60 on a Mega, utilizing a piezo buzzer for sound generation.
Parts used in the Touch-Sensor Piano Keyboard:
- Arduino microcontroller board (Uno, Mega, etc.)
- Resistors (2.2 MΩ recommended)
- Piezo buzzer
- Spare wires or jumper cables
- Aluminum foil
- Tape
- Cardboard or surface for mounting
- Soldering iron and solder (optional)
- Scissors
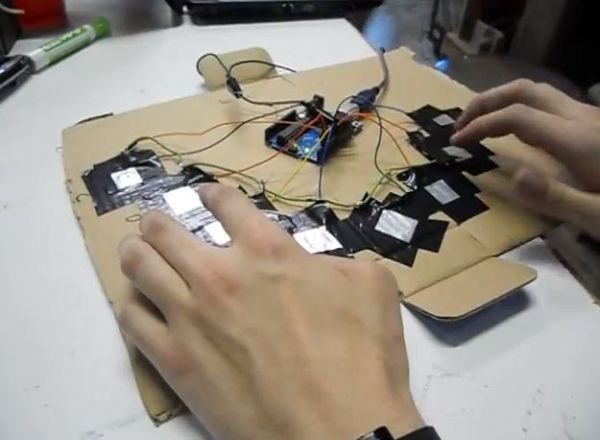
Using only an Arduino, a few resistors, a buzzer, and some bits of aluminum foil, you can create your own touch-sensor piano keyboard in just a few minutes! Using an Arduino Uno, you can create a piano with up to 18 keys; or with an Arduino Mega, you can get over 60 keys! Other Arduino boards should work with this project with little to no modification to the code.
Step 1: Parts and Material
You’ll first want to collect all of the parts you will need for the project:
• An Arduino (or Arduino-compatible) microcontroller board.
• Any Arduino board should work: Uno, Leonardo, Mega, Pro Mini, etc.
• Eight 2.2 Megaohm (2.2 MΩ) resistors
• Anywhere between 1 MΩ and 4.7 MΩ should work
• You need one resistor per piano key
• A 2.2 MΩ resistor has a color code of Red-Red-Green or Red-Red-Black-Yellow
• A piezo buzzer
• Some spare wires or jumper cables
• Aluminum foil
• A foot or two should do
• Tape
• A surface to tape your keys to
• We used a scrap piece of cardboard, but it can be anything you like, even the tabletop itself!
Equipment that you may need:
• Soldering iron and solder
• You can probably get by without an iron by wrapping wires together instead of soldering, but the connection will not be as reliable
• Scissors to cut aluminum foil and tape
Step 2: The Idea and Design
The basic principle behind our method of touch sensing is that each piano “key” is sensor that can measure the electrical capacitance of a person’s body. The measurement will change as the user gets closer to the sensor and will spike dramatically when the user touches the sensor. The Arduino will be looking for these spikes in order to detect when the user has touched the key.
We will need to use one pin an the Arduino for each key as an “input pin”, and we’ll need one pin total to be used as the “common send” pin. We will also need one pin for the buzzer that will be used to generate a tone. This means that since an Arduino one has 20 input pins (14 digital and 6 analog), we can have up to 18 keys on our keyboard! If you have an Arduino Mega or any other board with more pins, that number can be even higher!
Step 3: Create your “Keys”
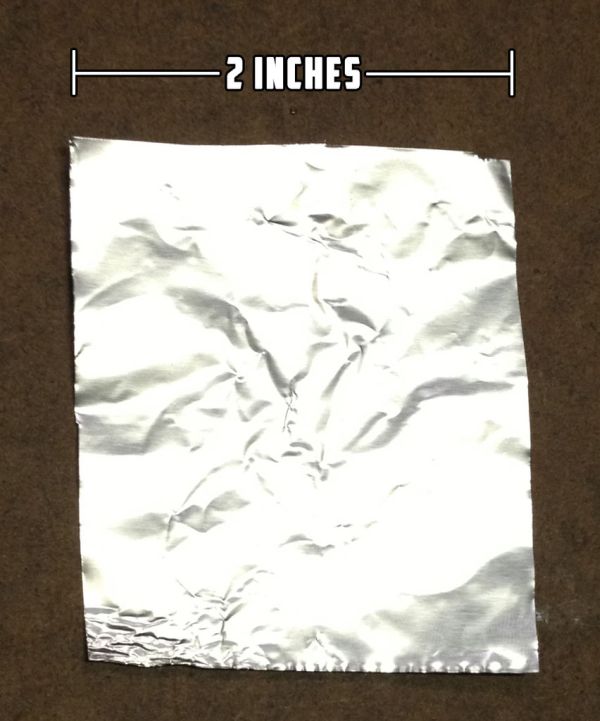
Out of your aluminum foil, cut a few shapes to be your piano “keys”. Any shape will do, but we took the simple route and made squares. Each key should be somewhere between 2″x2″ and 4″x4″, but most other sizes will work as well.
Step 4: Assemble the Key Circuitry
Each touch-sensitive “key” on the piano is going to require one resistor and two wires/cables. Solder one wire to each leg of the resistor, but make sure to leave part of the leg sticking out. The leg will be used to connect to the foil in the next step. Make as many of these as you plan on having piano keys.
Step 5: Connect the Foil “Key”
Remember the extra bit of leg we saved? Take it and poke it through a corner or side of one of your aluminum foil squares. Fold the leg over the edge back towards itself to make the connect hold more strongly. Go ahead and assemble all of your keys.
For more detail: Capacitive-Touch Arduino Keyboard Piano
- How many keys can an Arduino Uno support?
An Arduino Uno can support up to 18 keys because it has 20 input pins. - What is the best way to connect the resistor to the foil key?
Poke the extra leg of the resistor through the foil corner and fold it back over itself to hold strongly. - Can I use an Arduino Mega for this project?
Yes, an Arduino Mega allows you to create over 60 keys due to its higher pin count. - Does the size of the aluminum foil matter?
The foil should be between 2x2 inches and 4x4 inches, though other sizes work as well. - How does the touch sensor detect a press?
It measures electrical capacitance which spikes dramatically when a user touches the sensor. - What resistance value is recommended for the resistors?
A 2.2 Megaohm resistor is recommended, but values between 1 MΩ and 4.7 MΩ will work. - Do I need a soldering iron for this project?
No, you can wrap wires together instead of soldering, though connections may be less reliable. - Which pin on the Arduino is used for the buzzer?
One specific pin is used for the buzzer to generate the tone.