Summary of MKR1000 Universal Remonster!
This project creates a WiFi-connected universal remote using an Arduino MKR1000 for web connectivity and an Arduino Nano to handle IR signal transmission. The system allows users to control appliances via a smartphone web app by sending HTTP GET requests containing specific IR codes. Since the MKR1000's ARM architecture initially lacked compatible IR libraries, it acts as a server relaying commands to the Nano over serial communication. The hardware includes transistors to drive multiple IR LEDs for omnidirectional coverage, enabling control of devices like TVs and receivers without built-in infrared capabilities.
Parts used in the WiFi Connected Universal Remote:
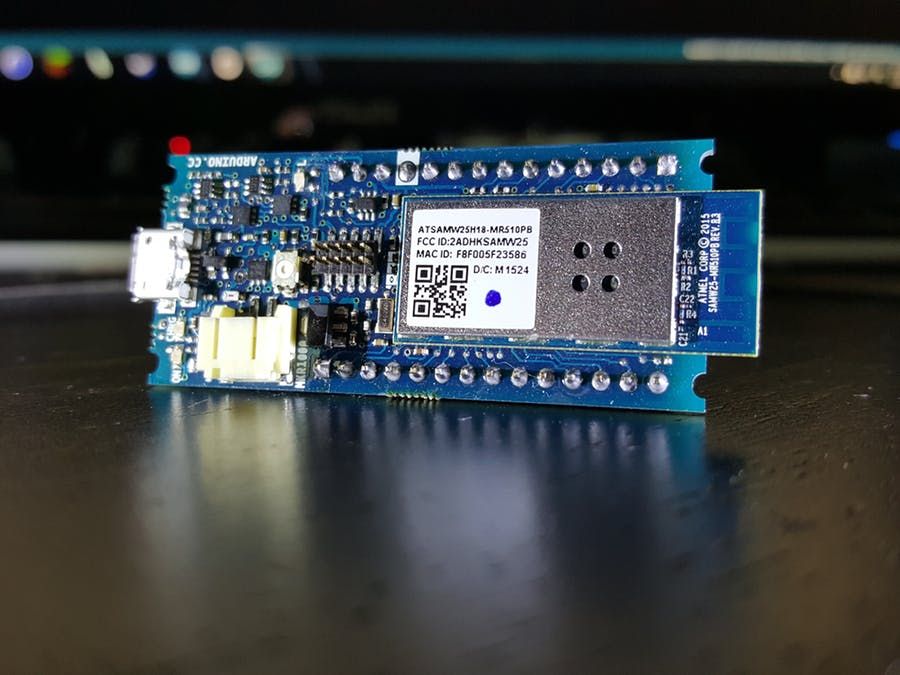
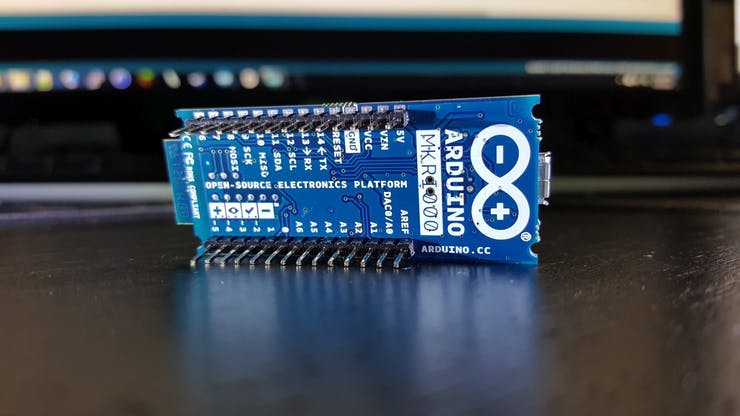
- Arduino MKR1000
- Arduino Nano R3
- General Purpose Transistor NPN
- Resistor 1k ohm
- IR transmitter (generic)
- General Purpose Transistor PNP
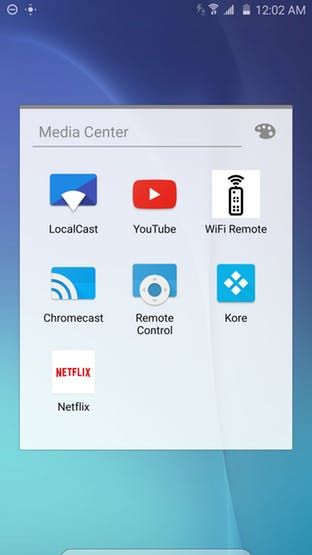
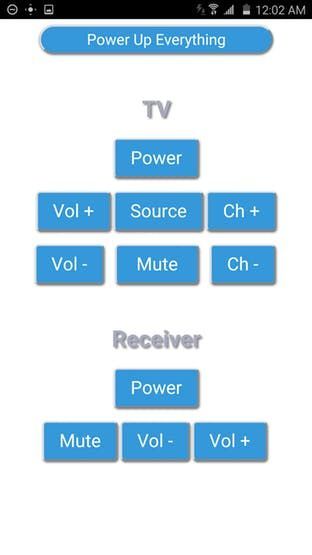
WiFi connected universal remote with smart phone webapp.
Things used in this project
Hardware components |
||||||
 |
|
|||||
 |
|
|||||
 |
|
|||||
 |
|
|||||
|
||||||
 |
|
|||||
Software apps and online services |
||||||
 |
|
|||||
Story
I had been toying with the idea of building a WiFi connected IR blaster that can control everything in a room through a webapp running on my phone (which does not have a built in IR blaster).
When I saw the World’s Largest Arduino Maker Challenge announced right here on hackster.io I took one look at the Arduino MKR1000 specs and realized it was a perfect fit:
- Low power 32bit ARM MCU
- Low power 802.11 b/g/n Wi-Fi
- Onboard Li-Po charging circuit
- Familiar Arduino IDE
- Tons of I/O like you’d expect from any Arduino
Since I wouldn’t get my MKR1000 for at least a month, I figured I’d start working on the code. I would need to accomplish three things:
- Connect to my home WiFi
- Light weight web server to accept HTTP requests
- Parse GET URL for virtual button presses
- Send IR signal depending on URL
The MKR1000 should be able to do all this on its own, but my prototype will need a few more components.
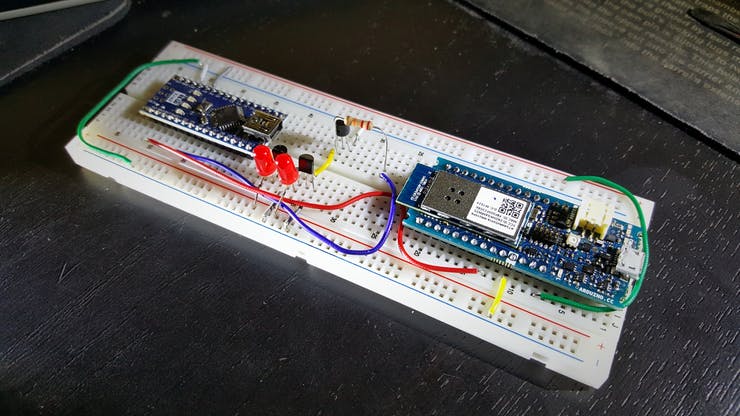
Prototyping
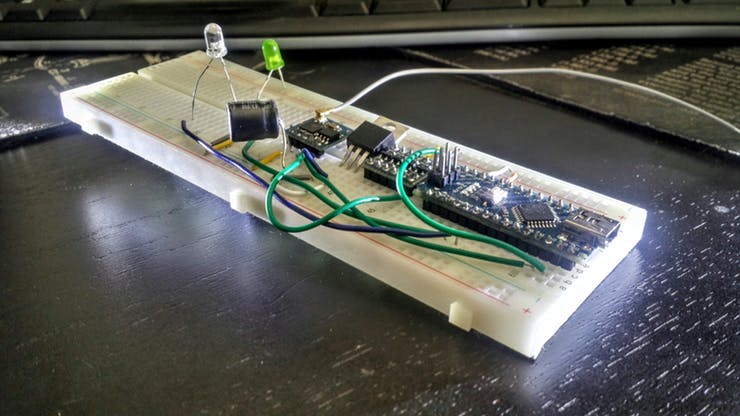
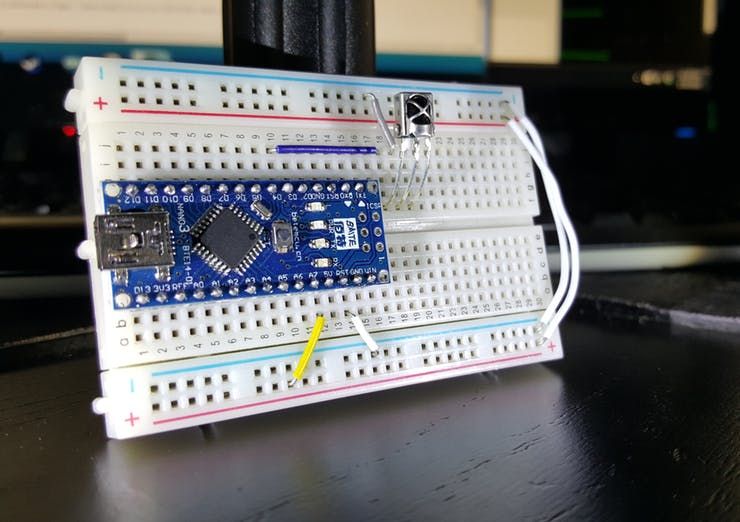
Here I have an ESP8266 running the WiFi client and relaying everything to the Arduino Nano over serial. The Nano is running the webserver itself and is responsible for handling the HTTP connections and parsing the URLs. It takes the URL, interprets that as a specific button press, and sends the corresponding IR code.
There is a bit of hackery needed to get this working. First, I’m using AT commands to manage the WiFi connection through the ESP8266. To get all the communication working over software serial, I had to level shift the voltages since the ESP8266 is 3.3v and the Nano is 5v. The ESP8266 also draws a lot of power when connecting to WiFi, so it requires its own power regulator and smoothing cap.
Fortunately, the MKR1000 can do all of this and more on just a single board that’s just slightly larger than the nano (4 pins longer, 3 pins wider on a breadboard).
Since the MKR1000 is a 3.3v board the output from the I/O pins would cause the IR LED to be quite dim. I also plan on having multiple LEDs pointed in different directions, so I’ll need to use the I/O pin to drive an NPN transistor which in turn switches a PNP transistor for each of the LEDs wired in parallel. These PNP transistors have the collector/emitter wired directly to the 5v supply voltage. Going this route, I can have as many IR LEDs as I want and can make an omnidirectional array.
Setting up the Backend
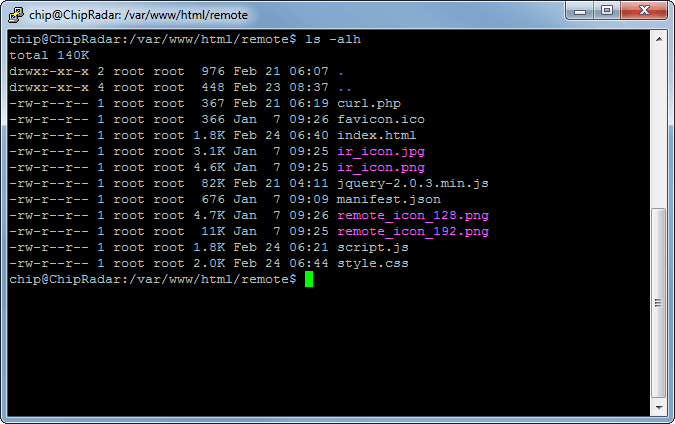
The web page that contains the UI is running on an underutilized C.H.I.P. $9 computer that is already setup on my home network. After doing some research, I found a great tutorial for implementing a REST API for Arduino to control LEDs on adafruit. I used their JavaScript and PHP files to submit the cURL requests and loaded that on the CHIP which is already running apache. After creating a basic HTML page for the remote control, I added the manifest.json and icon files so it can run as a native web app on an Android phone.
Writing the Code
On the MKR1000 side, I just had to switch out the ESP8266WiFi.h with the WiFi101.h library. Then I trimmed down the webserver to just accept a GET request, parse the URL, send a 200 OK, and then disconnect.
void loop() {
 // listen for incoming clients
 WiFiClient client = server.available();
 if (!client) {
   return;
 }
   Serial.println("new client");  // can be removed after debugging
   // Wait until the client sends some data
   while(!client.available()){
     delay(1);
   }
 // Read the first line of the request (the GET string)
 String req = client.readStringUntil('\r');
 Serial.println(req);  // can be removed after debugging
 // Send request over to Arduino Nano
 Serial1.println(req);
 client.flush();
   // give the client time to receive the data
   delay(1);
   // close the connection
   client.stop();
   client.flush();
   Serial.println("client disconnected");  // can be removed after debugging
}
Based off the URL, the Arduino would send the IR code that was mapped to the button pressed. I say “would” because I just found out the IRremote library I have used in the past does not work with the SAMD ARM based Arduinos (which the MKR1000 is).
Rather than re-writing the library, I’ll just output the commands from the MKR1000 over serial to an Arduino Nano and have that drive the LEDs.
Looking Forward
Once the library is ported over by the Arduino community, I’ll be able to remove that portion entirely and do it all on the single MKR1000 board.
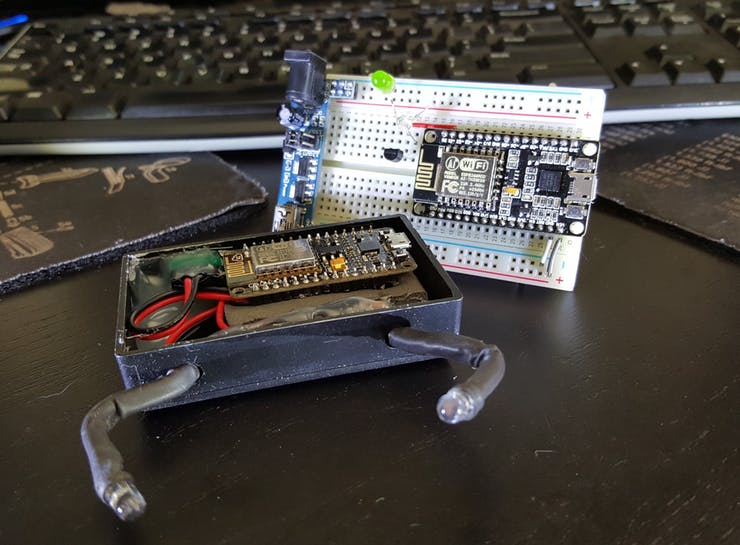
I built another one of these using just an NodeMCU ESP8266 dev board, so in the meantime I will still be able to control my appliances.
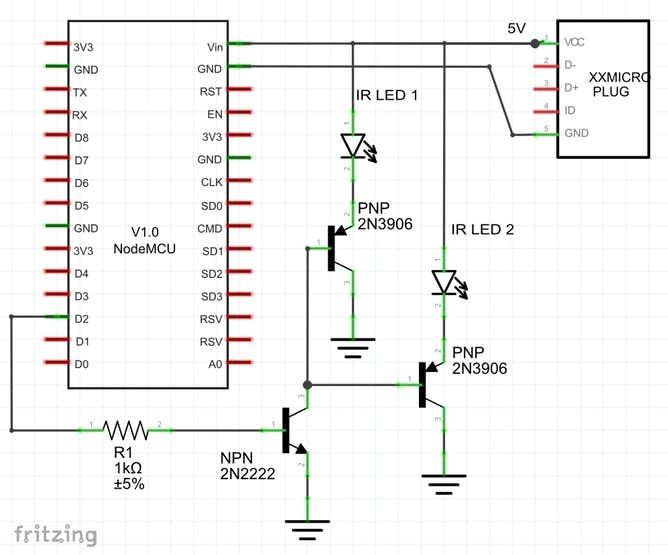
Schematics
Schematic
Code
Source : MKR1000 Universal Remonster!
- How does the MKR1000 communicate with the IR blaster?
The MKR1000 sends parsed URL requests over software serial to an Arduino Nano which drives the IR LEDs. - Why are transistors used in the circuit?
NPN and PNP transistors are used to switch the 5v supply for the IR LEDs because the MKR1000 outputs only 3.3v. - What is the purpose of the smartphone webapp?
The webapp runs on the user's phone to send cURL requests that trigger virtual button presses on the remote. - Can I use more than two IR LEDs?
Yes, you can use many more LEDs wired in parallel with individual PNP transistors for each one. - Why was the ESP8266 used in the prototype?
The ESP8266 was used temporarily because the MKR1000 was not yet available when prototyping began. - How are IR codes sent from the web interface?
IR codes are sent via GET request URLs formatted as http://[ip_address]/[IRcode]. - What happens if the IRremote library does not work on MKR1000?
The author offloads the IR signal generation to an Arduino Nano that supports the library. - Does the system require a separate computer?
A C.H.I.P. computer was used to host the backend web page but is not strictly required for the final single-board version.