
Summary of ESP8266 Web Server Tutorial
This article guides users in building a standalone web server using an ESP8266 module to toggle two LEDs. It explains the benefits of NodeMCU firmware, provides wiring instructions for connecting the module to a power source and computer, and details the process of flashing the device using NodeMCU Flasher software on Windows.
Parts used in the ESP8266 Web Server:
- ESP8266 module
- NodeMCU firmware
- LUA script
- NodeMCU Flasher (.exe file)
- Two LEDs
- Wires (for RX/TX, CH_PD, GPIO 0, VCC, GND connections)
- Windows Computer
Written by Rui Santos – Download free eBook with Arduino projects here
If you want to learn more about the ESP8266 module, first read my Getting Started Guide for the ESP8266 WiFi Module. In this project you’ll create a standalone web server with an ESP8266 that can toggle two LEDs.
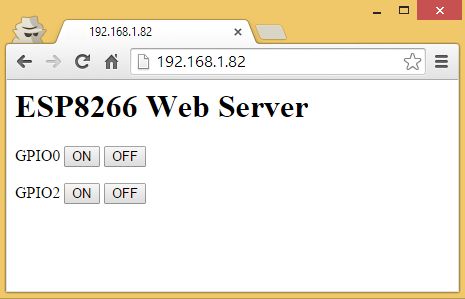
Why flashing your ESP8266 module with NodeMCU?
NodeMCU is a firmware that allows you to program the ESP8266 modules with LUA script. And you’ll find it very similar to the way you program your Arduino. With just a few lines of code you can establish a WiFi connection, control the ESP8266 GPIOs, turning your ESP8266 into a web server and a lot more.
Where to buy?
You can click here to get this module on eBay for less than $4.
Wiring:
- RX -> TX
- TX -> RX
- CH_PD -> 3.3V
- GPIO 0 -> GND
- VCC -> 3.3V
- GND -> GND
-
Downloading NodeMCU Flasher for Windows
After wiring your circuit, you have to download the NodeMCU flasher. It’s a .exe file that you can download using one of the following links:
You can click here to find all the information about NodeMCU flasher.
Flashing your ESP8266
Open the flasher that you just downloaded and a window should appear (as shown in the following figure).
Press the button “Flash” and it should start the flashing process immediately (You might have to change some of the settings on the Advanced tab). After finishing this process, it should appear a green circle with a check icon.
Schematics
Now follow the schematics bellow to create your web server to control two LEDs.
For more detail: ESP8266 Web Server Tutorial
- Why should I flash my ESP8266 module with NodeMCU?
NodeMCU allows you to program ESP8266 modules with LUA script, making it easy to establish WiFi connections and control GPIOs. - How can I connect the ESP8266 pins for this project?
You must connect RX to TX, TX to RX, CH_PD and VCC to 3.3V, GPIO 0 to GND, and GND to GND. - Where can I buy the ESP8266 module?
You can purchase the module on eBay for less than $4. - What software do I need to download for Windows?
You need to download the NodeMCU Flasher .exe file available for Win32 or Win64 systems. - How do I know the flashing process is complete?
The process finishes when a green circle with a check icon appears after pressing the Flash button. - Can I use this setup to control multiple devices?
Yes, the project creates a web server capable of toggling two LEDs. - Is programming the ESP8266 similar to Arduino?
Yes, using NodeMCU firmware makes programming very similar to how you program your Arduino.
