
Summary of Raspberry Pi Motion Sensitive Camera
Summary: A Raspberry Pi Motion Sensitive Camera uses a Pi, Pi camera module, PIR motion sensor, USB WiFi adapter, and Python scripts to detect motion, capture photos or short videos, and automatically upload them to Dropbox. A second Python program manages a power switch with an LED and safe shutdown. The housing is laser-cut birch plywood and the system requires basic Raspberry Pi setup, soldering, and laser cutter experience.
Parts used in the Raspberry Pi Motion Sensitive Camera:
- Raspberry Pi
- Raspberry Pi camera module
- PIR motion sensor
- USB WiFi adapter
- Power switch with built-in LED
- Additional status LED
- Wires and connectors for wiring to Raspberry Pi
- Soldering supplies
- 1/8 inch birch plywood for case
- Laser cutter (for cutting plywood)
- Memory card for Raspberry Pi
- Power supply for Raspberry Pi
- Python programs (motion detection/upload and switch monitor)
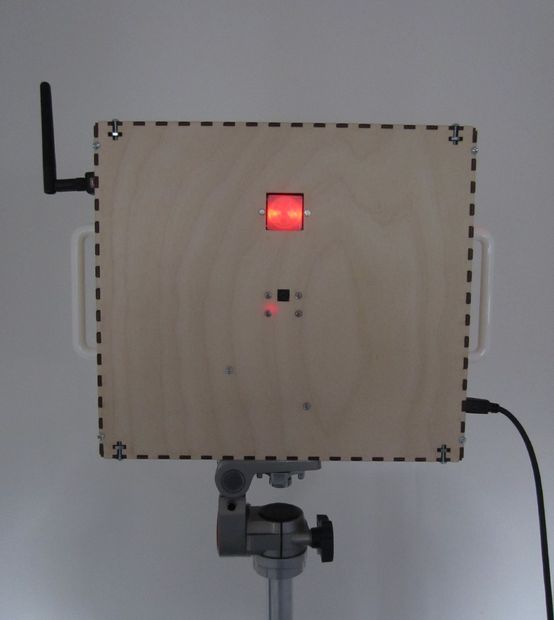
Using a Raspberry Pi, a Raspberry Pi camera module, a PIR motion sensor, a USB WiFi adapter, a handful of parts, and a couple of Python programs, you can construct a camera that will automatically snap photos or record short videos when something moves in front of the camera and will automatically upload the photos/videos to Dropbox. This instructable shows how to build a Raspberry Pi Motion Sensitive Camera.
My inspiration for making this was to help satisfy my curiosity about the behavior of my cats when I’m not home and to identify the local wildlife culprits that devour the plants in my garden. There are commercial products that can do this but I thought it would be fun to build one that works exactly the way I desire.
The Raspberry Pi executes a Python program that starts when the Raspberry Pi is booted and waits for motion to be detected by the PIR sensor. When motion is detected, the Raspberry Pi snaps a photo or records a short video and then uploads it to a DropBox account. The great thing about uploading to Dropbox is that the photos and videos are available to be viewed by the owner of the Dropbox account on any device (laptop, desktop, tablet, smart phone) from anywhere where internet access is available. When the upload is complete, the program sleeps for a few seconds and then waits again for motion to be detected.
There is a second constantly running Python program that monitors a switch on the side of the camera. This program illuminates an LED in the switch so you know when the camera is operational. When the program detects the switch being pressed, it blinks the LED in the switch and then halts the software in Raspberry Pi. The LED in the switch turns off to indicate that it is safe to unplug the power to the camera.
There is an additional LED mounted on one of the side panels that is illuminated when the Raspberry Pi is connected to power.
A more detailed explanation of how the software works is provided in step 20.
The diagram shows the wiring of the various components to the Raspberry Pi.
The case for the camera was made with 1/8″ thick birch plywood cut using a Epilog Helix laser cutter.
This instructable assumes you have basic experience with setting up and running a Raspberry Pi, that you have experience soldering, and that you have access to and experience with a laser cutter.
For more detail: Raspberry Pi Motion Sensitive Camera
- What does the camera do when motion is detected?
The Raspberry Pi snaps a photo or records a short video and uploads it to Dropbox, then sleeps for a few seconds and waits for more motion. - How are captured files made available remotely?
Captured photos and videos are uploaded to a Dropbox account so they can be accessed from any device with internet access. - How does the power switch safely shut down the Raspberry Pi?
A second Python program monitors the switch, blinks the switch LED when pressed, halts the Raspberry Pi software, and turns off the LED to indicate it is safe to unplug power. - What indicates the Raspberry Pi is powered?
An additional LED mounted on a side panel is illuminated when the Raspberry Pi is connected to power. - What hardware is required to detect motion?
A PIR motion sensor wired to the Raspberry Pi is used to detect motion. - What skills or tools are assumed to build this project?
The instructable assumes basic Raspberry Pi setup experience, soldering skills, and access to and experience with a laser cutter. - How is the camera housing made?
The case is made from 1/8 inch birch plywood cut using an Epilog Helix laser cutter. - When do the Python programs start running?
The motion-detection Python program starts when the Raspberry Pi boots; a second program constantly runs to monitor the power switch. - Does the project require internet connectivity?
Yes, a USB WiFi adapter is used so the Raspberry Pi can upload captured files to Dropbox.