
Summary of 3dpBurner – A 3D printed laser cutter/engraver
3dpBurner is an open-source, low-cost laser cutter and engraver built using 3D-printed components and standard hardware. It features a customizable X/Y work area and utilizes an Arduino UNO with CNC shielding to control NEMA17 motors via Pololu drivers. The system employs a blue laser diode cooled by a heatsink and fan, emphasizing safety through eye protection and ventilation against toxic fumes.
Parts used in the 3dpBurner:
- 3D printed parts
- M8 and M3 size hardware (rods, nuts, washers, bolts)
- Small bearings
- GT2 pulleys and belts
- Arduino UNO
- CNC shield
- Pololu based stepper drivers
- NEMA17 stepper motors
- Laser diode module (e.g., 1.6W blue laser)
- Aluminium heatsink
- Fan
- Constant current driver
3dpBurner is an open source laser cutter/engraver.
It is created with the same concept as RepRap, using 3D printed parts and some easy to find “vitamins” (non printed hardware).
I tried to make it as cheap as possible, by using cheap electronics and a “low power” laser (a laser diode).
The X/Y working area is fully customisable and the max working object height is up to 50-60mm.
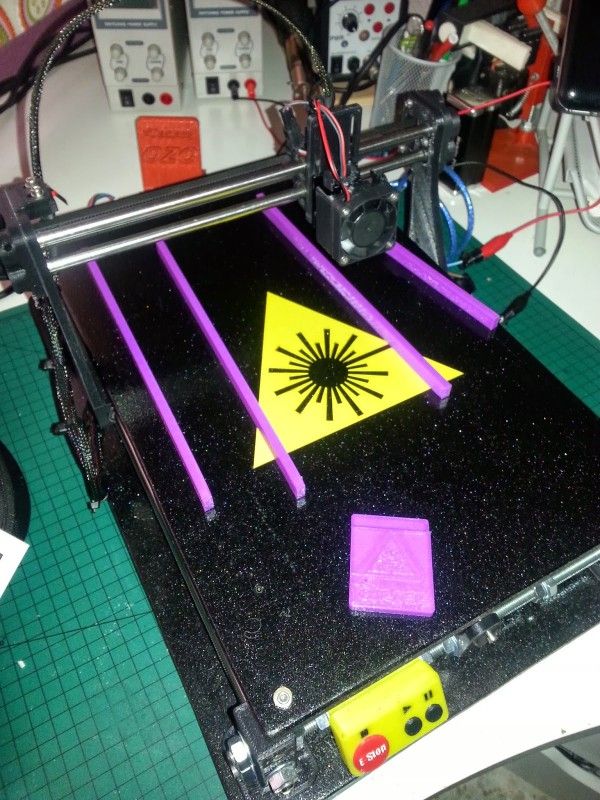
The cutter/engraver basically uses the 3D printed parts, M8 and M3 size hardware (rods, nuts,washers and bolts), some small bearings and GT2 pulleys and belts. I got most of the parts from my “old” RepRap printer.
The X/Y working area is fully customsable by changing the length of the 8mm rods.
The electronics uses an Arduino UNO with a cheap CNC shield and two Pololu based stepper drivers to drive two NEMA17 stepper motors.
It uses a laser diode to cut/engrave, the diode module is cooled by an aluminium heatsink and a fan and it is controlled by a cheap constant current driver. Personally I’m using a popular 1.6W blue laser diode (note this diode is sold as being capable of up to 3W), but you can use your own diode (DVD recorder, BluRay, M140…).
NOTE: It is imperative you get the appropriate protection for your eyes and have a way to vent the toxic fumes released by the most of materials. The first thing you need to buy prior to applying power to your laser is a pair of safety glasses appropriate to your laser wave length. The laser spot or laser reflections can hurt your eyes very easily. Avoid using IR laser diodes as the beam is invisible but will still cause the same amount of damage as a visible laser. IR diodes are more dangerous as it is not obvious when they are switched on.
For more detail: 3dpBurner – A 3D printed laser cutter/engraver
- How is the electronics system powered and controlled?
The electronics use an Arduino UNO paired with a cheap CNC shield and two Pololu based stepper drivers. - Can the working area dimensions be changed?
Yes, the X/Y working area is fully customizable by changing the length of the 8mm rods. - What type of laser diode is recommended for this project?
A popular 1.6W blue laser diode is used, though other diodes like DVD recorder or BluRay types are also acceptable. - How is the laser diode cooled during operation?
The diode module is cooled by an aluminium heatsink and a fan. - What safety equipment is required before applying power?
You must purchase a pair of safety glasses appropriate to your laser wavelength before turning on the device. - Why should IR laser diodes be avoided?
IR diodes are more dangerous because the beam is invisible, making it unclear when they are switched on. - What is the maximum height of an object that can be processed?
The max working object height is up to 50-60mm. - Where were most of the hardware parts sourced from?
Most parts were obtained from an old RepRap printer.
