I call this project “The Motivational Moody Workout T-Shirt” . Basically what I wanted to do was a t-shirt that makes you want to get out in the open and work out. To make that work, I sewed a LilyPad arduino onto a t-shirt and powered it with a solar panel. Then I connected a bunch blue LEDs in smiley face patterns to the LilyPad board and finally a ball tilt sensor. So for it to work you have to be outside in daylight. By doing that you turn on the LEDs that are forming a sad smiley face, :(, and one you start moving (preferably running) the ball tilt sensor will sense the movement and thereby make the happy smiley face, :), appear.
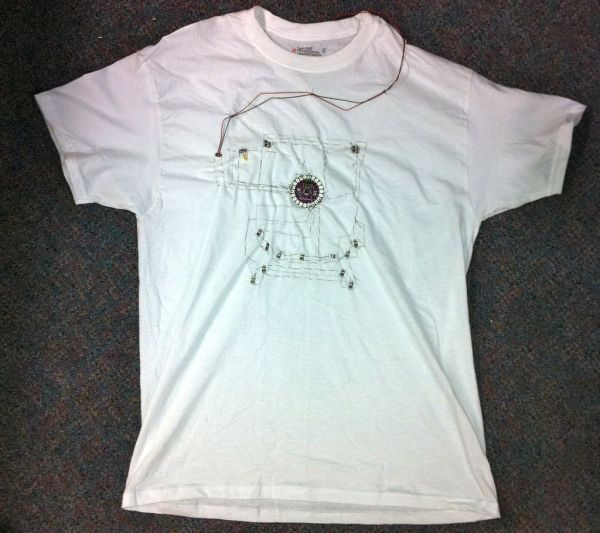
The first picture show the front with the LilyPad Arduino, LEDs, Tilt ball sensor and the sewing i.e. finished project. The second picture shows the solar panel on the back. The third picture is a small sketch from my original notes.
Step 1: What you need…
For this project I used the following components,
LilyPad arduino
FTDI breakout board
Conductive thread
LilyPad LEDs
LilyPad PCBs
Ball tilt sensor
Solar Panel
Sewing kit
Scissors
Tape
White T-shirt
Soldering machine and solder
Arduino software
Fritzing software
Most of these things can be found at,
http://www.sparkfun.com and
http://www.adafruit.com
http://fritzing.org/
http://www.arduino.cc/
Step 2: Layout and sewing
What I did was that I outlined my circuit on my t-shirt with a pencil. After that I taped all the components to the places where i wanted them. After that I just started sewing, which is pretty time consuming, and connecting all the LEDs, solar panel and ball tilt sensor to the LilyPad. When you sew make sure to make solid bonds at the connection points. I decided to put the solar panel on the back and the LilyPad arduino on front, easily accesible for all the lights and sensor.
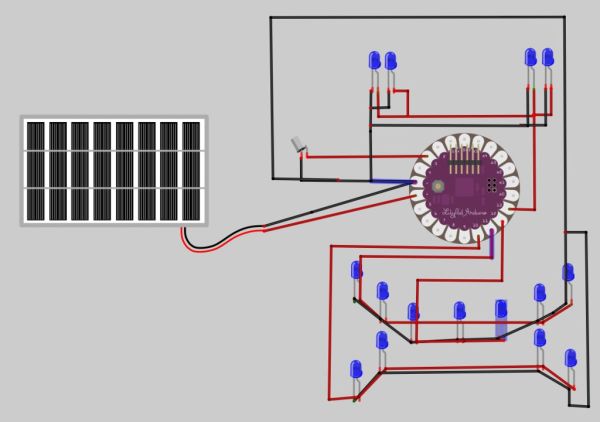
– I uploaded a fritzing schematic which shows the basic wiring.
– The ball tilt sensor I soldered on to a LilyPad PCB “thingy” to be able to easily sew it on the t-shirt. The same procedure for the solar panel.
Make sure to test all your connections with an ohm meter so you know your sewing works.
Major Components in ProjectLilyPad arduino
FTDI breakout board
Conductive thread
LilyPad LEDs
LilyPad PCBs
Ball tilt sensor
Solar PanelArduino software
Fritzing software
FTDI breakout board
Conductive thread
LilyPad LEDs
LilyPad PCBs
Ball tilt sensor
Solar Panel
Arduino software
Fritzing software
For more detail: The Motivational Moody Workout T-Shirt using an Arduino