In this tutorial I will go over how to make a transforming chandelier.
This project will be heavily CAD oriented (Solid works and Illustrator), made by laser cutting/engraving acrylic sheets, and a little bit of Arduino coding and soldering.
Step 1: Choosing materials.

All the pieces for the chandelier will be made out of flat materials, so I decided to use plexiglass since it comes in different colors and is strong.
Before designing the gears and how they work together, visit this link to help yourself understand how gears and mechanical joints could work in the structure.
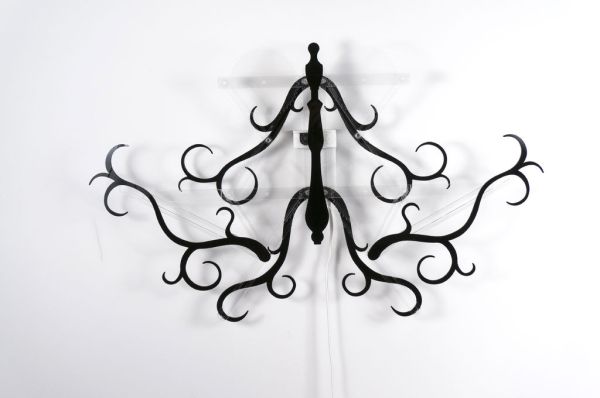
Step 2: Design.
Start by sketching out the basic shape you want. Its form will change into different configurations depending on how much the motor spins.
Sketching can be done very roughly as the form is likely to change later while designing it in computer.
My sketches were done in Adobe Illustrator in order to move around the shape modules to create different forms and see how it looks. Although this helps a little bit, going too deep into it isn’t recommended as the shape is most likely to change as the structures are built in 3D CAD.
I decided to go with somewhat traditional form of what chandeliers looked like, but you can always customize your own piece by cutting your own design and putting it together with the gears and the frame.
Step 3: CAD.
In a computer, draw out your parts (gears and the chandelier shapes you want) in a CAD program, such as Solid works, Rhino, or Sketchup. Solid works is a great tool to use in this case because it gives you the ability to assemble the complete form and test out how the gears move and interact with each shape.
Since each shape isn’t going to be completely 2 dimensional, remember to design small parts to lay on top of the materials to make hinges.
Because this phase is very important and complicated, I’ve uploaded my file on Thingiverse for you to reference or use in your making project. Feel free to grab the CAD file to look at, or take the illustrator file.
Thingiverse link: Here
Step 4: LASER!
After all the designing and tweaking is completed, it’s time to cut out the pieces.
I bought several plexiglass sheets to be laser cut. This tool allows me to cut all the pieces precisely as I designed them in the CAD program.
Because gears will be sandwiched between two pieces, make sure to cut the gears in thinner plexiglass.
For more detail: How To Make A Transforming Chandelier Using Arduino