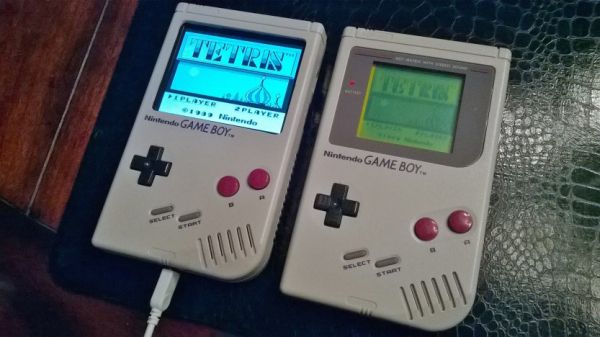
Getting Started!
I had recently bought an original Gameboy DMG from Good Will for a whopping $5.00, condition unknown. Taking a gamble, I purchased it and took it home to find that it had severe damage caused by a battery that exploded and leaked all over the mainboard.
I had also recently started looking on eBay for the elusive Gameboy Light. It’s a system I have always wanted but could never allow myself to buy since they are pretty expensive on eBay. The Gameboy Light is the Gameboy Pocket with an Indiglo light and was only released overseas in Japan.
I had bought a Raspberry Pi a while back and really didn’t know what I wanted to do with it. At that moment, like a Reese’s Peanut Butter cup, it dawned on me – could the Raspberry Pi be used with a Gameboy?
The Raspberry Pi is a small ARM based computer that fits in the palm of a normal adult hand. The great thing about the Pi is that it has several ways to connect I/O for video, audio, network, USB as well as a direct I/O set of pins called the GPIO pins.
After doing some research, I came to the conclusion that this project might actually be conceivable. Everything I needed was there, it was a matter of getting things together and working out the hardware as well as software side of things. That’s where this guide comes in. It’s my attempt to pass on what I’ve learned as well as taking you through the various steps I took to make it a reality. First off, the parts…
The Parts List
Hardware
- Pi Model B
- 3.5″ LCD Backup Screen
- Controller PCB
- 3 Watt Audio Amplifier
- Rear Buttons
- Power Switch
- Female to Male Micro USB Cable
- Broken Gameboy DMG (please don’t sacrifice a perfectly good working one)
Software
Tools
- Tri-Wing Screwdriver for Gameboy Case
- Dremel
- Soldering Iron
- Solder
- Wire Cutters
- Electrical Tape
- Hot Glue Gun
- Electrical Wire
- Exacto Knife
- Patience…
The Case
The first thing that had to be done was to see if the Pi would even fit into the case. I found that the Pi sits almost perfectly on the back case of the Gameboy. The width of the Pi fits snug down the center of the case, but in order for it to fit, some modifications had to be done to the case itself.
Using a Dremel, I cut out a most of the battery compartment as well as some posts that on the case for the LCD that would no longer be needed. Doing so, the Pi sits flush with the back of the DMG case:
More detail: Super Mega Ultra Pi Boy 64 Thingy Build

