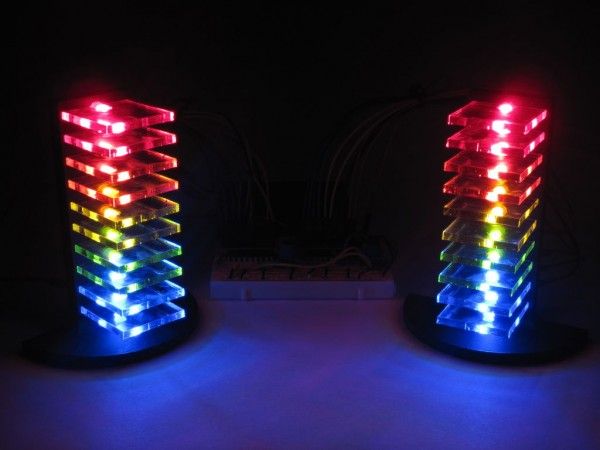
The inspiration for this project started when I saw a variety of awesome stereo LED towers on YouTube (also referred to as VU meters). Many of the videos showed the end result, and maybe a slideshow of the assembly process, but lacked complete build details or a circuit diagram. So, I set out to find out how they worked, and build my own “mini” desktop version that would go nicely with computer speakers, instead of a big living room stereo. This Instructable will give you complete directions to assemble the required circuit (even if you have no electronics experience – you can even do it without soldering), build two LED towers, and hook them up to an audio input so you can simultaneously drive them and listen to music.
To give credit where credit is due – if you search Instructables, there are a lot of “make LEDs respond to music” type projects. They range from rather simple, like using a transistor to drive a single LED; to using an Arduino or a Raspberry Pi to make an audio equalizer. This project lies somewhere in between – it uses a handy “LED driver” chip called the LM3914. The chip can drive a bar of 10 LEDs proportionally to an analog input, with no microcontroller required. So, using two of the chips with a simple circuit and stereo sound is sufficient to drive two separate volume towers.
While there are already a handful of Instructables about using the LM3914, I’m hoping this new one can contribute two things: a very clear explanation of how the circuit works along with assembly instructions, and a way to make aesthetically-pleasing LED towers that will look nice on a computer desktop, instead of just sticking all the LEDs on a breadboard. Head on to the next step for a full materials list – but first, a quick note about some of the resources I used:
I owe a special thank you to the SoHa SMART makerspace for letting me use their laser cutter for this project. I also used the UP! Plus 3D printer I won in last year’s UP! contest. I have my fingers crossed for this year’s Epilog Challenge, as it would be great to have my own laser cutter for projects like this in the future. As I’ve learned from previous projects, cutting acrylic with a jigsaw is a pain. Scoring it with a plastic-cutting knife or utility knife and snapping it works OK for rectangular pieces, but that quickly becomes a limiting factor if you want to do more complicated shapes. However, if you don’t have access to a 3D printer and/or laser cutter, don’t despair! You can still follow the instructions to build the circuit, you will just need to come up with an alternate method for building the LED towers. I’ll provide some suggestions for that in the following steps.
Some helpful updates thanks to the comments:
- You can chain together multiple chips to make each tower have more than 10 LEDs. See this video for a demonstration and page 11 of the LM3914’s datasheet for instructions on how to connect multiple chips.
- Thanks to switch62 for pointing out that technically the LM3914 makes a voltmeter and not a VU meter, because its voltage divider has a linear scale. There are two similar chips, the LM3915 and LM3916, that are almost exactly the same, but have logarithmically-scaled voltage dividers, corresponding to certain points on a decibel (dB) scale. This seems like a common misconception (most of the YouTube videos I saw originally referred to LM3914 VU meters), but if anyone tries this out with one of the other chips, let me know! I’m curious how different the output would look.
For more detail: Mini LED volume towers (VU meters)

