
Summary of Arduino Infra-Red Remote using Arduino Uno with Proteus Simulation
This project demonstrates capturing and decoding raw infrared (IR) signals from a Keyes remote using an Arduino Uno and the IRremote library (NEC protocol focus). It outputs protocol type, hexadecimal command, bit length, and raw pulse timing to the serial monitor, and supports both Proteus simulation and real hardware testing for learning IR protocols and building IR-based systems.
Parts used in the Arduino Infra-Red Remote using Arduino Uno with Proteus Simulation:
- Arduino Uno
- IR Receiver Module (TSOP4838 compatible)
- Keyes Infrared Remote
- USB cable (for serial communication)
Introduction
This microcontroller project demonstrates how to capture and analyze raw infrared (IR) data from a Keyes IR remote using the NEC protocol. Built around an Arduino Uno, the project focuses on decoding IR signals and displaying detailed timing and protocol information via serial output.
It is especially useful for learners exploring Proteus simulation, embedded systems, and practical electronics related to remote control decoding.
The project helps understand how consumer IR remotes communicate at the signal level.
It is a solid foundation for building IR-based control systems.
This setup is fully suitable for simulation and real hardware testing.
This Arduino IR Proteus Simulation helps beginners understand infrared signal decoding, NEC protocol timing, and embedded systems behavior using virtual hardware.
How the Project Works (Overview)
An IR receiver module connected to the Arduino captures infrared pulses transmitted by a Keyes remote.
The IRremote library decodes these pulses and identifies the protocol type (such as NEC).
Once a button is pressed on the remote, the Arduino processes the signal and outputs:
-
Encoding type
-
Hexadecimal command value
-
Bit length
-
Raw timing data
All decoded information is sent to the serial monitor for analysis.
Block Diagram / Workflow Explanation
-
IR Remote (Keyes) transmits an NEC-encoded infrared signal
-
IR Receiver (TSOP4838) captures the IR pulses
-
Arduino Uno decodes the signal using the IRremote library
-
Serial Monitor displays protocol type, code value, and raw timing data
This workflow helps visualize the complete IR communication chain from transmitter to decoded data.
Key Features
-
Captures raw IR timing data accurately
-
Supports NEC and multiple other IR protocols
-
Displays protocol name, hex code, and bit length
-
Outputs RAW pulse timing for signal analysis
-
Ideal for both Proteus simulation and hardware testing
-
Uses standard Arduino libraries and serial debugging
Components Used
-
Arduino Uno
-
IR Receiver Module (TSOP4838 compatible)
-
Keyes Infrared Remote
-
USB cable (for serial communication)
Applications
-
IR-based home automation systems
-
Reverse-engineering remote controls
-
Universal remote development
-
Learning IR communication protocols
-
Embedded systems education and labs
Explanation of the Code (High-Level)
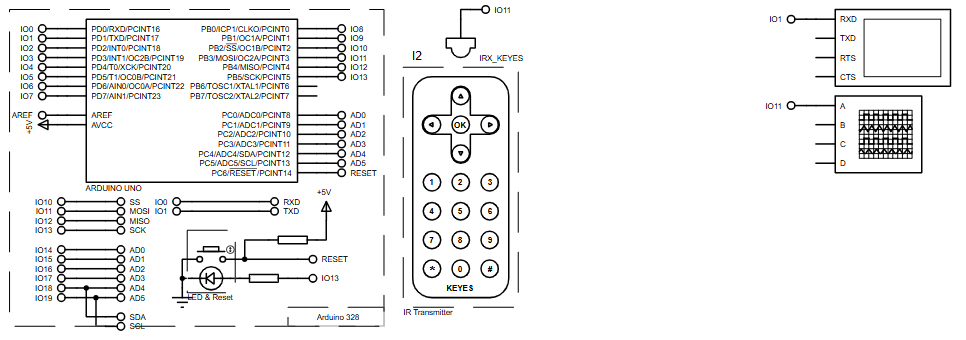
The code initializes the IRremote library and assigns pin D11 as the IR receiver input.
When a signal is detected:
-
The decoding type (NEC, SONY, RC5, etc.) is identified
-
The hexadecimal value and bit count are printed
-
Raw timing values are displayed in microseconds
-
Source-ready raw arrays are generated for reuse
This modular structure makes the firmware easy to extend or modify.
Source Code
Download
// Display IR code
//
void  ircode (decode_results *results)
{
  // Panasonic has an Address
  if (results->decode_type == PANASONIC) {
    Serial.print(results->address, HEX);
    Serial.print(":");
  }

  // Print Code
  Serial.print(results->value, HEX);
}Proteus Simulation
In Proteus, the Arduino Uno is connected to an IR receiver module at pin D11.
When IR signals are injected (or simulated), decoded data appears on the virtual serial terminal.
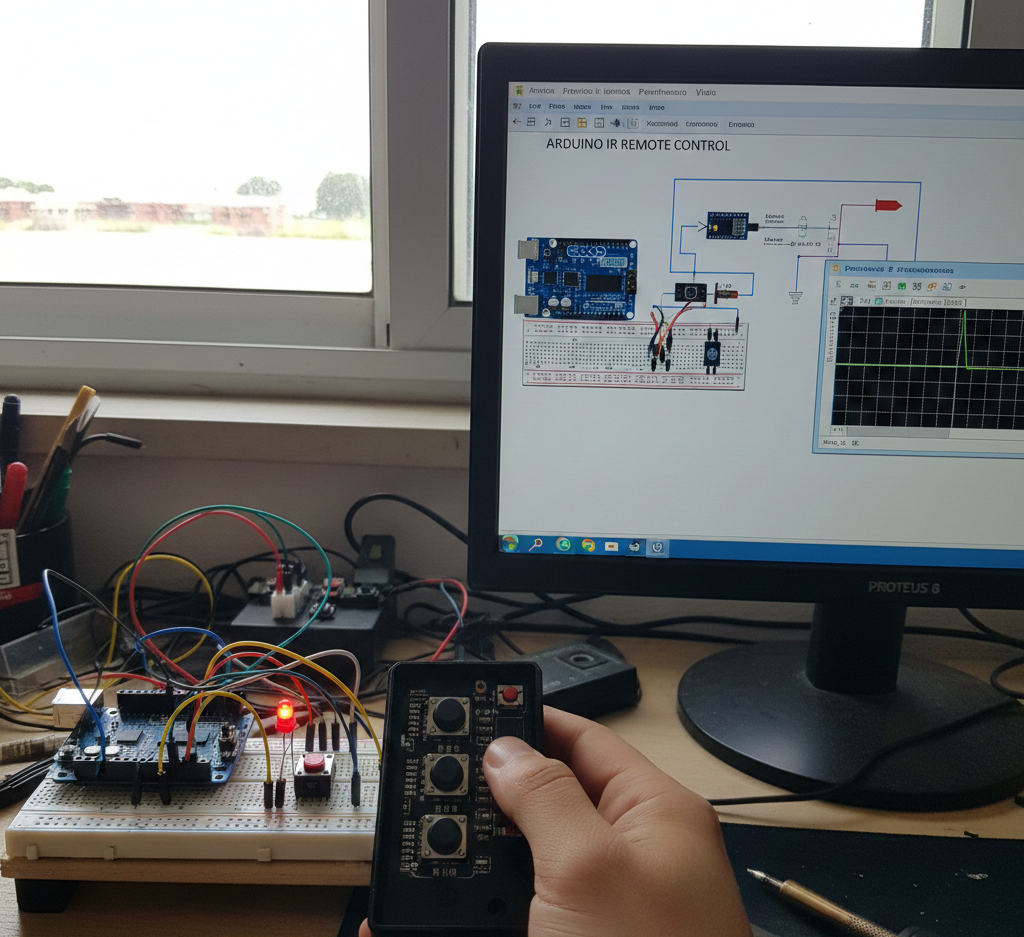
This allows testing protocol decoding without physical hardware, making it ideal for VSM-based learning.The Arduino IR Proteus Simulation accurately displays decoded IR data on the virtual serial terminal when a Keyes remote button is pressed.
FAQs
[ultimate-faqs Include_category=”arduino-infra-red-remote”]Conclusion
This Arduino Infra-Red remote project is a practical way to learn IR communication, NEC protocol decoding, and Proteus simulation using embedded systems.
It provides clear insight into how remote controls work at the signal level and builds a strong foundation for more advanced IR-based projects.
A valuable learning exercise for anyone working with DIY electronics and microcontroller projects.
Complete File
Arduino Infra-Red Remote using Arduino Uno with Proteus Simulation
- How does the project capture IR signals?
An IR receiver module (TSOP4838) connected to Arduino pin D11 captures the infrared pulses. - Can the project decode NEC protocol?
Yes, the IRremote library decodes NEC and multiple other IR protocols and identifies the protocol type. - What information is printed to the serial monitor?
The serial monitor displays protocol name, hexadecimal command value, bit length, and raw pulse timing data. - Does the project support Proteus simulation?
Yes, Proteus VSM can simulate IR signal injection and show decoded data on the virtual serial terminal. - What pin is used for the IR receiver on the Arduino?
Pin D11 is assigned as the IR receiver input in the project. - Can the raw timing data be reused?
Yes, the project outputs source-ready raw arrays that can be reused for analysis. - What is the project useful for?
It is useful for learning IR decoding, reverse-engineering remotes, universal remote development, and embedded systems education. - Does the code handle protocol-specific fields like addresses?
Yes, for protocols such as Panasonic the code prints the address before the code value.
