
This Instructables will teach you how to make the alternative controller to play my short game, Grogu Eats, on itch.io!
This Instructables will be very basic up until the soldering. If you want to make this project, I recommend looking at soldering tutorials when you get to that step.
Supplies
- Baby Yoda plush. I used this one, but you can use any you want!
- Flex sensor
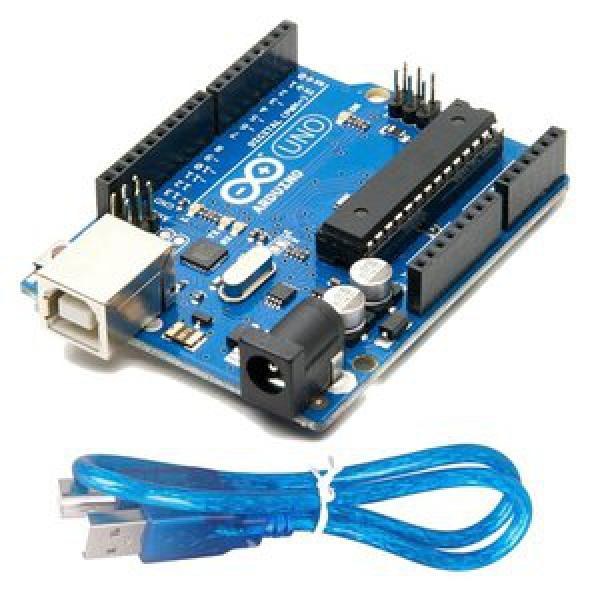
- Arduino Uno
- Soldering iron
- Helping hands
- Stranded wire
- 47K oHm resistor
- Install Unity. I’m using 2019.4.3.1f
- Install the Arduino IDE
Step 1: Get Ready to Wire!
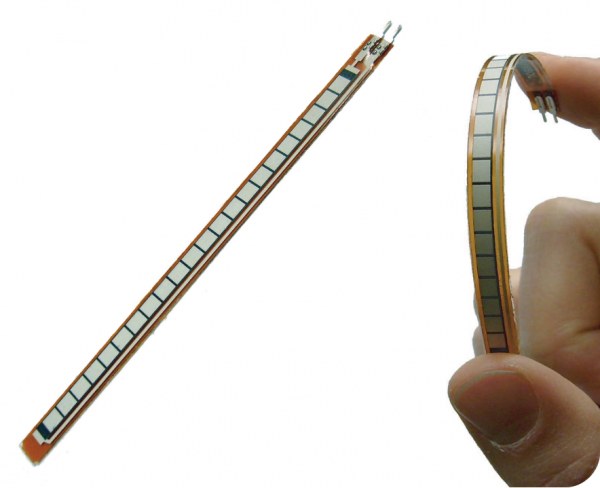
For this first step, you’ll need your flex sensor, resistor, and stranded wire. I will break down this Sparkfun tutorial into the parts I used for this project.
Keep in mind that flex sensors are designed to bend in only one direction. Before you start, follow the picture above to make sure you’re using yours in the right direction too! (picture found on Sparkfun)
Step 2: Wire the Flex Sensor to Your Arduino
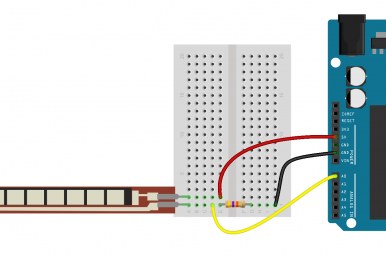
If you’re new to wiring, you may want to use a breadboard first to make sure your circuit is correct. Breadboards let you plug your components in place and make connections.
To start, make sure the flex sensor link (the side with all the horizontal lines) is facing you. You’ll want to use a red stranded wire to connect the leg on the right side to 5V (+) on your Arduino.
Then, you’ll want to connect the left leg of the flex sensor to one of the analog pins on your Arduino. After you’ve done that, you’ll want to connect the same leg to GND (-) on your Arduino using a resistor and a black stranded wire.
When you’re done, your circuit should look something like one of these!
Step 3: Testing Your Sensor
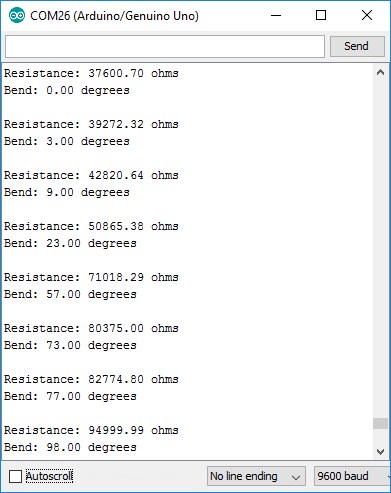
Next, plug your Arduino into your computer via a USB port and open the Arduino IDE. Once you have that open, go to the Sparkfun tutorial I mentioned earlier. Scroll towards the bottom of the page and copy the example code into your editor.
Upload this code and open the Serial Monitor (Tools -> Serial Monitor), play with your flex sensor, and watch the results! If you used the sample code from the tutorial, your results will look similar to the picture above.
Step 4: It’s Soldering Time!
After you’ve tested that your circuit works, you have the option to solder your circuit! This way, it can exist outside of the breadboard and will help when you want to put your circuit into your plushie. Here’s a quick timelapse video of me soldering my circuit.
If you’re new to soldering, I suggest looking at this super informative tutorial by Adafruit. Here is the instructional video from their page:
Step 5: Installing Your Circuit

Now you get to put your circuit into your baby yoda Grogu plushie! For testing purposes, I simply taped my flex sensor to Grogu’s armpit. This is a great temporary solution, but the tape quickly comes undone.
To install the flex sensor, sew two pockets: one on Grogu’s arm (or inside the sleeve of his robe) and the other on his side where his ribs would be (again, you can also sew the pocket into his robe).
Then, you’ll simply put one end of your flex sensor into each pocket. Make sure you install it the proper way so you don’t damage it when you’re playing with it! Go back to step 2 to double-check you’ve done it right.
Then, you’ll want to have the rest of the wires come through the back of his robes so you can easily plug them into the Arduino.
Step 6: Tell Your Arduino What to Do
This step might look intimidating but it doesn’t require any coding so bear with me!
- Download and install the Arduino IDE here
- Connect your Arduino to your computer
- Add the Uduino library to your Arduino libraries
- Then go to File -> Examples -> Uduino -> Uduino
- Upload this code to your Arduino
- Now close the Arduino IDE
If you get stuck on these steps, this is a helpful page.
Now your Arduino is ready to communicate with the Baby Eats game!
Step 7: Play!!

Finally, this is what your circuit should look like when it’s on your plushie. Remember, I’m only using tape here as a temporary solution. And please ignore the component I have on the table! I didn’t end up using it in the end.
Make sure you’re plugged into the following pins on your Arduino:
- flex sensor LEFT leg –> A0
- flex sensor LEFT leg –> ground
- flex sensor RIGHT leg –> 5V
Now go eat all those mama frog eggs!
Source: Baby Eats, Alternative Video Game Controller