
Summary of Telegram Bot Library
This article demonstrates hosting a Telegram bot on an Arduino MKR1000 to control IoT devices like LEDs. It guides users through installing the TelegramBot, ArduinoJson, and WiFi101 libraries, creating a bot via @BotFather, and writing code to toggle an LED based on "On" or "Off" messages sent to the bot. The project enables real-time interaction with hardware using the Telegram messaging app over Wi-Fi.
Parts used in the Host a Telegram Bot on your Arduino:
- Arduino MKR1000
- WiFi shield 101 (for Arduino Zero)
- LED
- Telegram Bot Library
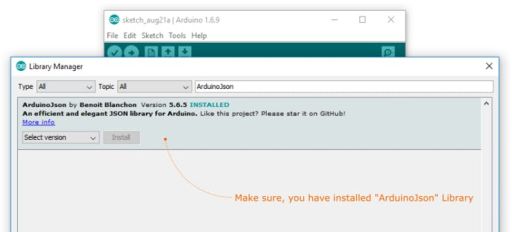
- ArduinoJson Library
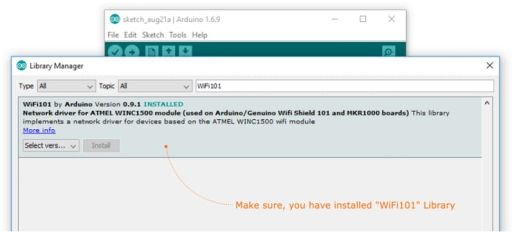
- WiFi101 Library
- Arduino Web Editor
- @BotFather account
Host a Telegram Bot on your Arduino and chat with your brand new IoT device!
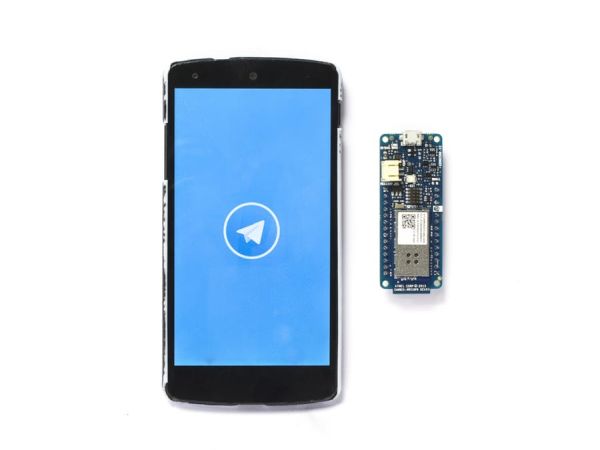
Things used in this project
Hardware components |
||||||
 |
|
× | 1 | |||
Software apps and online services |
||||||
 |
|
|||||
Story
Learn how to use the Telegram Bot library, host a Telegram Bot on your Arduino/Genuino Board, and use the messaging app to interact with your device.
It currently works on Arduino MKR1000, and Arduino Zero with the WiFi shield 101. You can view the last released Telegram API documentation here.
Installing
Step 1 (TelegramBot Library)
Download TelegramBot Library (Download).
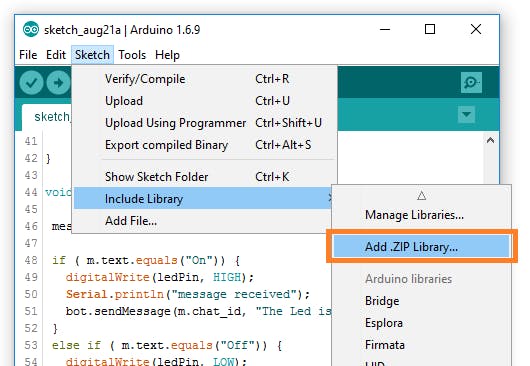
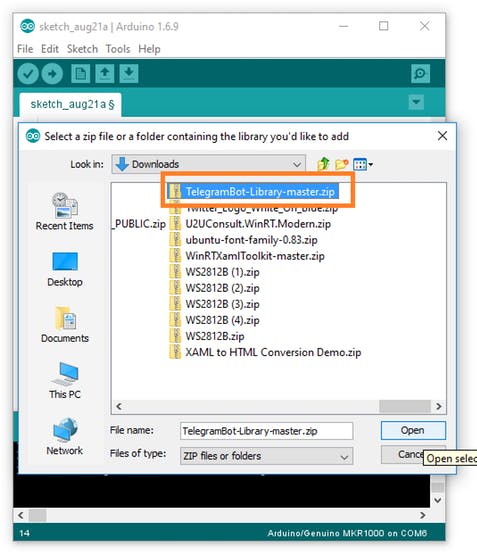
To install library, open Arduino, goto menu: Sketch / Include Library / Add .ZIP Library… and select your downloaded .ZIP file.
 Install TelegramBot Library
 Install TelegramBot Library
You can include a new .ZIP library into the Arduino IDE by selecting the menu: Sketch / include Library / Add .Zip library.
Step 2 (ArduinoJson & WiFi101 Library)
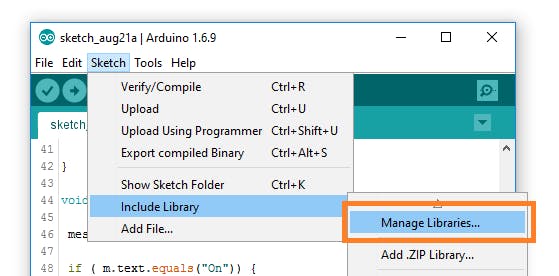
Install ArduinoJson & WiFi101 Library from Library Manager.
Getting started
Step 1 (Create a new TelegramBot )
Be sure you have installed Telegram on your phone or your laptop, then, in the search bar, look for @botfather.
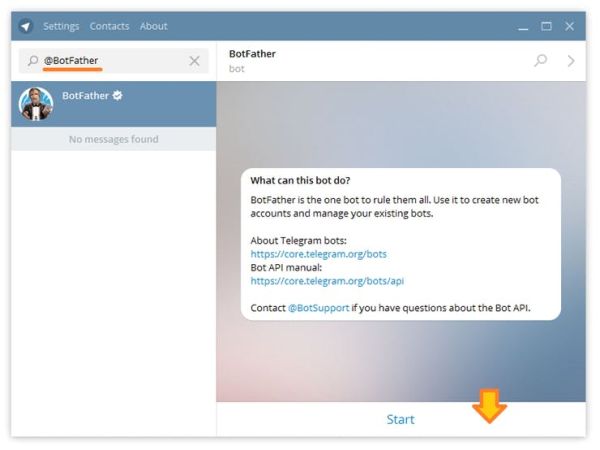 Step 1: Look for @BotFather
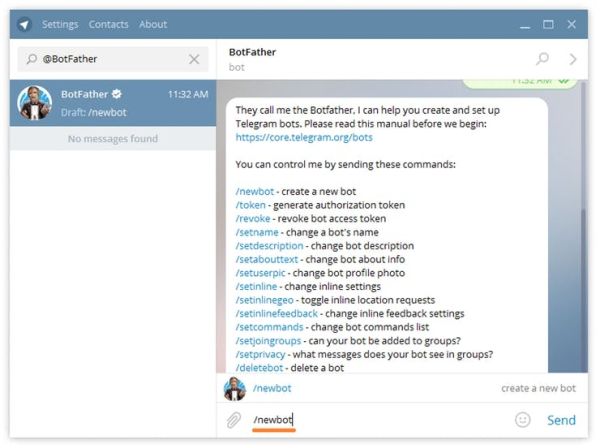 Step 2: Type “/newbot” to create new Telegram Bot
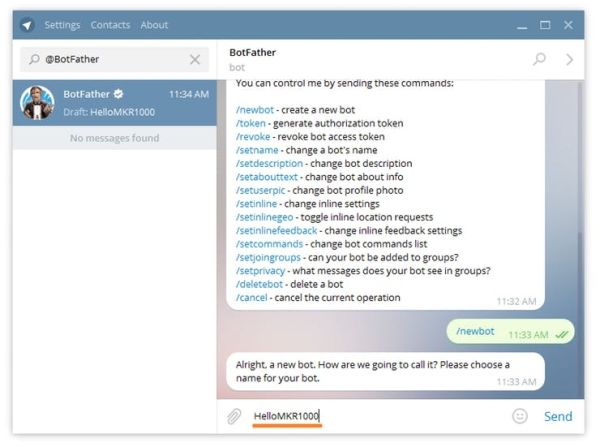 Step 3: Type your bot’s name
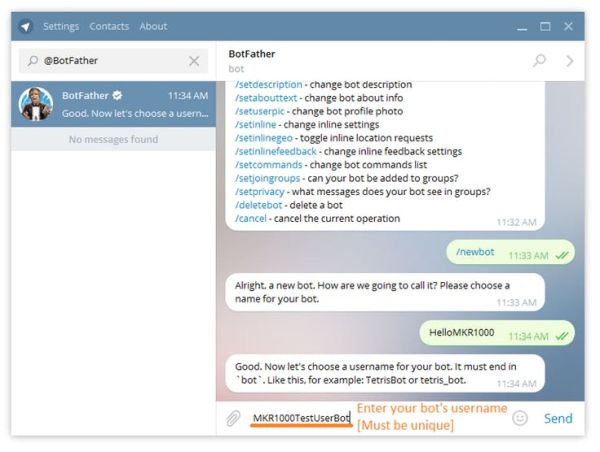 Step 4: type your Bot’s user name
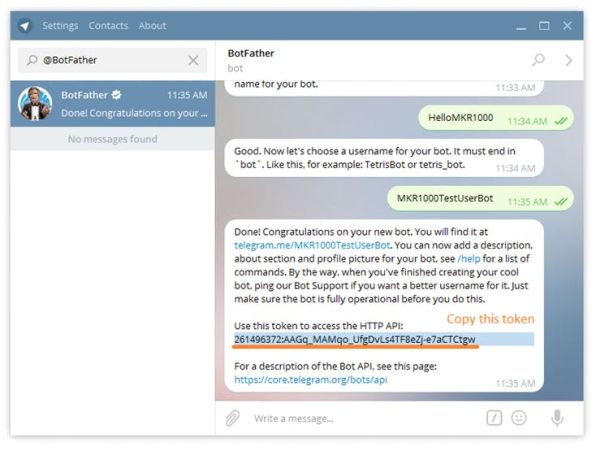 Step 4: Notedown BotName, BotUserName and Token
Talk to him and use the /newbot command to create a new bot. The BotFather will ask you for a name and username, then generate an authorization token for your new bot.
The Name of your bot will be displayed in contact details and elsewhere.
The Username is a short name, to be used in mentions and telegram.me links. Your bot’s username must end in ‘bot’, e.g. ‘tetris_bot’ or ‘TetrisBot’.
Hello World
Now that we have our new bot we can set it to do what we want.
In this example we will make it turn on and off a LED by texting him a simple ‘On or Off’ message.
#include <WiFi101.h>
#include <SPI.h>
#include <TelegramBot.h>

// Initialize Wifi connection to the router
char ssid[] = "xxxx";             // your network SSID (name)
char pass[] = "yyyy";            // your network key
// Initialize Telegram BOT
const char* BotToken = "xxxx";    // your Bot Teken
WiFiSSLClient client;
TelegramBot bot(BotToken,client);
const int ledPin = 6;  // the number of the LED pin
void setup()
{
 Serial.begin(115200);
 while (!Serial) {}  //Start running when the serial is open
 delay(3000);
 // attempt to connect to Wifi network:
 Serial.print("Connecting Wifi: ");
 Serial.println(ssid);
 while (WiFi.begin(ssid, pass) != WL_CONNECTED)
       {
   Serial.print(".");
   delay(500);
 }
 Serial.println("");
 Serial.println("WiFi connected");
 bot.begin();
 pinMode(ledPin, OUTPUT);
}
void loop()
{
 message m = bot.getUpdates(); // Read new messages
 if (m.text.equals("On"))
       {
   digitalWrite(ledPin, HIGH);
   Serial.println("message received");
   bot.sendMessage(m.chat_id, "The Led is now ON");
 }
 else if (m.text.equals("Off"))
       {
   digitalWrite(ledPin, LOW);
   Serial.println("message received");
   bot.sendMessage(m.chat_id, "The Led is now OFF");
 }
}
Let’s see in action
Notes about the groups
When the bot is included in a group it will be, by default, in privacy mode. Which means that it will receive only messages starting with “/”, the so called commands. In order to disable the privacy mode you have to chat with BotFather and go through this flow:
/mybots
@yourBot
Bot setting
Group privacy
Turn off
You can also create your own list of commands using /setcommands while chatting with the BotFather. This list will appear only in the mobile view, pressing the “/” icon.
Code
Source : Telegram Bot Library
- Which boards support this Telegram Bot project?
The project currently works on the Arduino MKR1000 and the Arduino Zero when paired with the WiFi shield 101. - How do I create a new Telegram bot for this project?
You must search for @BotFather in Telegram, type the /newbot command, provide a name and username ending in bot, and save the generated token. - What libraries are required to install for this project?
You need to install the TelegramBot library as a ZIP file, plus the ArduinoJson and WiFi101 libraries from the Arduino Library Manager. - Can the bot respond to group messages by default?
No, bots in groups are in privacy mode by default and only receive commands starting with a forward slash unless you disable group privacy via BotFather. - How can I turn off the privacy mode for my bot in a group?
Chat with BotFather, select mybots, choose your bot, go to Bot setting, then Group privacy, and select Turn off. - What is the example function of the provided code?
The example code turns an LED on or off based on receiving text messages saying On or Off from the user. - How do I define custom commands for my bot?
You can create a list of commands by chatting with BotFather and using the setcommands feature, which appears in the mobile view under the icon. - What connection method does the code use to communicate with Telegram?
The code uses the WiFiSSLClient class to establish a secure connection for sending and receiving messages.
