
Summary of Simple Android Bluetooth Application with Arduino Example
This article guides users in creating a basic Bluetooth Android app with Arduino to toggle an LED. Using Android Studio, the project involves setting up a new "Empty Activity" named "Simple Bluetooth" and designing a GUI with a vertical LinearLayout containing a checkbox labeled "Toggle LED." The app connects via an HC-06 module to control hardware without requiring prior Android development experience.
Parts used in Simple Bluetooth:
- Android Studio IDE
- Android SDK
- Android phone
- Arduino microcontroller
- HC-06 bluetooth module
- LED
- Java programming basics
This article will detail how to make a simple bluetooth application using Android Studio and demo it using an Arduino to toggle an LED and send data back-and-forth. No prior knowledge of Android development is needed, however it will help to know some basics of Java programming. I will be using an Android phone for testing purposes and not an Android virtual device. The Android app that you develop can be used with any other microcontroller, I only used the Arduino in this example with the HC-06 bluetooth module since they are both cheap and popular. I’m going to be creating other posts with different microcontrollers that use this same phone app. Some of the funtionality that I will be using was taken from the offical bluetooth SDK doc. I also derived some ideas from this blog post.
Android Development
Install and Setup
If you haven’t already, download and install the Android IDE and SDK.
- Create a new project by navigating to “File->New Project”
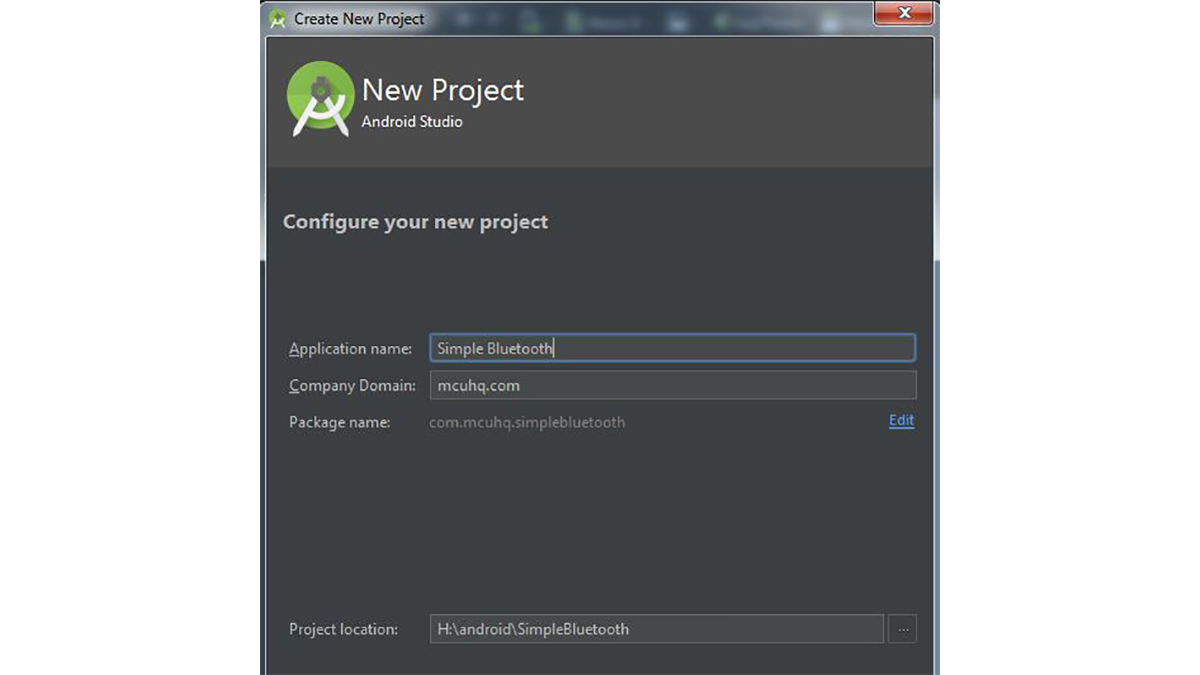
- I named my project “Simple Bluetooth” and my company domain as “mcuhq.com”.
- The minimum API version was auto-selected to be at 15 for me at the time of writting which covers 97.3% of all devices on the market (pretty good coverage I’d say). Leave all of the other checkboxs blank since we won’t be needing them.
- Select the “Empty Activity”
- Keep the Activity Name default as
MainActivity. - Your project will now be created. It should look something like this:
GUI layout
I will be making the GUI layout first since it is easier to grasp what we are trying to do via the visual elements. The GUI builder has similarities such as anchors and layout managers similar to Java Swing. We will be using the LinearLayout (Vertical) to make our application. Without a layout manager, your GUI components would arrange themselves differently depending on the screen size of the device. The default layout choice is the RelativeLayout and works by aligning all of the components in relation to the first component placed on the screen (or as dictated by you). You can see this effect by opening activity_main.xml found in your app/res/layout folder structure and dragging a text component onto the screen. Notice how a green line indicates its anchor relationship.
Moving the default Hello World! text will now move the text that you just placed. Making an app using this RelativeLayout is straightforward and easy, but often causes headaches with larger or smaller screens than the one you are developing on.
Drag the LinearLayout (Vertical) from the Palette to the component tree. Then drag a checkbox from the Palette to your main activity screen and double-click on it to call it “Toggle LED”. Align it in the middle of the screen. This checkbox will be used to turn ON and OFF an LED on the Arduino. Your Component screen should now look like
Read More: Simple Android Bluetooth Application with Arduino Example
- What is required before starting this project?
No prior knowledge of Android development is needed, but knowing some basics of Java programming helps. - Can I use an Android virtual device for testing?
The author uses an Android phone for testing purposes rather than an Android virtual device. - Is the app limited to only Arduino?
No, the developed Android app can be used with any other microcontroller besides the Arduino. - Which bluetooth module was used in this example?
An HC-06 bluetooth module was used because it is cheap and popular alongside the Arduino. - How many devices does the selected API version cover?
The minimum API version 15 covers 97.3% of all devices on the market at the time of writing. - What layout manager is recommended for this app?
A LinearLayout (Vertical) is used to ensure components arrange consistently regardless of screen size. - What component is used to turn the LED on and off?
A checkbox labeled Toggle LED is dragged onto the main activity screen to control the hardware. - Where is the default Hello World text located initially?
The default Hello World! text is found in the activity_main.xml file within the app/res/layout folder.
