
Summary of Mystery Beeping Prank
This article details the creation of "The Mystery Beeping Prank," a hidden device that emits intermittent beeps to annoy unsuspecting people. The project involves embedding an Arduino-controlled circuit into a hollowed-out book using specific electronic components and wood blocks for housing. The author designed it as a subtle, creative prank among friends, relying on the annoyance of unpredictable frequencies.
Parts used in the Mystery Beeping Prank:
- Arduino micro
- 40 pin socket
- LM386 audio amp
- 220uF capacitor
- Speaker
- Prototype circuit board
- AA x 4 battery holders
- Book
- Rubber cement
- Wood blocks
The Mystery Beeping Prank is a device hidden in a hollowed out book that beeps intermittently at different frequencies. I made this because I am surrounded by a lot of incredibly creative people who have a penchant for pranking one another, and this seemed like the most subtly annoying thing that I could think of. In fact, I imagine this will be outright maddening for all those not in on the joke. Hopefully these people will have a good sense of humor about it, and not be too permanently scarred by the experience. It is all in good fun, after all.

Step 1: Go Get Stuff
You will need:
(x1) Arduino micro (Radioshack #276-258)
(x1) 40 pin socket (Radioshack #276-1996)
(x1) LM386 audio amp (Radioshack #276-1731)
(x1) 220uF capacitor (Radioshack #272-1029)
(x1) speaker (Radioshack #273-092)
(x1) Prototype circuit board (Radioshack #276-150)
(x2) AA x 4 battery holders (Radioshack #270-391)
(x1) Book
(x1) Rubber cement
(x2) 12″ x 9″ x 1/4″ wood blocks
Step 2: Socket
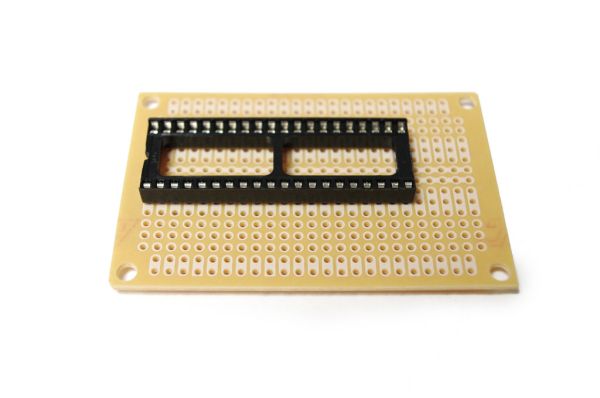
Solder the socket onto the circuit board.
Make sure to leave room for the LM386 chip.
Note: The schematic shown here applies to the next 7 steps.
Step 3: LM386
Solder the LM386 chip onto the circuit board next to the socket.
Step 4: Capacitor
Solder the positive lead of the capacitor to pine 5 on the LM386 chip.
Solder the negative lead to any free terminal.
Step 5: Wiring
Wire the Arduino micro’s ground pin to ground, and the VI (voltage in) pin to the 12V rail.
Solder pin 6 from the Arduino micro to pin 2 on the LM 386 chip.
Connect pins 3 and 4 on the LM386 to ground, and pin 6 to power.
Note: I made some of these connections with solder below the board.
Step 6: Battery Packs
Connect the battery packs in series on the circuit board.
Connect the single red wire to the 12v power rail, and the lone black wire to the ground rail.
Step 7: Speaker
Solder the red wire coming off of the speaker to the negative lead of the 220uF capacitor, and the black wire to ground.
Step 8: Program
Program the Arduino with the following code:
For more detail: Mystery Beeping Prank
- What is the purpose of this project?
The project creates a device hidden in a hollowed out book that beeps intermittently at different frequencies. - How do you power the circuit?
You connect two AA x 4 battery packs in series to provide power. - Which chip amplifies the audio signal?
The LM386 audio amp is used to amplify the sound. - Where should the speaker wire connect?
The red speaker wire connects to the negative lead of the 220uF capacitor, and the black wire connects to ground. - Can I use other components instead of Radioshack parts?
The article specifically lists Radioshack part numbers for each component required. - What code is needed for the Arduino?
The Arduino must be programmed with specific code provided in the full project details. - How is the device concealed?
The device is hidden inside a hollowed out book using rubber cement and wood blocks. - Why did the creator make this prank?
The creator made it because they are surrounded by creative people who enjoy pranking one another.
