
Summary of Soldering an SMT MOSFET Driver with a hotplate
This article explains how to easily solder Surface Mount Device (SMD) components at home using a hotplate instead of a traditional iron. It outlines a five-step process involving part preparation, PCB cleaning, applying solder paste, component placement, and reflow soldering on an aluminum plate for better heat management and cooling.
Parts used in the SMD MOSFET Driver Kit:
- PCB
- Solder paste
- SMD components
- Hotplate
- Isopropyl alcohol
- Flux
- Toothpick
- Tweezers
- Magnifying ring or head mounted magnifying goggles
- Aluminium plate
- Pliers
Soldering SMD components isn’t as hard as you might think. In fact it’s easy.
If you follow this instructables you’ll soon see just what great results you can obtain at home using just a hotplate.
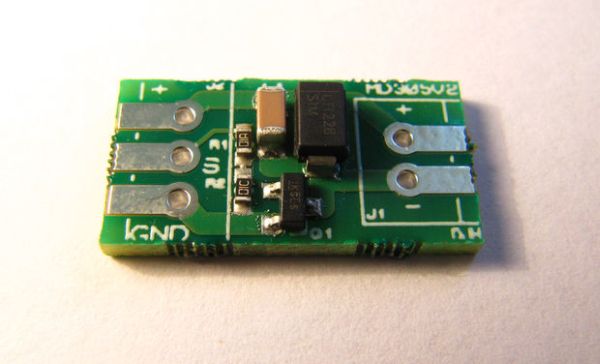
It’s not just being able to make small circuit boards that makes SMT soldering so good it’s also a nicer way to solder. All the ‘hard’ work is in placing the components. You then only need to reflow the solder for about 5-7 minutes and your done.
No more long soldering sessions spent hunched over a hot soldering iron breathing in all those fumes.
All you need is the PCB, some solder paste, the SMD components and a hotplate.
If you’d like a kit that includes the PCB, components and solder paste then follow this link
SMD MOSFET Driver Kit
More information is available at
www.CarbonFrog.com
Step 1: Gather all the parts
Gather and identify all the parts, remove packaging and lay out ready to be placed on the board.
Make sure you know which resistor is which, they are each marked as shown.
Also ensure that the diode will go in the correct way round. The cathode, the end you want connected to the positive rail, is marked with a line.
Step 2: Prepare the PCB
Clean the boards’ pads, preferably with isopropyl and put some flux on each of the pads. Also make sure the legs of the components are clean.
Step 3: Apply Solder Paste
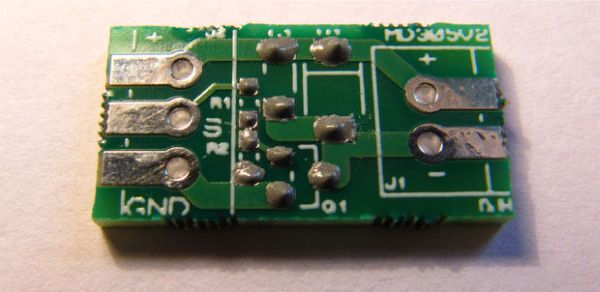
Using a tooth pick put a dot of solder paste on each pad. Don’t use too much and avoid splats and bridges. Less is more with solder paste.
Step 4: Place Components
Carefully position each component (starting with the smallest) using a pair of tweezers. At this point a magnifying ring or head mounted magnifying goggles can really help.
WARNING! Make sure the diode is the correct way round and that the two resistors are in their correct positions.
Step 5: Setup Hotplate
Place the board on a hot plate and prepare for soldering. It is also a good idea to place the board on an aluminium plate if you have one. This not only makes it easier to move around, but also at the end of the reflow process you can pick up the plate with a pair of pliers and put it elsewhere to cool. Doing this will allow it to cool quicker and avoid over heating caused by thermal inertia.
For more detail: Soldering an SMT MOSFET Driver with a hotplate
- What is the main advantage of using a hotplate for SMT soldering?
A hotplate avoids long sessions hunched over a soldering iron and reduces breathing in fumes. - How long does the reflow process take?
The reflow time is approximately 5-7 minutes. - What should be used to clean the PCB pads?
Isopropyl alcohol is recommended to clean the boards' pads. - Which tool is suggested for applying solder paste?
A toothpick should be used to put a dot of solder paste on each pad. - Why is an aluminium plate useful during the setup?
An aluminium plate makes it easier to move the board and allows it to cool quicker by avoiding thermal inertia. - How can you ensure the diode is placed correctly?
The cathode, marked with a line, must be connected to the positive rail. - What aids are helpful for placing small components?
A magnifying ring or head mounted magnifying goggles can really help position components. - What is the best way to handle solder paste application?
Use less paste to avoid splats and bridges between pads. - Can I buy a kit that includes all necessary parts?
Yes, a kit including the PCB, components, and solder paste is available via the provided link. - Where can I find more details about this project?
More information is available at www.CarbonFrog.com.
