A web-controlled smiling snowball based on the Arduino MKR1000 controlled via WiFi using MQTT, Shitr.io and Node-red.
Things used in this project
Hardware components |
||||||
 |
|
× | 1 | |||
|
× | 6 | ||||
 |
|
× | 1 | |||
|
× | 1 | ||||
|
× | 1 | ||||
Software apps and online services |
||||||
 |
|
|||||
|
||||||
 |
|
|||||
Hand tools and fabrication machines |
||||||
|
||||||
|
||||||
Story
Introduction
This project started with the intention to be a proof of concept for some techniques that I wanted to learn. Since it is winter now and it started to snow, I came up with the idea to build it as a smiling snowball.
The main goal is to make the Smiling Snowball controllable via WiFi using a simple web-based user application. This application should be easy to create and to control.
The following hardware and software is used:
- As hardware for this project, it uses the Arduino MKR1000 because this is a fast development board including a stable WiFi support embedded on the board.
- For the communication via WiFi, the MQTT protocol is used. This protocol needs a broker in the network. Therefore, Shiftr.io is used. But this can also be an other MQTT broker.
- For the web application, Node-RED is used. This runs on top of Node.js. Node-red is a simple drag and drop tool for creating applications on top of Node.js. Node-RED also supports communication via MQTT. Node-RED also has the potential to create a dashboard and connect UI elements to functions.
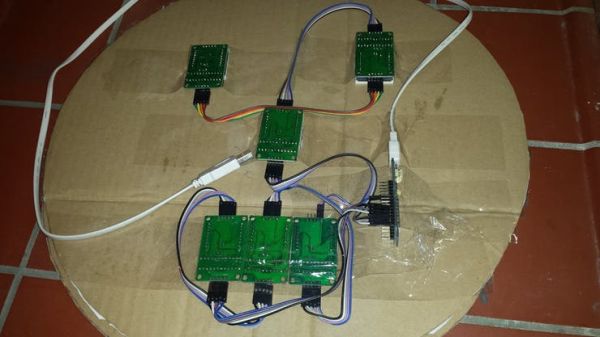
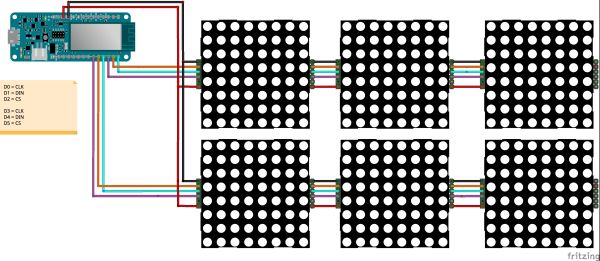
- For the display elements in the snowball, we connected six 8×8 LED matrix units and split them into groups of 3 for testing multiple control of devices.
Global project setup
The goal was to control the smiling snowball via WiFi using a simple web-based app that can be used from PC/tablet or mobile phone. The following diagram shows the different components of the project and the communication between them.
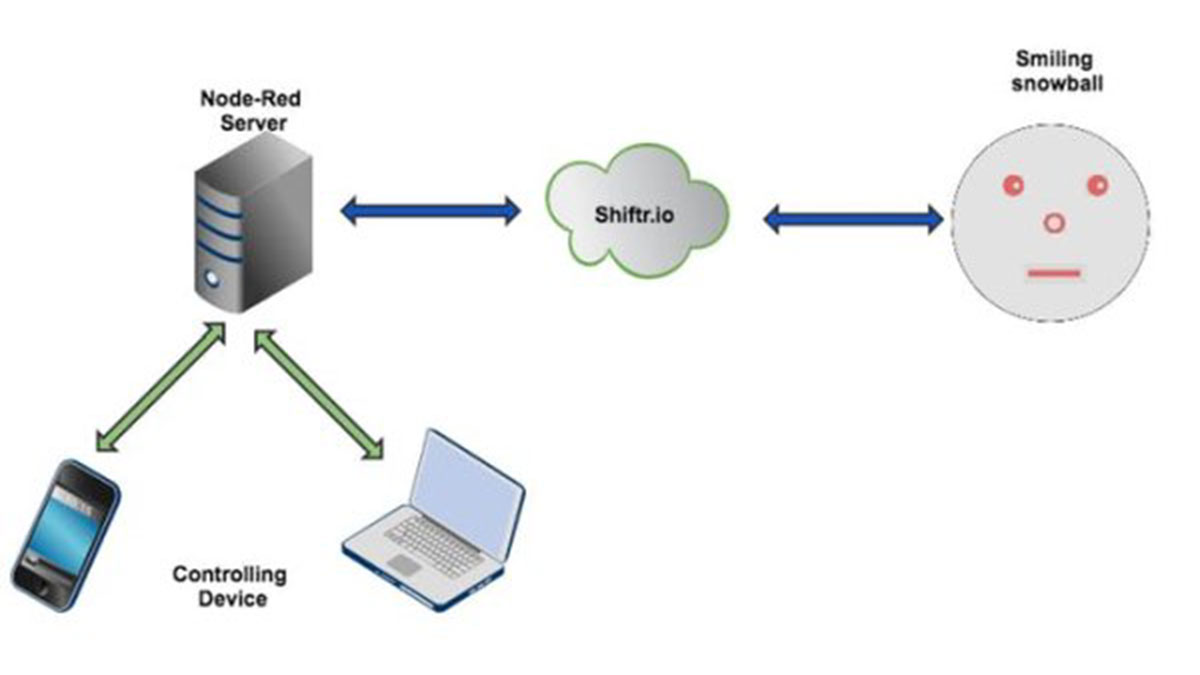
The blue arrows are the communication via MQTT. The green arrows are the web communication to the tablet and mobile phone. The physical communication is via Ethernet and WiFi.
Arduino MKR1000 Application
The Arduino MKR1000 is used for two functions. It handles the communication with the MQTT broker (Shiftr.io) using its WiFi connection and it controls the LED matrices.
This application uses the default 101WIFI library for creating the WiFi connection. To create a connection to your WiFi access point, you need to fill the correct information for your access point.
char ssid[] = "##############";     //  your network SSID (name)
char pass[] = "##############";      // your network password
For the MQTT PUB/SUB communication, the MQTTClient library is used. For this library, a connection to some MQTT broker is needed; also, the IP address and port should be filled in. Also a username and password is needed for the MQTT broker. See more details at the paragraph of the MQTT broker.
To receive commands in the Arduino MKR1000, the application should listen to the broker for messages on topics it has been subscribed to. If data is published for a topic, the application will call the message received function and process the message.
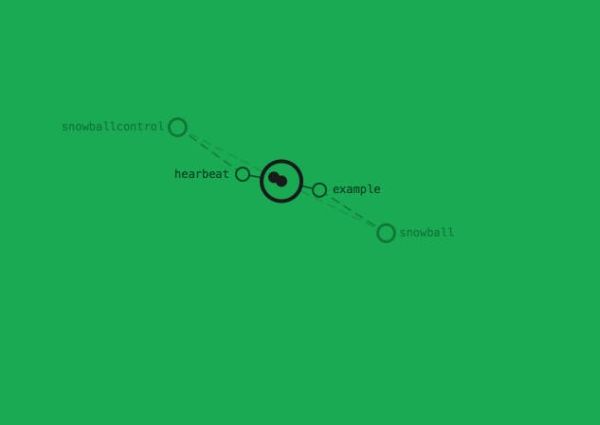
To see if the applications are up and running, a heartbeat message sent between the Node-RED and the Arduino MKR1000 is included. On the Shiftr.io dashboard, it is easy to see the flow of the data. The moving black dots on the dashboard are the data.
The LED matrices connected to the Arduino MKR1000 are divided into two groups of 3; this is to prove the communication of two led sets. For controlling the matrices, a LED matrix lib is created (current available matrix libraries did not work correctly on the Arduino MKR1000). The library is stored on GitHub.
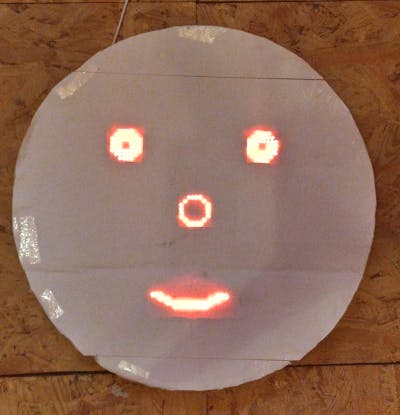
If the settings for the WiFi in MQTT broker are correctly filled in in the application, it can be built and uploaded to the Arduino MKR1000. After installing the software, a default face will become visible if everything is connected correctly.
This is how it looks if you have also made the snowball as described later in this story.
MQTT broker (Shiftr.io)
As an online MQTT broker, the Shiftr.io is used. This is a broker specific for prototyping. To start using it, you should signup to create your own account.
After that, you can go to your own dashboard and create a namespace. Within the namespace, you should create a token (config button after the namespace name). The token should be filled in the Arduino code and in the Node-RED configuration.
For the Arduino code, look for the line:
client.connect("snowball", "#######", "##################")
Node-RED
Node-RED should be installed on a PC/RasberryPi or other system in the network. If you use your own MQTT broker, it is possible to use the same system for it. How to install Node-RED is described here: http://nodered.org/docs/getting-started/installation.
If Node-RED is installed, you should add the node: node-red-dashboard – see here. This is needed to create a web based dashboard. After installing this, Node-RED can be started. Go to the Node-RED page. Mostly localhost:1880but see this on your terminal.
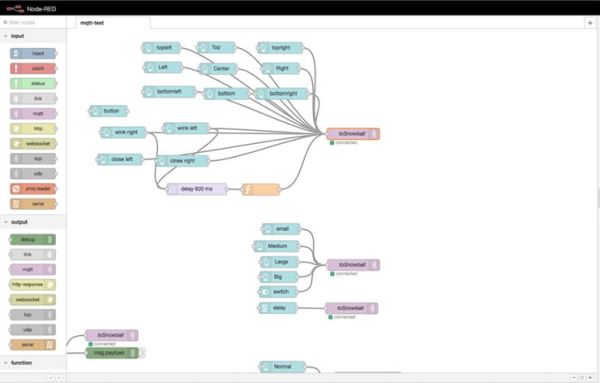
After starting Node-RED, you should load the Node-RED application in to the Node-RED environment. Do this by copying the Node-RED application on this page and inserting it in to your Node-RED environment. At the right top of the Node-RED screen, there is a config/settings icon. Click on this icon and then select import from clipboard, and import the application as new. After loading the Node-RED application, you should see the following:
The application is now loaded. To get it up and running, the application should be deployed. Before deploying the application, the MQTT settings should be set correctly, the link to the server and the token. To do that, search for a MQTT node.
Click on it and you see the following popup screen:
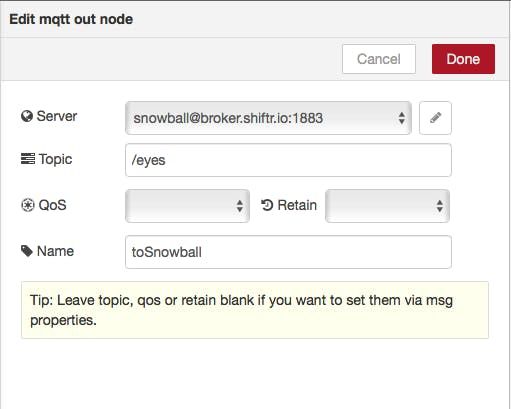
Click on the edit button after server and the edit screen for updating the server appears.
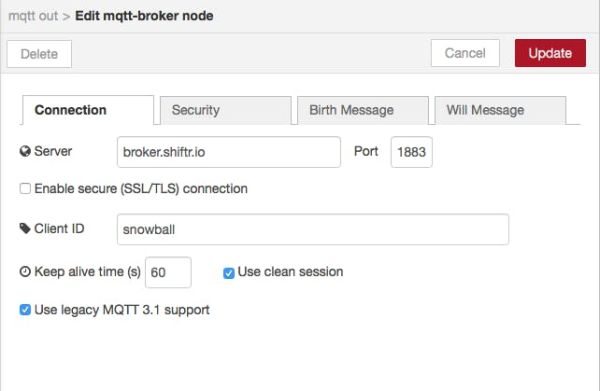
Fill in your server address. Select the tab Security and also fill in your token. Now the noded application can be deployed.
Open a new web browser window and go to the dashboard. The dashboard has the same address as the Node-RED application but with /UI(localhost:1880/ui/):
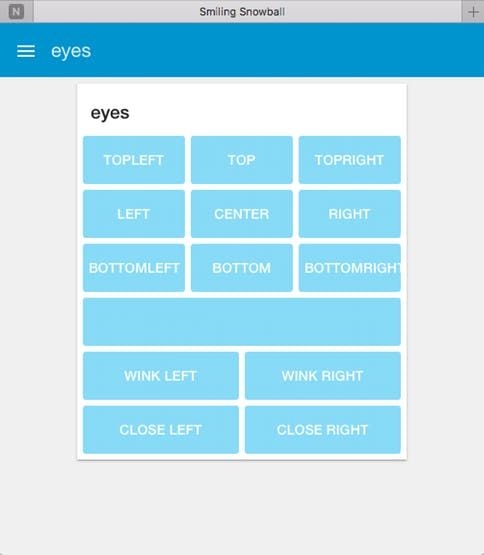
If all is configured correctly, you should be able to control the snowball remotely.
Making the Smiling Snowball
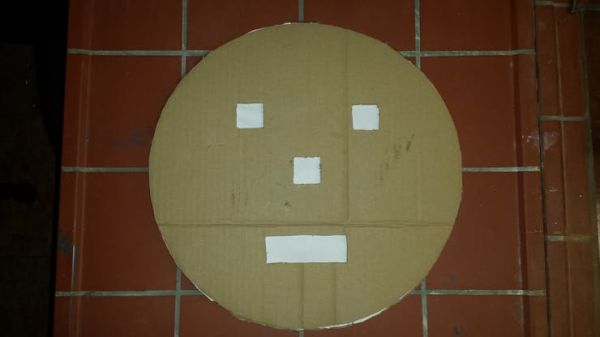
The last step is creating the snowball self. Start making the snowball out of cardboard. You need cardboard of 400 mm x 400 mm (15.7 inch x 15.7 inch). Cut out a circle with a diameter of 400 mm (15.7 inch). Draw the squares where the matrices should be placed as shown in the following drawing.
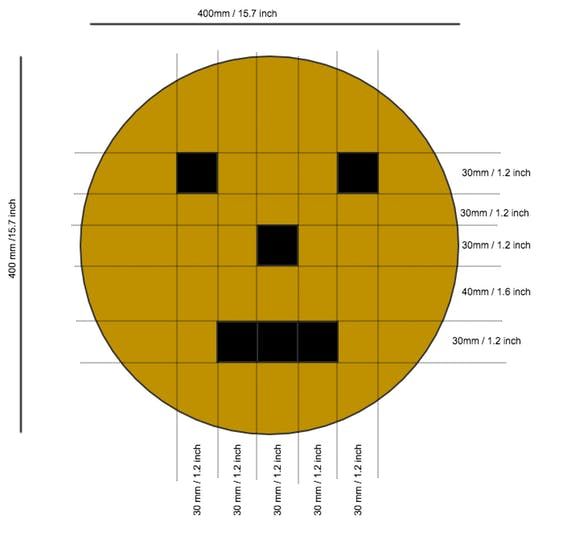
Cut out the places where the matrices should be placed, the black squares as shown in the drawing above.
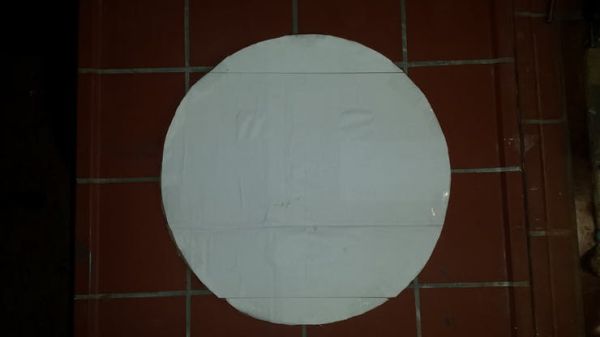
Paste over the front the white paper and make it look like a snow ball.
After checking the matrices and defining which is which matrices, you put the matrices in the face on the correct places. Paste the matrices with tape on the cardboard. The result should be as the image below.
Have fun with it.
Smiling snowball schematic
Code
Source : Smiling Snowball