An if statement allows you to choose between two discrete options, TRUE or FALSE. When there are more than two options, you can use multiple if statements, or you can use the switch statement. Switch allows you to choose between several discrete options. This tutorial shows you how to use it to switch between four desired states of a photo resistor: really dark, dim, medium, and bright.
This program first reads the photoresistor. Then it uses the map() function to map its output to one of four values: 0, 1, 2, or 3. Finally, it uses the switch() statement to print one of four messages back to the computer depending on which of the four values is returned.
Circuit
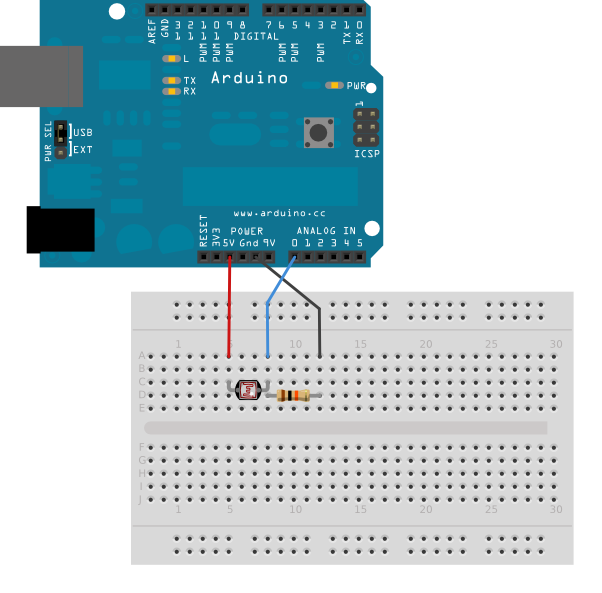
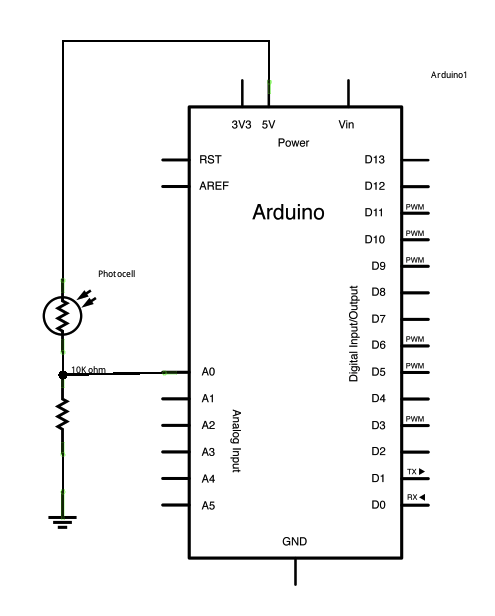
The photoresistor is connected to analog in pin 0 using a voltage divider circuit. A 10Kilohm resistor makes up the other side of the voltage divider, running from analog in 0 to ground. The analogRead() function returns a range of about 0 to 600 from this circuit in a reasonably lit indoor space.
image developed using Fritzing. For more circuit examples, see the Fritzing project page
Schematic:
Code
Switch statement
Demonstrates the use of a switch statement. The switch
statement allows you to choose from among a set of discrete values
of a variable. It’s like a series of if statements.
To see this sketch in action, but the board and sensor in a well-lit
room, open the serial monitor, and and move your hand gradually
down over the sensor.
[box color=”#985D00″ bg=”#FFF8CB” font=”verdana” fontsize=”14 ” radius=”20 ” border=”#985D12″ float=”right” head=”Major Components in Project” headbg=”#FFEB70″ headcolor=”#985D00″]
Hardware Required
- Arduino Board
- (1) photocell, or analog sensor
- (1) 10k ohm resistors
- breadboard
- hook-up wire
[/box]
For more detail: Arduino Switch Statement used with sensor input