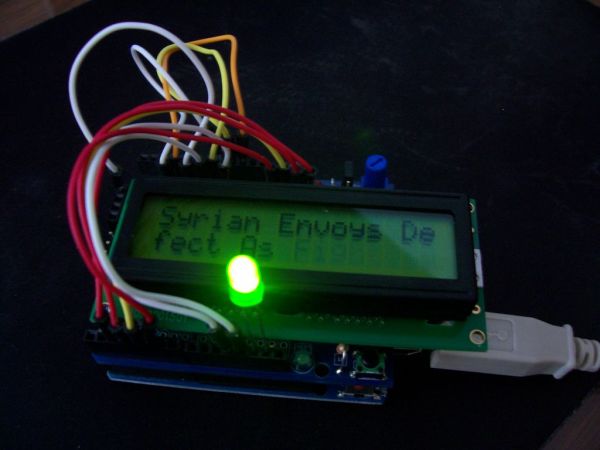
This Arduino project will display RSS feed headlines on an LCD via an Arduino and a USB cable. It works quite well, and lets you keep up with the world news while you’re sitting at your desk. Many of the values in the code can be changed, and the system can be adapted to display Twitter and other information as well. It uses Python to interface with the Arduino.
All of the code and instruction provided is done so with no guarantee of success. I’ve bugtested the code to the best of my ability, and it should work in most cases, but certain things can throw it off. Details of such are within.
Step 1: Required Pieces/Parts for the Project
The project requires very few parts, generally things that most people with Arduinos will have lying around somewhere:
(1) Arduino Uno board
(1) Breadboard (I used a MakerShield prototyping shield instead, but a breadboard works just as well, albeit less compact)
(1) LED, your choice of color
(>12) Breadboard cables
(1) 16×2 Character LCD display, compatible with the LiquidCrystal library (works with larger LCD’s with tweaking)
(1) Potentiometer, preferably 10K ohms.
(1) USB to USB-B cable (standard USB-to-Arduino cable)
Step 2: Wiring up the LCD and the LED
The LCD should be wired up as is shown in this picture (given it’s a 16×2 LCD that uses the HD44780 driver). Potentiometer controls the contrast. It should also be noted that most LCD’s use pins 15 and 16 on the LCD as the +5v and GND for the backlight.
Picture is from http://arduino.cc/en/Tutorial/LiquidCrystal. Make sure you test it using the “Hello World!” program described. The screen may need to have the contrast turned all the way up for it to display properly.
The LED just goes in digital pin 13 and the GND pin next to it. Make sure the polarity is correct (Longer leg should be the + leg, short legs goes to ground).
Step 3: Getting the Required Software and Libraries
2 pieces of software and 2 Libraries/Extensions are needed for this project to work. The first library is an Arduino Library called LiquidCrystal440. It is available here: http://code.google.com/p/liquidcrystal440/. It is an updated version of the LiquidCrystal library, and helps deal with some issues when it comes to addressing memory that isn’t currently visible on the screen.
Obviously to use the LiquidCrystal440 Library, you will need the first piece of software: The Arduino coding interface, which I assume all Arduino users have (if not, just check the Arduino.cc website)
The second piece of software you will need is Python. Python is an easy to learn programming language for the PC, Linux, or Mac. It is available for free here: http://www.python.org/.
The final thing you need is the extension that will let the Python computer program work with the Arduino itself, via the serial cable. The required extension is Pyserial, available here: http://pyserial.sourceforge.net/. Make sure you get the correct version of Pyserial to work with your version of Python (2.7 to 2.7, 3.1 to 3.1, etc).
Step 4: The Arduino Code
// This code is for the Arduino RSS feed project, by Fritter
// Read the comment lines to figure out how it works
int startstring = 0; // recognition of beginning of new string
int charcount = 0; // keeps track of total chars on screen
#include <LiquidCrystal.h> // import the LiquidCrystal Library
LiquidCrystal lcd(12, 11, 5, 4, 3, 2);
void setup() {
Serial.begin(9600); // opens serial port, sets data rate to 9600 bps
lcd.begin(16,2); // Initialize the LCD size 16×2. Change if using a larger LCD
lcd.setCursor(0,0); // Set cursor position to top left corner
pinMode(13, OUTPUT);
}
[box color=”#985D00″ bg=”#FFF8CB” font=”verdana” fontsize=”14 ” radius=”20 ” border=”#985D12″ float=”right” head=”Major Components in Project” headbg=”#FFEB70″ headcolor=”#985D00″](1) Arduino Uno board
(1) Breadboard (I used a MakerShield prototyping shield instead, but a breadboard works just as well, albeit less compact)
(1) LED, your choice of color
(>12) Breadboard cables
(1) 16×2 Character LCD display, compatible with the LiquidCrystal library (works with larger LCD’s with tweaking)
(1) Potentiometer, preferably 10K ohms.
(1) USB to USB-B cable (standard USB-to-Arduino cable)[/box]
For more detail: An Arduino RSS Feed Display


