Summary of Smart Home Control System With Touch Screen
This article details a DIY Smart Home Control system using an Arduino Uno and Nextion touch screen. The project enables door lock control, temperature monitoring, and real-time date/time tracking. It covers circuit assembly, component preparation, code uploading for both Arduino and Nextion, case modification, and final testing to create a functional home automation interface.
Parts used in the Smart Home Control:
- Arduino Uno
- Nextion Touch Screen
- LM35
- DS1307
- Servo Motor
- Buzzer
- Mini Breadboard
- Plastic Case Box
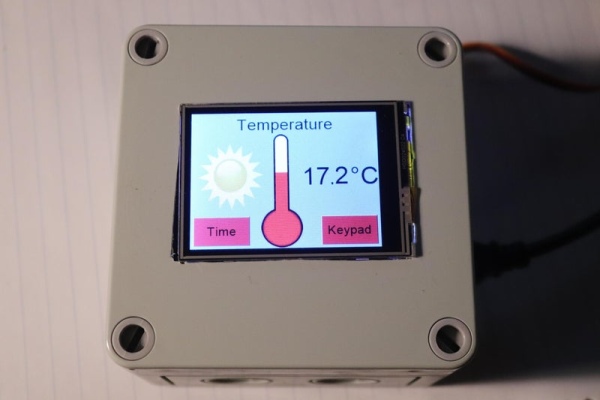
In this project, I have shown how to make a Smart Home Control with Arduino Uno and Nextion touch screen to control door lock system, temperature and daytime monitoring.
During the article, I have shown all the steps to make this smart home system.
This Home Automation system has the following features:
- Control Lock – Unlock door with Touch Screen Keypad
- Temperature measurement and monitoring
- Real Time date/day/hour monitoring
Supplies
- Arduino Uno
- Nextion Touch Screen
- LM35
- DS1307
- Servo Motor
- Buzzer
- Mini Breadboard
- Plastic Case Box
Step 1: Circuit Diagram of the Home Automation Project
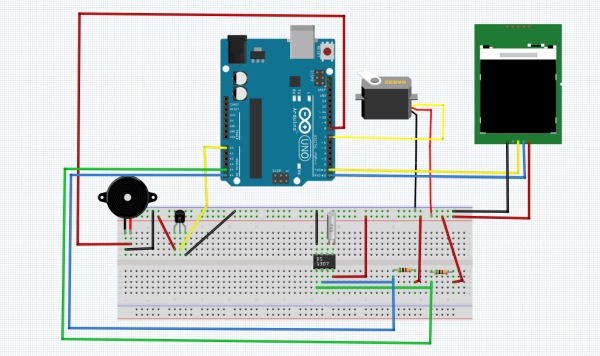
- A4 -> SDA
- A5 -> SCL
Step 2: Preparing the Components
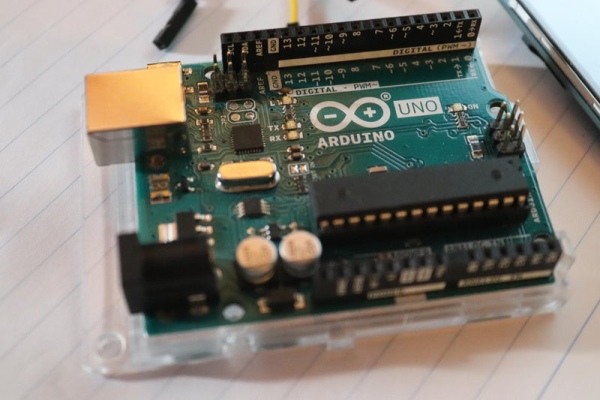
Connect wires to the Arduino
Carefully follow the wiring configuration table provided which shows the Arduino pin numbers and the associated pin numbers.
Step 3: Arduino Code
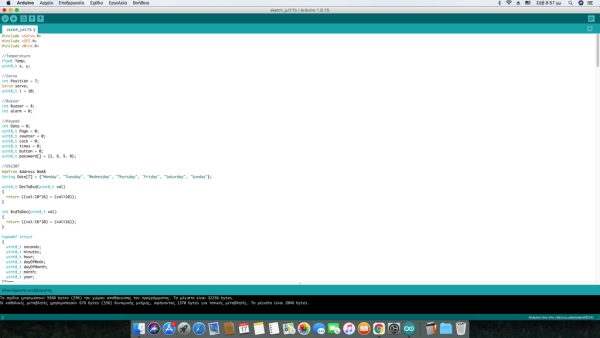
1. Upload and Test the code
Upload the code through the Arduino IDE
Step 4: Nextion Code
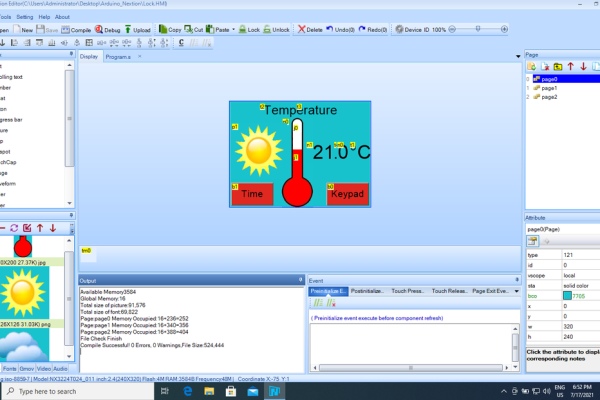
1. Upload and Test the code
Upload the code via Nextion Editor.
(To use Nextion code file, change the .ino to .HMI)
Step 5: Case Preparing
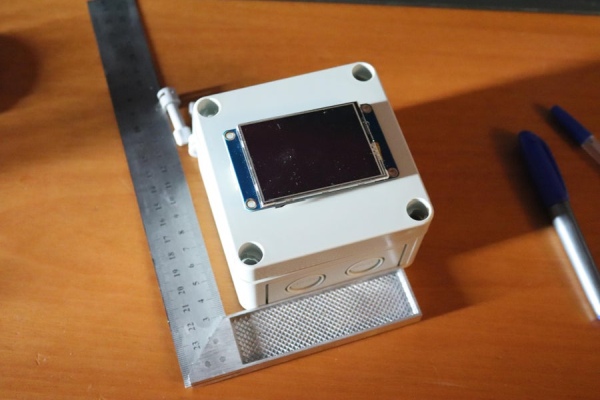
1. Cut the top of the case to fit the touch screen.
Use a pencil to mark out the dimensions of the screen and cut the plastic with a saw.
2. Cut and position the USB cables.
Open a hole for the cable with a drill.
Step 6: Run and Use Project
Source: Smart Home Control System With Touch Screen
- What features does this Home Automation system include?
The system includes controlling a lock with a touch screen keypad, temperature measurement and monitoring, and real-time date, day, and hour monitoring. - How do I connect the Nextion screen to the Arduino?
Connect pin A4 to SDA and pin A5 to SCL on the Arduino. - Can I use the Nextion code file directly in Arduino IDE?
No, you must change the .ino extension to .HMI before using the Nextion code file. - What is the best way to prepare the plastic case for the project?
Mark the screen dimensions with a pencil and cut the top of the case with a saw, then drill a hole for the USB cables. - Does the project require specific wiring configurations?
Yes, you must carefully follow the provided wiring configuration table showing Arduino pin numbers and associated pins. - How do I upload the code for the Arduino board?
Upload the code through the Arduino IDE after preparing the components and wires. - What tool is recommended for cutting the plastic case?
A saw is used to cut the plastic case after marking the dimensions with a pencil. - Does the system monitor time information?
Yes, it provides real-time monitoring of the date, day, and hour.