Will show several ways to show how to use an Arduino as a sensor using The Nexus 7 for a terminal and to do development. This can be very important for protecting your electronic equipment especially servers.
Note 1: All connections are to a standard Arduino board. This instructable is for users very familiar with the Arduino boards. If you are a novice, you may want to get additional help.
Note 2: With android 5.1, you may not be able to direct connect the devices, but using a router that has a dhcp server can be a temporary fix. Android 5.0x does not seem to support ethernet connections.
Wigh android 5.1.1and the latest version of the software, there is no way to fix the baud rate so uploads do not work.
Step 1: Working With the Nexus 7.
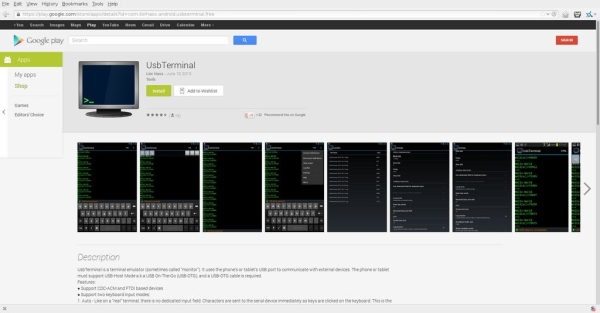
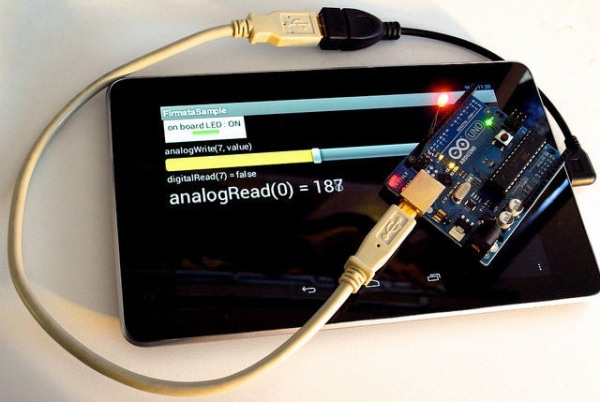
Want to hook your Nexus 7 directly to your arduino, then all you need is a OTG cable and a standard usb cable. Get the free (at this time) UsbTerminal app from the playstore and install it.You will want to set the Arduino serial port and the nexus 7 both the the same speed. We use 9600.
Have fun.
Code to test the connect from the Arduino to the Nexus 7.
<code>
void setup() {
// put your setup code here, to run once:
Serial.begin(9600);
}
void loop() {
// put your main code here, to run repeatedly:
Serial.println(“This is a test”);
delay(1000);
}
</code>
Step 2: Developing for the Arduino on the Nexus 7
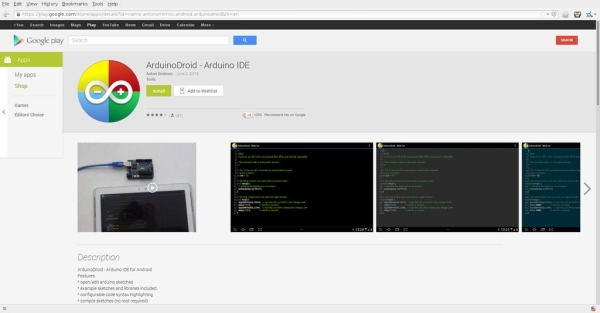
Assuming you have used the standard ide for the Arduino on a personal computer. There are enough tutorials that it should not be needed to be repeated. (arduino.cc). Arduinodroid is an ide for the Arduino that runs under Android. It seems to have the basic files built in. The software also worked with my Osepp Arduino board. It was the first application I saw in the playstore, but there may be more.
Step 3: Several Examples to Work With.
Some examples aka basic building blocks to play with. Some of frames are still under construction or to be completely revised..
1. EMF (Electomotive force) field reader
2. Capacitive reader
3. Temperature reading
4. Flood detection.
Step 4: Magnetic Field
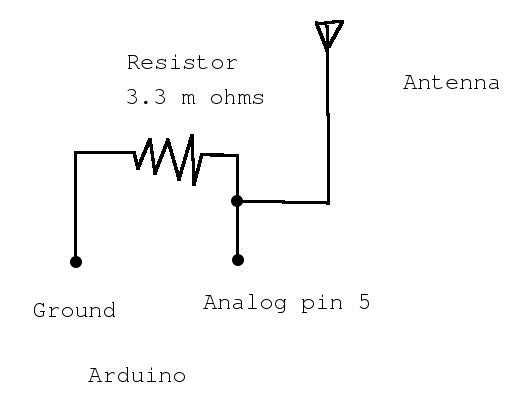
Test anything that might be emitting electromagnetic energy, Bug detector?
<code>
// EMF Detector for LED Bargraph v1.0
// 5.12.2009
// original code/project by Aaron ALAI – aaronalai1@gmail.com
#define NUMREADINGS 15 // raise this number to increase data smoothing
int senseLimit = 15; // raise this number to decrease sensitivity (up to 1023 max)
int probePin = 5; // analog 5
int val = 0; // reading from probePin
// variables for smoothing
int readings[NUMREADINGS]; // the readings from the analog input
int index = 0; // the index of the current reading
int total = 0; // the running total
int average = 0; // final average of the probe reading
void setup() {
Serial.begin(9600); // initiate serial connection for debugging/etc
for (int i = 0; i < NUMREADINGS; i++)
readings[i] = 0; // initialize all the readings to 0
}
void loop() {
val = analogRead(probePin); // take a reading from the probe
if(val >= 1){ // if the reading isn’t zero, proceed
val = constrain(val, 1, senseLimit); // turn any reading higher than the senseLimit value into the senseLimit value
val = map(val, 1, senseLimit, 1, 1023); // remap the constrained value within a 1 to 1023 range
total -= readings[index]; // subtract the last reading
readings[index] = val; // read from the sensor
total += readings[index]; // add the reading to the total
index = (index + 1); // advance to the next index
if (index >= NUMREADINGS) // if we’re at the end of the array…
index = 0; // …wrap around to the beginning
average = total / NUMREADINGS; // calculate the average
Serial.println(val); // use output to aid in calibrating
}
}
</code>
Step 5: Capacitive Sense.
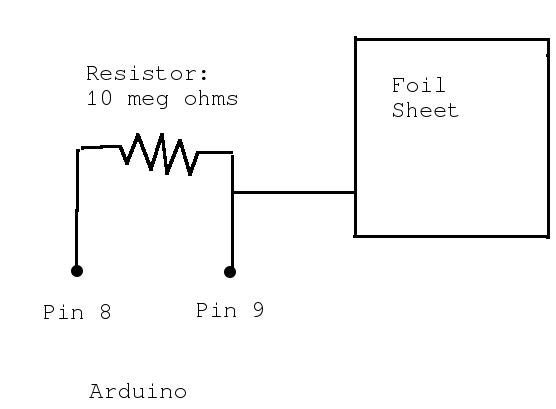
Touch sensor or field sensor. great for using on doors (around door knobs) or near something that should not be touched.
Read more: Nexus 7 and the Arduino.