Summary of Internet Radio Using an ESP32
Today’s Instructable shows how to build an Internet radio using an ESP32 and a 3.5" Nextion display, playing online MP3 streams via a VS1053 decoder, with audio isolation and amplification. The project stores favorite stations in ESP32 memory, uses simple buttons and a potentiometer for station switching and volume, and the Nextion GUI is loaded via SD card. An isolation transformer fixes noise, and the whole build can be completed quickly and cheaply.
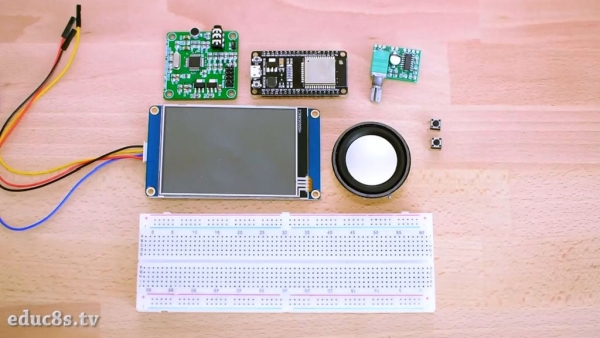
Parts used in the Internet Radio:
- ESP32
- MP3 decoder (VS1053 module)
- Isolation Transformer (Audio Transformer)
- PAM8403 Amplifier
- 3W speaker
- 3.5 inch Nextion Display
- Push Buttons
- Breadboard
- Wires
- Potentiometer
- SD card (for Nextion .tft upload)
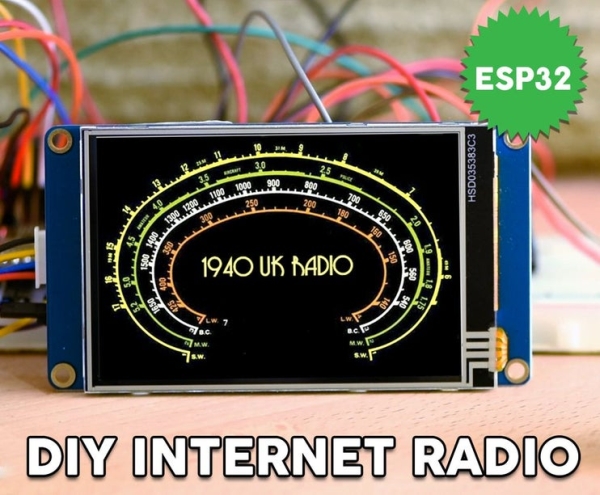
Dear friends welcome to another Instructable! Today we are going to build an Internet Radio device with a big 3.5” display using an inexpensive ESP32 board. Believe it or not, we can now build an Internet Radio in less than 10 minutes and with less than 30$. There is a lot to cover so, let’s get started!
A few months ago, I completed an Arduino FM Radio project which works great and looks even better in my opinion. If you want to see how I built this project you can read the Instructable here. The problem is that, although this radio looks cool it is not practical because I live in a small town in southern Greece and the big Greek radio stations I prefer to listen to, do not have transmitters around here. So, I listen to my favorite radios online on my laptop or tablet pc which is also not so practical. So, today I am going to build an Internet radio device in order to be able to listen to my favorite radio stations from all over the world!
You can observe that an initial iteration of the project is completed on a breadboard. Let’s turn it on. The project is designed to connect to the Internet and play music from preselected Radio Stations.
I am currently listening to Real FM radio station in Athens and we can switch stations using these buttons. I stored my preferred radio stations in the ESP32’s memory for convenient access. I am able to adjust the speaker’s volume using this potentiometer. I show the Radio Station’s Name on a large 3.5″ screen with a vintage User Interface design while we listen. The project functions well and is simple to construct.
You can build the same project in less than 10 minutes but you need to have some experience. If this is your first project, consider building a simpler one first, to gain some experience. Check my Instructables for simple project ideas and when you are more comfortable with the Arduino the electronics come back to build this cool project. Let’s now start building our own Internet Radio.
UPDATE 6/6/2019
The noise issue has been solved by adding an isolator transformer. Check out the updated shematic diagram. Thanks!
Step 1: Get All the Parts
We are going to need the following parts:
- ESP32 ▶ http://educ8s.tv/part/ESP32
- MP3 decoder ▶ http://educ8s.tv/part/MP3Decoder
- Isolation Transformer ▶ http://educ8s.tv/part/AudioTransformer
- Amplifier ▶ http://educ8s.tv/part/PAM8403
- 3W speaker ▶ http://educ8s.tv/part/3WSpeaker
- 3.5″ Nextion Display ▶ http://educ8s.tv/part/Nextion35
- Push Buttons ▶ http://educ8s.tv/part/Buttons
- Breadboard ▶ http://educ8s.tv/part/LargeBreadboard
- Wires ▶ http://educ8s.tv/part/Wires
The total cost of the project is around 40$ but if you don’t use a display the cost of the project is around 20$. Amazing stuff. We can build our own Internet radio with just 20$!
Step 2: ESP32 Board
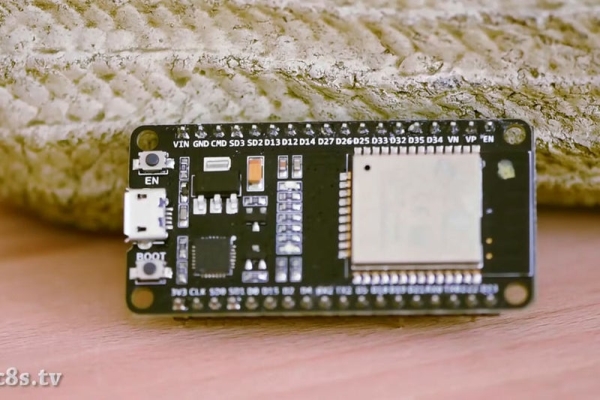
The heart of the project is, of course, the powerful ESP32 board. If you are not familiar with it, the ESP32 chip is the successor of the popular ESP8266 chip we have used many times in the past. The ESP32 is a beast! It offers two 32 bit processing cores which operate at 160MHz, a massive amount of memory, WiFi, Bluetooth and many other features with a cost of around 7$! Amazing stuff!
I suggest watching the detailed review that I made for this board. I have added the video to this Instructable. It will be advantageous to comprehend the reason this chip will permanently change the way we produce goods. One exciting feature of the ESP32 is its low-power deep-sleep mode, which only uses 10μΑs of current despite its impressive capabilities. This feature makes the ESP32 ideal for tasks requiring low energy consumption.
This project involves the ESP32 board connecting to the Internet, fetching MP3 data from the current radio station, and sending instructions to the display.
Step 3: MP3 Decoder
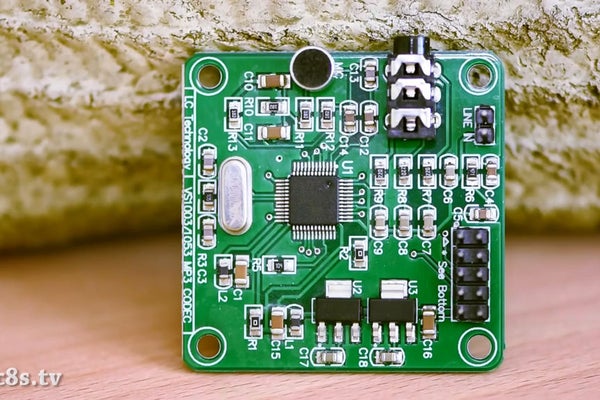
The MP3 data is received by the MP3 decoder module via the SPI interface. This module utilizes the VS1053 IC. This IC is custom-made hardware created for the purpose of decoding MP3 files. It retrieves the MP3 data from the ESP32 and quickly changes it to an audio signal.
The audio jack outputs a quiet and muffled sound, necessitating us to eliminate the muffle and increase the audio level. If you have headphones on, you don’t have to worry about eliminating noise or amplifying the signal. I employ an Isolation transformer to eliminate noise from the audio and a PAM8403 audio amplifier to increase the audio signal before sending it to a speaker.
Step 4: Nextion Display
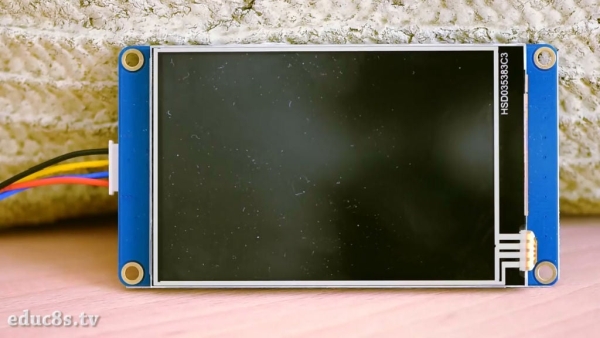
I chose to use a Nextion display for this project since it is very easy to use. We only need to connect one wire to control it.
The Nextion displays are new kind of displays. They have their own ARM processor at the back which is responsible for driving the display and creating the graphical user interface. So, we can use them with any microcontroller and achieve spectacular results. I have prepared a detailed review of this Nextion display which explains in depth how they work, how to use them and their drawbacks. You can read it here , or watch the attached video.
Step 5: Connecting All the Parts
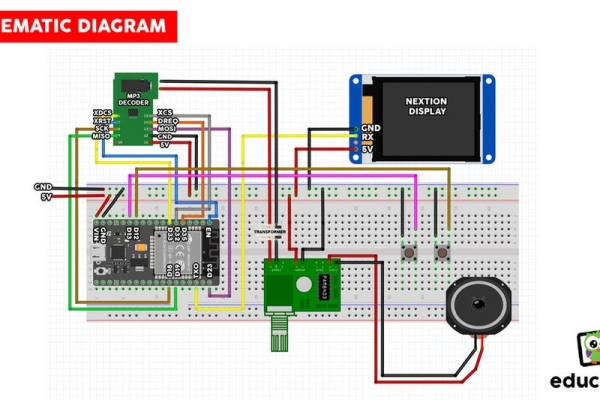
The MP3 data is received by the MP3 decoder module via the SPI interface. This module utilizes the VS1053 IC. This IC is custom-made hardware created for the purpose of decoding MP3 files. It retrieves the MP3 data from the ESP32 and quickly changes it to an audio signal.
The audio jack outputs a quiet and muffled sound, necessitating us to eliminate the muffle and increase the audio level. If you have headphones on, you don’t have to worry about eliminating noise or amplifying the signal. I employ an Isolation transformer to eliminate noise from the audio and a PAM8403 audio amplifier to increase the audio signal before sending it to a speaker.
Each audio channel must go through the isolation transformer to clear any noise present before connecting to the amplifier.
To transfer information to the screen, we simply have to link a single wire to the ESP32’s TX0 pin. Following the assembly, we must upload the code to the ESP32 and the interface to the Nextion display.
To transfer the GUI onto the Nextion display, simply move the InternetRadio.tft file that I will provide to an SD card with available space. Insert the SD card into the designated slot located on the rear of the screen. Next, switch on the screen, and the graphical user interface will be activated. After that, take out the SD card and reconnect the power.
Once the code has been loaded successfully, we can then activate the project. It shows the message “Connecting…” on the screen for a brief period of time. Upon establishing an internet connection, the project links to a specified radio station. The hardware is functioning as anticipated, now we need to focus on the software aspect of the project.
Source: Internet Radio Using an ESP32
- How does the project play online radio stations?
The ESP32 connects to the Internet, fetches MP3 data from the selected radio station, and sends it to the MP3 decoder for playback. - Can I control the display with the ESP32 using one wire?
Yes, the Nextion display is controlled by connecting a single wire to the ESP32 TX0 pin. - What decodes the MP3 stream into audio?
The MP3 decoder module using the VS1053 IC decodes MP3 data received from the ESP32 into an audio signal. - How is audio noise handled in the project?
An isolation transformer is used for each audio channel to eliminate noise before the amplifier. - Does the project include a way to amplify the audio for a speaker?
Yes, a PAM8403 audio amplifier is used to boost the audio signal before sending it to the 3W speaker. - How is the Nextion GUI uploaded to the display?
Copy the provided InternetRadio.tft file to an SD card, insert it into the display, power it on to transfer the GUI, then remove the SD card. - Can I save my preferred radio stations?
Yes, preferred radio stations are stored in the ESP32's memory for convenient access. - What controls volume and station switching?
Station switching is done with push buttons and volume is adjusted using a potentiometer.