Every now and then you might be interested to input text to your arduino project. You can do it using Serial input but this would require Arduino to be always connected to a computer.
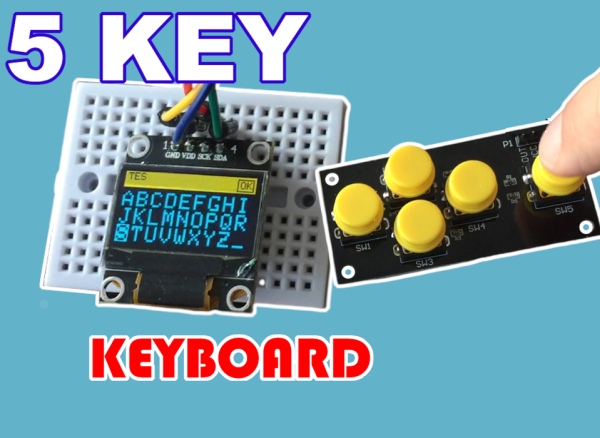
In this tutorial I would show you how to implement text input using the small OLED display and 5 key keyboard module or alternatively potentiometer.
Step 1: 5 Key Keyboard Module
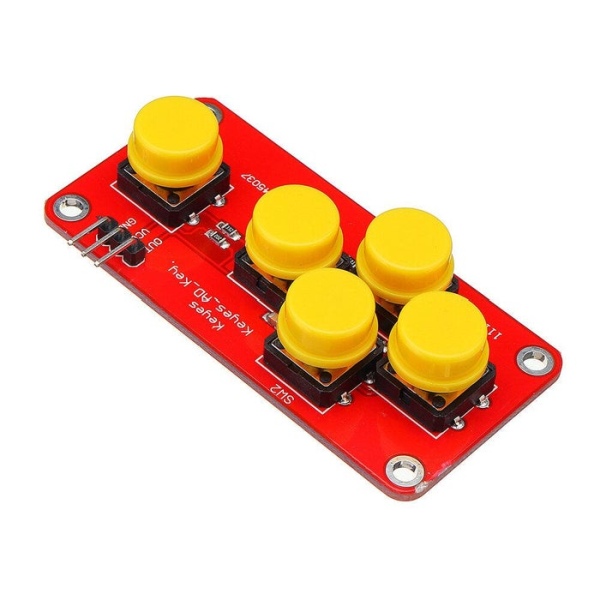
There are various types of keyboard modules we can use with Arduino. The one I am using you can purchase on Aliexpress for less then 2USD.
This is an analog device which works lie a voltage divider. We connect 5V and GND to it and depending on which button we press electricity flows through different resistor so we end up which different output voltages at the signal pin.
When we connect this signal pin to Arduino we can read those changing input voltages and recognise which button was pressed and write a code which would have different actions assigned to each button.
Step 2: Connecting Module to Arduino
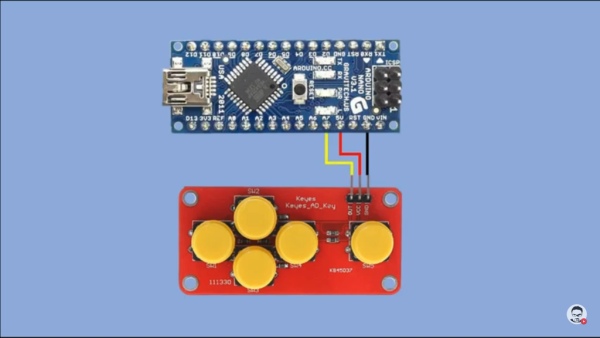
I connected the module to arduino and using serial monitor checked what are the possible states of that module.
To do it I wrote a very simple code.
We declare the analog pin to which we connected signal pin of the keyboard module
int Keyboard=A7;
In setup function we start serial monitor
void setup() {
  Serial.begin(9600);
}
And in loop function we read analog values from the keyboard module and display them in Serial monitor. This way we can capture different voltage values depending on which button is pressed.
void loop() {
  Serial.println(analogRead(Keyboard));
}
Analog read command reads voltages from 0 to 5 where:
- Value 0 represents 0v
- 1023 represents 5V
So the voltage range of 0 to 5V is mapped to range 0 to 1023 of analog values read on the arduino pin.
Step 3: All Possible States of the Keyboard Module
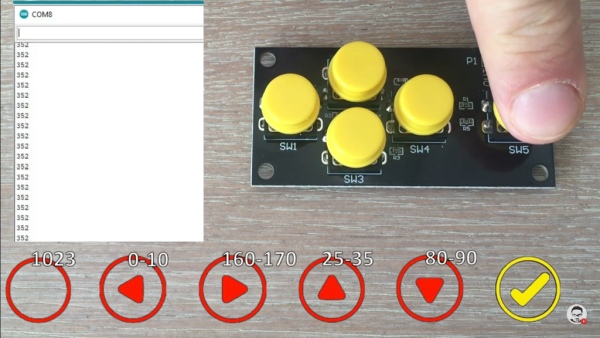
All possible stetes of the keyboard module and their values. Sometimes the input data fluctuates a bit, so I am accounting for this by using ranges.
- 1023 – no button pressed
- 0-10 – left button pressed
- 160-170 – right button pressed
- 25-34 – up button pressed
- 80-90 – dow button pressed
- 350-360 – select button pressed
When you get your own keyboard module you should run this program to see if the module has the same ranges. They may be different.
In the example you see me pressing select button and we can see thatb the value 352 was read at the arduino pin.
Step 4: Simple Code to Recognise Pressed Buttons
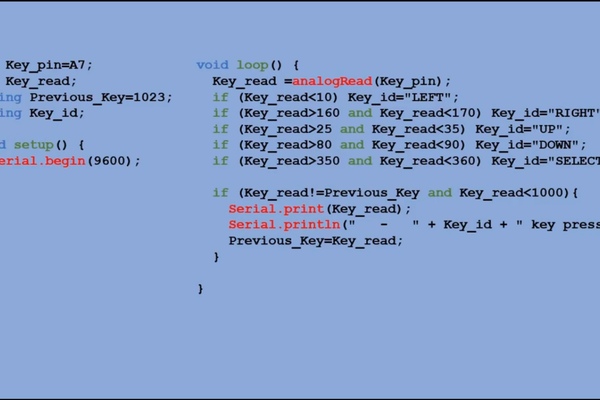
Here is a simple code that recognises which button was pressed. Each time we press the button the corresponding text is output serial monitor.
The photo shows the execution of that code.
Step 5: Connecting OLED Display to Arduino and Keybord Module to Build Text Input Device
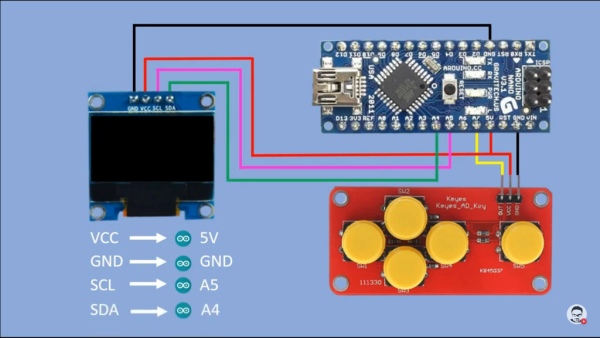
Here we are adding OLED SSD1306 dsiplay module into the loop.
With all the components connected we can start working on the code.
Step 6: Design of the Text Input Screen
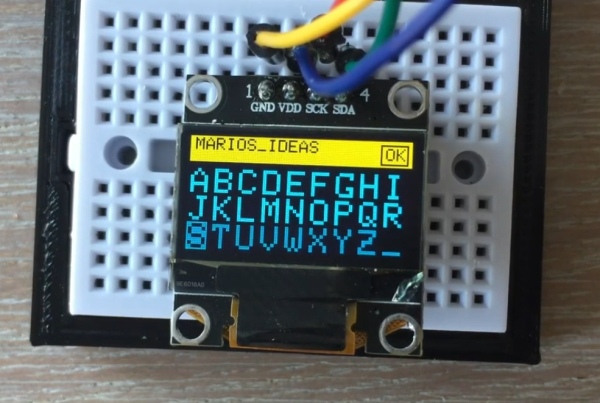
We want to create two panels on the OLED screen.
- the top one in yellow is where the input text will be displayed
- the bottom one in black would have the list of all possible input charactters with one highlighted at the time. And we navigate through those characters by pressing buttons on the key module.
We choose characters by navigating to them and pressing Select button.
Ehen the whole text is input you navigate to OK in the top panel and press Select. In this scetch the input text would start blinking but you associate any action you want with the press of the OK button. In the example I would discuss further I will be encoding the input text into morse code and transmitting it with buzzer sound s and led blinking.
You can see the in depth explanation on how the code works in the attached video.
The code can be found in the link below
Step 7: Text Input Device Where the Keyboard Module Is Replaced With the Potentiometer

I have also created the text input device where I replaced the keyboard module with potentiometer and two push buttons. I personally prefer this solution as I navigate through character much faster.
Please check the video where I used this method of text input to create morse code encoder
Step 8: Conclusion
Thank you for spending time going through this tutorial.
Hope you would find it useful and use it in your future projects.
If you liked this contend give the videos included in this tutorial a like.
You can also support me in creating similar content by going to my Patreon webpage
https://www.patreon.com/MariosIdeas Or Paypal
Source: How to Input Text Into Arduino Project Using OLED Display and 5 Key Keyboard Module or Potentiometer