Summary of Gameduino Snake – Final Project
Summary: The Gameduino Snake is a handheld SparkFun RedBoard-based Snake game using an 8×8 LED matrix and MMA8452Q accelerometer for tilt controls, three buttons (power, reset, tweet), and an Ethernet shield to post scores to Twitter. The project stores scores in EEPROM, uses accelerometer thresholds to avoid diagonal movement, and includes wiring details and code excerpts. Optional battery power caused instability; several planned features (GPS, piezo) were omitted due to memory and timing issues.
Parts used in the Gameduino Snake:
- SparkFun RedBoard / Arduino Uno
- MMA8452Q Triple-Axis Accelerometer
- 8×8 Bi-Color LED Matrix with I2C backpack (single color optional)
- 3 Push Buttons (blue power, green reset, red tweet)
- 2 10K Ohm Resistors
- 2 330 Ohm Resistors
- Arduino Ethernet Shield
- Several wires
- Optional: 9-volt battery
- Optional: Battery holder
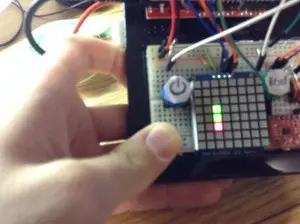
For my physical computing class, I created a project utilizing the SparkFun Redboard. I’ve named it the Gameduino Snake, as it’s essentially a compact handheld gadget that enables users to enjoy a game of snake on an LED matrix.
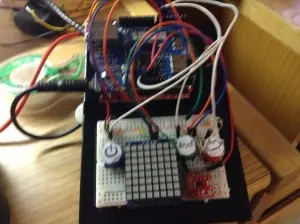
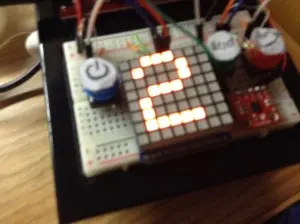
The game incorporates a basic 8×8 LED matrix, capable of displaying both the game itself and the score once the game ends. Adjacent to the LED matrix, there’s a triple-axis accelerometer attached to the breadboard. This accelerometer detects the movement of the entire game board, allowing the snake to move in the direction corresponding to the tilt of the device. For instance, tilting it forward causes the snake to move upwards. Additionally, an Ethernet shield is integrated into the Arduino, enabling players to share their scores via Twitter once they complete a game.
Furthermore, the Gameduino includes three distinct buttons. The blue button functions as a power button, initiating the game by placing the snake and target on the LED matrix. The green button serves as a reset button, primarily used after the player encounters a game over, resetting the game and returning to the initial blank start screen. Lastly, the red button is used to send a Tweet containing the player’s score, which is stored in the RedBoard’s EEPROM memory upon game over. To prevent duplicate Tweets, the red button also includes the number of seconds elapsed since the last reset. It’s important to note that the Tweet button must be pressed on the main screen prior to starting the game, in other words, it needs to be reset in advance.
Please excuse the difficulty in playing the game while filming simultaneously, making it appear more challenging than it actually is. Additionally, I apologize for the poor visibility of the computer screen in the video. It displays “Snake Score,” followed by my score of 3, and then “Time Since the Last Reset” along with the time, which was 14 seconds.
When I started brainstorming ideas for my final project at the beginning of the term, I knew I wanted to create a game. After conducting some research online, I came across someone who had recreated Super Mario Bros. using an LED matrix and Arduino. This inspired me to utilize the LED matrix to develop a game on the Arduino. However, considering my limited coding skills as a beginner, I realized I would have to create a simpler game than Super Mario Bros. After careful consideration, I decided to make the game Snake, as I believed it would be easier to code and implement.
I also had the idea to incorporate an Ethernet shield into the circuit, allowing players to share their scores on Twitter once the game ended. Additionally, I thought it would be interesting to include a GPS module to include the time and date in the tweets. However, after working on my intermediate project, I realized that the GPS module consumed a significant amount of memory. Considering the constraints of my final project, I had to exclude that feature.
Initially, I had planned to control the snake using four push buttons. However, my teacher suggested using the accelerometer to make the project more engaging and physical. I decided to take the advice and implemented the accelerometer, which turned out to be a fun and unique way to play the game.
Furthermore, I had intended to include a Piezo buzzer to add a musical tune to the game. Unfortunately, I couldn’t find a suitable method to integrate it properly. The only way I knew to code music with the Piezo was by using delays, but incorporating the buzzer during gameplay would render the game unplayable. If I used it for the game over display, it would play the tune, show the display, play the tune again, and so on, never showing them simultaneously. Although I might have eventually found a solution, I decided to prioritize time constraints and omit the buzzer, as it didn’t significantly enhance the overall experience.
While developing this project, I encountered several challenges along the way. One of the initial major issues I faced was getting the snake to move correctly. Initially, I had programmed the RedBoard to disregard the specific x and y values captured by the accelerometer and instead focused solely on the accelerometer’s orientation. After adapting a code I found online, the game worked fine and the snake moved as intended. However, this meant that the player had to tilt the board significantly for the snake to respond. Although it functioned, it wasn’t the optimal setup for proper gameplay.
Realizing this limitation, I decided to experiment with the values and modify the code so that it would consider the position and move the snake accordingly when the x and y values exceeded certain thresholds. This adjustment proved successful, and overall, the game ran smoothly, especially after receiving guidance from my instructor to ensure continuous movement of the snake. However, I encountered another small issue that impacted the game’s enjoyment and playability. When the device was tilted at a diagonal angle, particularly in the lower right direction, it caused the snake to move diagonally. This was a disruptive glitch in the game’s functionality.
To address this problem, I collaborated with my professor and devised a solution. Essentially, I identified the values when the accelerometer was in a flat position and established that as the baseline reference point. I then determined a threshold around that point. If the relevant values exceeded that threshold, the snake would move in the corresponding tilted direction. This adjustment rectified the issue and ensured smooth movement of the snake while avoiding unintended diagonal movements caused by the diagonal tilt.
I encountered a few additional issues during the project development. Initially, I had planned for the blue button to serve both as the power button and the reset button. However, I faced coding challenges while trying to implement this functionality. Realizing that I had an extra push button available, I decided to connect it separately to serve as the reset button, simplifying the process.
The Tweet function also presented some difficulties. Initially, I had set it up to allow sending tweets from the game over screen, but it only worked at a specific moment. To resolve this issue, I modified the approach by having the RedBoard store the score in the EEPROM memory and enabling it to send the tweet from the start screen instead. It took some time to determine what additional information to include in the tweet to avoid duplicate messages. After experimenting with various setups, I eventually included the number of seconds elapsed since the last reset.
Furthermore, I encountered a problem where the game occasionally crashed when using a 9-volt battery. It would run the game smoothly but freeze when displaying the game over screen. Although the issue seemed to be resolved during testing while writing this, I prefer connecting the device to a computer for power to avoid this potential glitch. It could be due to the battery being low on power or insufficient to support all the game features. Additionally, I discovered that using the battery made playing the game challenging due to its weight. The battery hanging off the side required more forceful tilting to register accelerometer and snake movements. Adjusting the thresholds in the code or attaching the battery to the bottom of the board might potentially address this issue, but it’s difficult to determine the exact solution. I’m still unsure why the crashes occurred frequently during previous tests.

If you’re interested in building your own version of the Gameduino, below are the necessary parts, along with the corresponding schematic, sketch, and code.
Parts:
– 1 SparkFun Redboard/Arduino Uno
– 1 MMA8452Q Triple-Axis Accelerometer
– 1 8×8 Bi-Color LED Matrix with I2C backpack (can be a single color if desired, and the I2C backpack is optional but requires different code)
– 3 Push Buttons
– 2 10K Ohm Resistors
– 2 330 Ohm Resistors
– 1 Arduino Ethernet Shield
– Several Wires
Optional:
– 9-volt battery
– Battery holder
You can view the schematic and sketch by referring to the resources provided below:
[Link to schematic] [Link to sketch/code]Please note that the provided resources will contain detailed information on the connections and programming required to assemble the Gameduino.

To connect the buttons, the power button, and the Tweet button, you need to supply 5 volts to one side of each button. From the other side, connect a 10K resistor to ground. This configuration ensures that when the button is pressed and the voltage is low, the current flows to the ground, completing the circuit. Additionally, connect a wire from that side of the button to the desired digital pins on the Redboard. In the case of my project, I used pin 7 for the power button and pin 6 for the Tweet button.
For the reset button, simply connect one end of the button to the reset pin on the Redboard, and the other end directly to ground. This setup works because the reset pin triggers a reset when it receives a low or LOW reading, which is achieved by connecting it to ground. When the button is not pressed, the reset pin reads a normal reading, and when it’s pressed, it receives a reading from ground (0 volts or LOW), resulting in a game reset without the need to press the reset button on the Redboard.
As for the LED matrix, if you have an Adafruit I2C backpack attached to it, the connection is straightforward. Supply 5 volts to the pin with a plus sign (+) on the matrix to power it. Connect the pin with a minus sign (-) to ground to provide a path for the current to flow. Since the matrix backpack utilizes I2C communication, you’ll also need to connect the SDA and SCL pins on the backpack to the corresponding pins on the Redboard. You can use the designated SDA and SCL pins on the Redboard, or alternatively, the A4 and A5 pins can serve the same purpose. In my project, I used A4 for SDA and A5 for SCL, utilizing the analog pins for this function.
Lastly, to connect the triple-axis accelerometer, supply 3.3 volts to the pin labeled 3.3 on the accelerometer. Connect a wire from the ground pin on the accelerometer to the ground, completing the circuit and allowing the current to flow. Since the accelerometer also uses I2C communication, connect the SDA pin on the accelerometer to the SDA or A4 pin on the Redboard, passing it through a 330 Ohm resistor. Similarly, connect the SCL pin on the accelerometer to the SCL or A5 pin on the Redboard, also passing it through a 330 Ohm resistor.
Final_Project Gameduino Code
The code contains comments that explain the functionality in detail. In summary, the Redboard sets up its values, and if it detects a press of the blue button, it proceeds to draw both the target and the snake based on the information obtained from the setup function. The program then continuously monitors two conditions: whether the snake is within the playing area and whether it has collided with itself. If both conditions are true, a function is called to detect the position of the accelerometer and adjust the snake’s movement accordingly. However, if either condition is false, the game over function is triggered.
|
1
2
3
4
5
6
7
8
9
10
11
12
13
14
15
16
17
18
19
20
21
22
23
24
25
26
27
28
29
30
31
32
33
34
35
36
37
38
39
40
41
42
43
44
45
46
47
48
49
50
51
52
53
54
55
56
57
58
59
60
61
62
63
|
void moveSnake() { // this function will move the snake according to the accelerometer if (accel.available()) { accel.read(); //this will read the values of the accelerometer Serial.print("x: "); Serial.print(accel.cx, 3); Serial.print("\t"); Serial.print("y: "); Serial.print(accel.cy, 3); Serial.print("\t"); Serial.print("z: "); Serial.print(accel.cz, 3); Serial.print("\t"); Serial.println(prevDirection); float restingX = 0; //the accelerometer at rest float restingY = 0; float threshold = 0.350; //how much it should be tilted to move the snake. Serial.println(accel.cy - restingY); Serial.println(accel.cx - restingX); Serial.println(abs(accel.cx - restingX)); if (((accel.cy - restingY) > threshold) && (abs(accel.cx - restingX) < threshold)) { //if the accelerometer is tilted left Serial.println("Left"); snakeY[0] = snakeY[0] + 1; // the snake will move to the left. prevDirection = 1; } if (((accel.cy - restingY) < -threshold) && (abs(accel.cx - restingX) < threshold)) { //if the accelerometer is tilted right Serial.println("Right"); snakeY[0] = snakeY[0] - 1; // snake will move to the right prevDirection = 2; } if (((accel.cx - restingX) > threshold) && (abs(accel.cy - restingY) < threshold)) { //if the accelerometer is tilted up Serial.println("Up"); snakeX[0] = snakeX[0] - 1; // the snake will move up prevDirection = 3; } if (((accel.cx - restingX) < -threshold) && (abs(accel.cy - restingY) < threshold)) { //if the accelerometer is tilted down Serial.println("Down"); snakeX[0] = snakeX[0] + 1; // it will move the snake down prevDirection = 4; } if ((-threshold < accel.cx) && (accel.cx < threshold) && (-threshold < accel.cy) && (accel.cy < threshold)) { if (prevDirection == 1) { snakeY[0] = snakeY[0] + 1; } if (prevDirection == 2) { snakeY[0] = snakeY[0] - 1; } if (prevDirection == 3) { snakeX[0] = snakeX[0] - 1; } if (prevDirection == 4) { snakeX[0] = snakeX[0] + 1; } } }} |
This function starts by initializing the values that our x and y should have when the accelerometer and board are held flat. We then define a threshold to detect tilting and movement. For example, if we want to move left, we check if our y value (acting as a horizontal axis) minus our resting value is greater than the threshold. Additionally, to prevent the diagonal movement glitch I encountered during my second coding attempt, we need to ensure that the absolute value of the current x reading minus the resting x is less than the threshold. Essentially, we need to ensure that the x value falls between the threshold and the negative threshold, so that two directions cannot be read simultaneously. In this case, since we set the resting values as zero, we could directly use the accel.cx and accel.cy values instead of subtracting the resting value. However, subtracting the resting value allows for easy adjustment of the neutral position if needed in the future.
The same principle applies to the other three directions. For each direction, we save the direction it was moving in to a variable. This ensures that, in order to maintain a sufficient level of challenge, the snake continues moving in the last known direction until the accelerometer returns to a flat state and is tilted again.
Furthermore, during the snake’s presence within the game arena, as it moves without colliding with itself, the game will continuously track the positions of both the snake and the target to determine whether the player achieves a score.
|
1
2
3
4
5
6
7
8
9
10
11
12
13
|
if ((snakeX[0] == targetX) && (snakeY[0] == targetY)) { //this will read if the snake is on the target snakeLength++; //if it is it will gain a length of one score++; // and the score will increase by one Serial.print("Score: "); // the score will then be written on the serial monitor Serial.println(score); if (snakeLength < maxSnake) { // if the snake is less than the maxium length makeTarget(); //then we will make a new target to go after } else { targetX = targetY = -1; //if it is not less than the max, then we will not //make any more targets }} |
The following code snippet verifies whether the snake’s head, represented by snakeX[0] and snakeY[0], occupies the same coordinates as the target. If this condition evaluates to false, the target remains in its current position, and the snake maintains its existing length. However, if the condition is true, the snake extends by one pixel, and the score increases by one point. Subsequently, the code checks the length of the snake. If it is less than the predetermined maximum length (set as 64 in my code, corresponding to the entire LED matrix), a function is called to generate a new target for the snake to pursue. If the snake’s length surpasses the maximum limit, the generation of new targets ceases. Modifying the maximum snake length is as simple as adjusting the variable “maxSnake” in the code.
Although I am content with the outcome of the Gameduino, there remain several possible enhancements and modifications. Firstly, as mentioned earlier, it exhibits different behavior when connected to a battery, and determining the cause of this discrepancy—whether it lies in the code, hardware, or is simply due to the added weight of the battery—would be beneficial. Another significant improvement would involve integrating a Wi-Fi shield into the setup, enabling users to post tweets without the need for an Ethernet cable, particularly useful if the battery-related issues are resolved. Additionally, expanding the device’s capabilities to include other games such as Breakout or Super Mario Bros, as previously suggested, would be advantageous. Furthermore, with an Arduino board featuring a larger memory capacity, it might be possible to accommodate multiple games simultaneously. Such an upgrade would also permit the incorporation of the originally planned GPS module. Several other improvements could enhance the device, such as including the game duration in the tweet instead of solely displaying the time since the last reset. Moreover, by eliminating delays in the code controlling the Piezo buzzer, it could be seamlessly integrated into the overall setup, adding a delightful auditory element.
- What does the blue button do?
The blue button functions as the power button, starting the game by placing the snake and target on the LED matrix. - How is the reset button connected and used?
The reset button connects one end to the RedBoard reset pin and the other end to ground; pressing it pulls reset low and returns to the blank start screen. - How does the accelerometer control the snake?
The MMA8452Q provides x and y readings; the code compares these against resting values and thresholds to move the snake in the corresponding direction. - How does the project prevent diagonal movement when tilted?
The code defines resting x and y and a threshold; a move is accepted only if the primary axis exceeds threshold while the other axis stays within threshold. - How are scores shared to Twitter?
The Ethernet shield sends tweets; the RedBoard stores the score in EEPROM and the tweet is sent from the start screen using the tweet (red) button, including seconds since last reset to avoid duplicates. - Why was the GPS module omitted?
The GPS used too much memory in the intermediate project, so it was excluded due to project memory constraints. - Why was the piezo buzzer not included?
Playing music with the piezo required delays that interfered with gameplay timing, so it was omitted to keep the game playable within time constraints. - What power issues were experienced with a 9-volt battery?
The game sometimes crashed or became hard to play with a 9-volt battery, possibly due to low power, insufficient supply, or added weight affecting tilt sensitivity. - How is the LED matrix connected?
With an Adafruit I2C backpack, supply 5V and ground to the plus and minus pins, and connect SDA and SCL to the RedBoard SDA and SCL pins (or A4 and A5). - How does the game detect when the snake eats the target?
The code checks if snakeX[0] equals targetX and snakeY[0] equals targetY; if so, snakeLength and score increment and a new target is made unless maxSnake is reached.