This is an Instructables on how I Remixed my old CNC Laser engraver and made a Stable version of an Arduino based Laser CNC engraver and thin paper cutter using old DVD drives and using 250mW laser.
Old Version of My CNC :https://www.instructables.com/id/Mini-CNC-Laser-Wood-Engraver-and-Paper-Cutter/
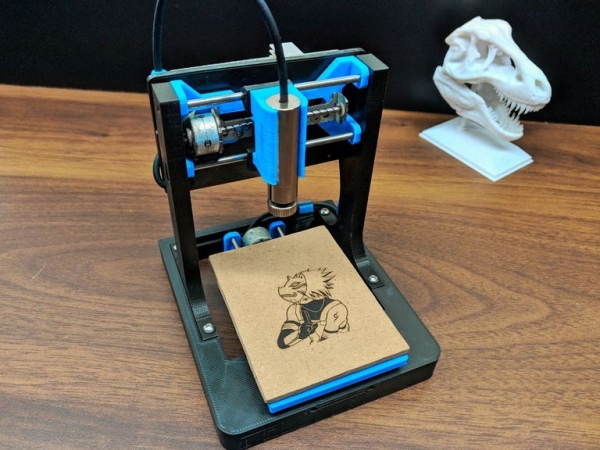
Old version was not much stable and had some wobble due to uneven parts, so I decided to make a stable version of it using 3D printed parts. Which gave me excellent results in laser engraving even in very tiny details, this machine is cable of doing the work well. You can see the details in the eye of the engraved picture.
Playing area is 40mm x 40mm max.
Step 1: Parts and Materials Required
- Arduino Nano (with USB cable)
- 2x DVD drive stepper mechanism
- 2x A4988 stepper motor driver modules (or GRBL shield)
- 250mW Laser with adjustable lens (or above)
- 12v 2Amps power supply minimum
- 1x IRFZ44N N-CHANNEL Mosfet
- 1x 10k resistor
- 1x 47ohm resistor
- 1x LM7805 voltage regulator (with heatsink)
- Blank PCB Board
- Male and Female Headers
- 2.5mm JST XH-Style
- 2pin male connector
- 1x 1000uf 16v capacitor Jumper cables
- 8x small neodymium magnets ( which I have salvaged from DVD lens mechanism)
- 1x 2pin plug in screw terminal block connector
- Zip ties (100mm)
- Super Glue
- 6x M3x12 screws
- 8x M2x5 screws
- Laser Safety Glasses
“LASER SAFETY GLASSES are must needed in this project”.
Step 2: Printed Parts
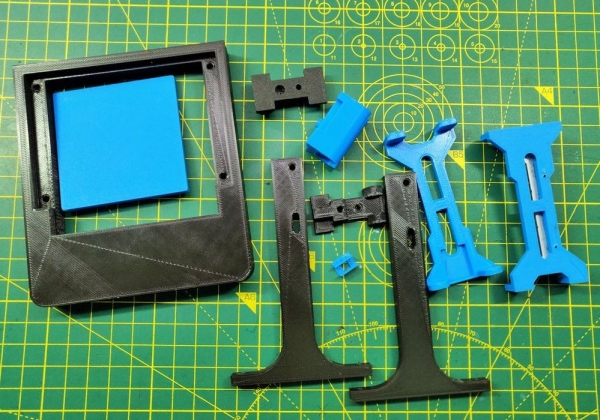
STL files, see the attached file or go to : https://www.thingiverse.com/thing:3521286
All Parts are printed in ABS material.
Print Settings:
Layer height: 0.2mm
Infill: < 25%
Supports: No
Step 3: Taking Apart the DVD Drive Stepper Mechnaism
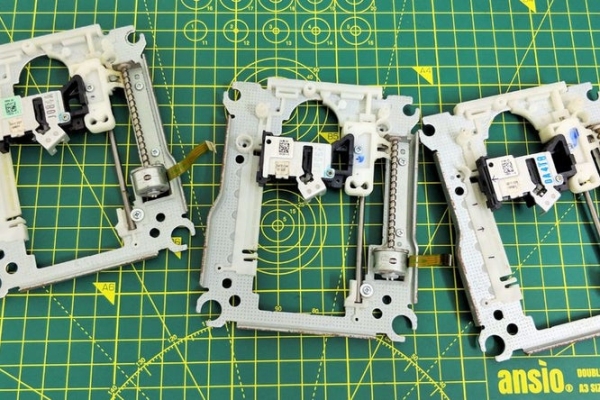
Two DVD driver mechanism are required, one for the X-Axis and the second for the Y-axis.
Using a small Phillips head screw driver I removed all the screws and detached stepper motor, the sliding rails and the follower.
The stepper motors are 4-pin Bipolar Stepper Motor.
The small size and low cost of a DVD motor mean that you can’t expect
high resolution from the motor. That is provided by the lead screw. Also, not all such motors do 20 steps/rev. 24 is also a common spec. You’ll just have to test your motor to see what it does.
Procedure for calculating the resolution of the CD Drive Stepper motor:
In order to measure the resolution of the CD/DVD drive stepper motor,
a digital micrometer was used. The distance along the screw was measured. The total length of the screw using a micrometer, which turned out to be 51.56 mm. To determine the lead value which is the distance between two adjacent threads on the screw. The threads were counted to be 12 threads within this distance. Lead = distance between adjacent threads = ( total length / number of threads = 51.56 mm) / 12 = 4.29mm/rev. The step angle is 18 degrees which corresponds to 20 steps/revolution. Now that all the information needed is available, the resolution of the stepper motor could be calculated as shown below: Resolution = (Distance between adjacent threads) / (N Steps/rev) = (4.29mm/rev) / (20 steps/rev) = 0.214 mm/step. Which is 3 times better the resolution required which is 0.68mm/step.
Step 4: Preparing the Slider.
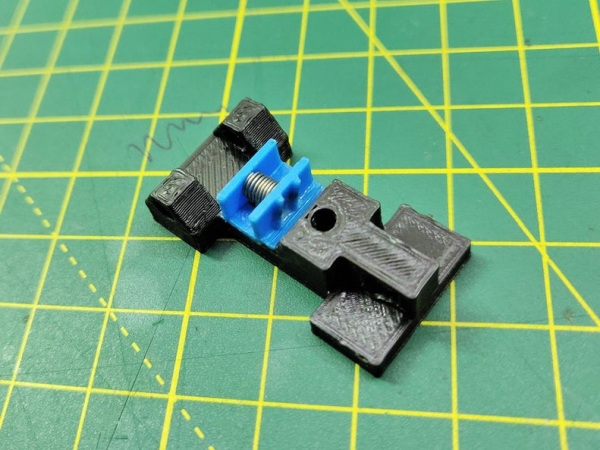
Using Super Glue I’ve glued the slider and the guide into one part. Spring is attached to maintain the tension between the guide and the lead screw to avoid black-lash.
Source: DIY Mini CNC Laser Engraver.