Santa is here but you need to guess your gift’s password! It’s a great starting point if you’re new to Arduino MKR1000, networking & Android
Things used in this project
Hardware components |
||||||
 |
|
× | 1 | |||
 |
|
× | 1 | |||
 |
|
× | 1 | |||
 |
|
× | 1 | |||
|
× | 1 | ||||
Story
Christmas is here! You’ve got your gift but you need to unlock it. Get your Arduino MKR1000 and your Android phone ready!
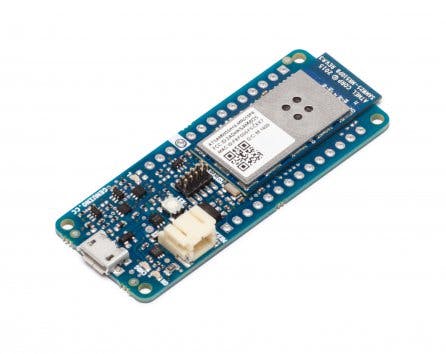 New to Arduino MKR1000? You’ve just hit the right place. This tutorial is meant to be a simple starting point that will introduce you to some cool stuff to make your projects shine.
We’ll also learn a little bit about UDP and Sockets. (Don’t worry if you’re not familiar with those guys, I’ll talk a bit about them; I’ll also mention some other stuff but will leave them for you to explore.)
What will we do?
We’ll use your Android phone to send the password to the ArduinoMKR1000over a network which will in turn check your password and unlock the gift that’s secured by a home lock connected to an AC Relay.
- The Network (a little intro about what happens behind the scenes )
- Arduino MKR1000 and what the Arduino does
- Circuit
- Sample Android program
Network
The Arduino MKR1000 will be connected to your home WiFi router. It’ll talk to the Android through the network using UDP sockets.
UDP (User Datagram Protocol*) is a network protocol that’s fast and very easy to use, though it doesn’t guarantee data transfer.
Our home network isn’t busy and thus won’t cause any problems regarding data loss.
*Protocol: simply, it’s a way for devices to talk to each other.
Sockets are like software doors; they connect your device (say, the Arduino ) to the whole world or your whole home! They take data from your device/Arduino in a Packet (bucket? Close enough…) and send it to the nearest “Router” and it will tell it where to go.
 A Packet is a chunk of bytes. Packets travel all over the internet. They arrive at their correct destinations because they carry their destination IP address with them.
Arduino MKR1000
Our Arduino will be listening on its socket. Sockets have port numbers; each device may be opening many sockets simultaneously, and since each device has only one IP normally, port numbers denote which socket to go to.
An analogy for port numbers are houses on the same street: you know the street number/name, but you also must know the house number in order to reach your exact destination. Hence, the sender (your phone) must know not only the destination IP but also port number.
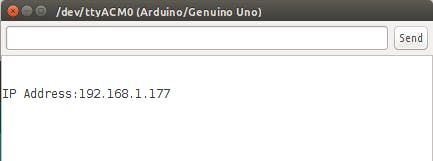
Your WiFi router will assign an IP to each newly connected device -umm, using DHCP- so we can’t know our Arduino’s IP until it’s already connected to the network. So, we’ll print it to serial (full code is attached to project).
IPAddress ip = WiFi.localIP();
Serial.print("IP Address: ");
Serial.println(ip);
This will show something like this: (this IP is what you will use in the Android application)
After connecting to our router and obtaining our IP, we start our UDP socket on a port that we define in a variable. A port number is a 16-bit value (Arduino int type is 16-bit).
unsigned int localPort = 2390; // local port to listen on
Opening a UDP socket is as simple as…
Udp.begin(localPort);
Now we need to check if something has arrived, and as I mentioned before, UDP is really simple to use. This line will return the number of available bytes to read. We can simply check that to know if something has arrived.
int packetSize = Udp.parsePacket();
To actually “read” data we need – you guessed it! – a read function. The function takes in the buffer size and returns the amount of actually read data. As you don’t know how much data is coming, you want to create a container that’s large enough to carry incoming data – the buffer . That’s just a fancy way to say an array of chars. Then you can slice and dice it depending on actual amount of bytes you received.
// len will contain number of bytes arrived at our Arduino
int len = Udp.read(packetBuffer, 255); // char packetBuffer[255]
255 bytes are large enough -really!- for a password string. You can change this to a larger value, but take care as UDP packets are limited in size by your network; this value is called maximum transfer unit (MTU).
After reading our data, we check if sent password matches passwords we defined on Arduino. If so, we’ll open our gift! Or else, we’ll make an LED scream.
full code is on Arduino Web Editor here.
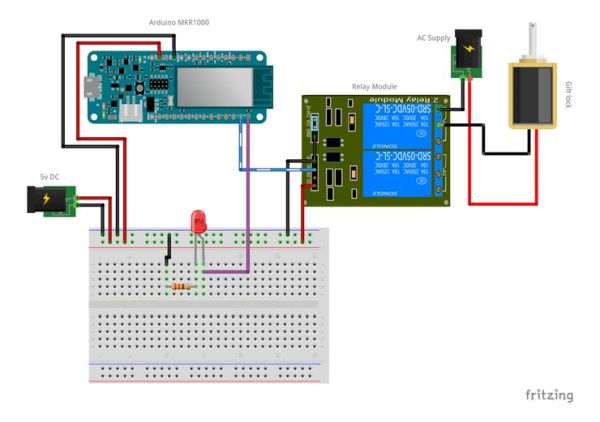
Circuit
Our circuit is fairly simple; we’re using a relay module as it’s easier to hook up. If you’re not familiar with relays, check my project on that. If you don’t want to use a relay, it’s totally up to you. That’s just an example to add some ketchup and make it more fun. Arduino controls relay and the warning LED. The relay is connected to gift lock. (Assuming that you’re using a really strong AC lock for the Christmas gift!)
Android
Now that we have our socket ready on Arduino, we need a sender socket on Android. I’ll post full Android project link below, but will talk about some points in the network code.
In Android, a UDP socket is called a DatagramSocket, and a UDP packet is in the same sense called a DatagramPacket.
Core logic is wrapped in sendPacket and receivePacket functions in the MainActivity class.
Sending a packet: as the documentation says, if we want a packet to be sent, we supply its constructor with destination IP Address and destination port number, then we call the send function of the DatagramSocket(documentation) and pass it our packet.
// Create a packet containing our message, IP and port number
final DatagramPacket packet = new DatagramPacket(messageBytes,
        messageBytes.length, InetAddress.getByName(ipString), portNumber);
socket.send(packet);    // Send packet
Receiving a packet: conversely, when creating a packet to receive data, we don’t specify any IP Address or port number, we just pass it a buffer to store data and buffer’s length.
byte buffer[] = new byte[255];
DatagramPacket p = new DatagramPacket(buffer, buffer.length);
socket.receive(p);
It’s just as easy as that!
Note: when you check the project on GitHub navigate to MainActivity.Javafile.
Now you are loaded with all the knowledge you need to create your IoT-ish gift lock!
Thanks for reading and good luck! If you like the project, don’t forget to hit respect 😉
Schematics
