Summary of Arduino Ethernet Camera
This article outlines a simple project to build an Arduino Ethernet Camera that captures images via a web browser without needing a smartphone app. It details the necessary hardware, software libraries, and code modifications required to connect a TTL serial camera to an Arduino Uno with an Ethernet shield. The system allows users to take photos, view them as JPEGs, and delete files by sending specific commands through a browser interface.
Parts used in the Arduino Ethernet Camera:
- Arduino Uno
- Arduino Ethernet Shield
- Serial Camera (TTL)
- SD Card
I will introduce a Arduino ethernet Camera.
You can take a picture inside of house which have a this arduino ethernet camera by just openning the web site if you follow this contents.
It is very easy and simple way which don’t need any app. for smart phone.
Let’s start.
Step 1: Prepare Meterials
We need a several meterials.
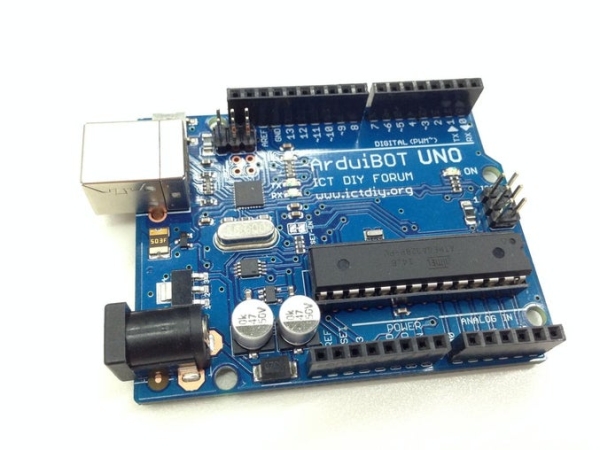
1. Arduino Uno
2. Arduino Ethernet Shield
3. Serial Camera ( https://learn.adafruit.com/ttl-serial-camera)
They are all…. for this project.
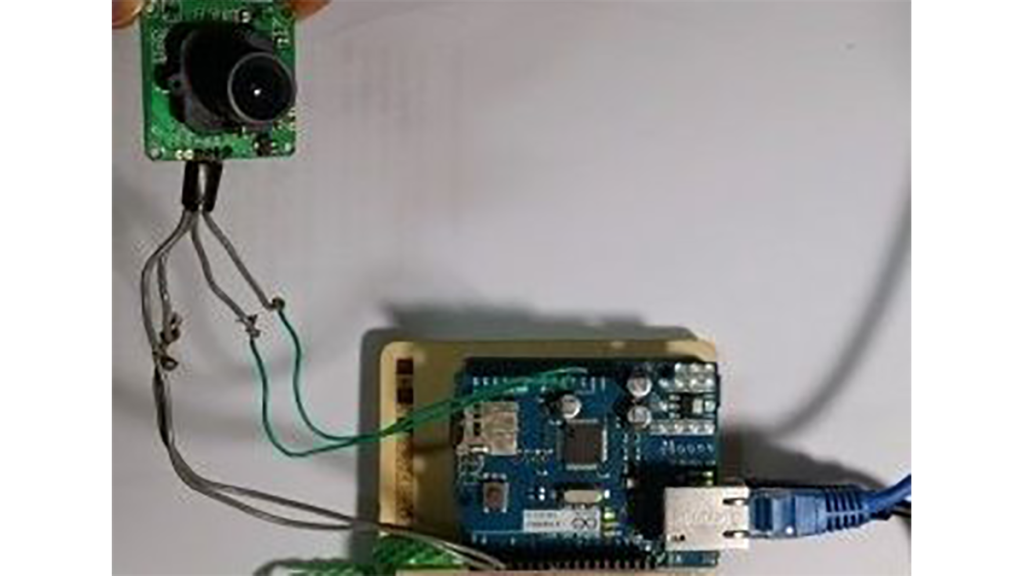
Step 2: Hardware Connection
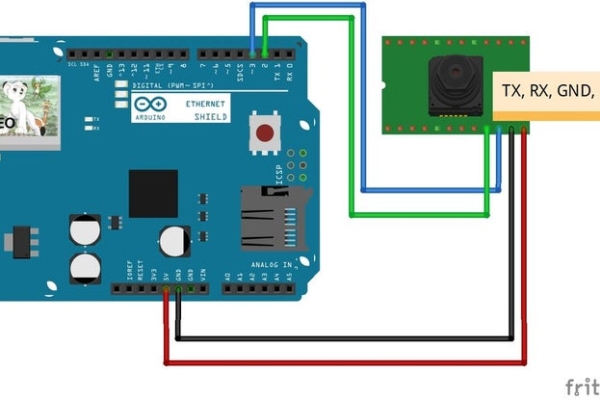
Hardware connection is very easy.
Just follow picture.
Picture shows us all of we have to connect.
Step 3: Prepare for Software : Library
We need download few libraries for this project
You can download libraries in http://arduino.cc
Adafruit_VC0706.h (for TTL Camera)
SdFat.h (for SD card)
SdFatUtil.h (for SD card
Ethernet.h (for Ethernet shield , default installed in Sketch)
SoftwareSerial.h(for TTL Camera)
If you downloaded them, you are ready for run this project.
Step 4: Software : Sketch Code
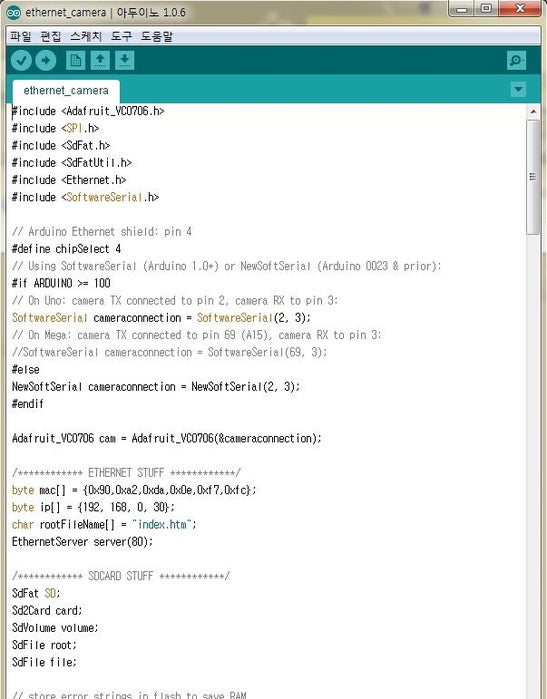
Here is a sketch code we need to run this project.
Please download attached sketch file (ethernet_camera.ino)
There are little to know about this code.
1. You have to modify mac[] and ip[] as your arduino’s information.
2. To see jpg file on browser, we have to give a command to translate to jpg format as below four line.
client.println(“HTTP/1.1 200OK”);
client.println(“Content-Type: image/jpeg”);
client.println();
client.print((char)c);
Most of all, you can study about image file, serial communication, sd card file write/read, ethernet with this sketch code.
Step 5: How to Run & Test Result
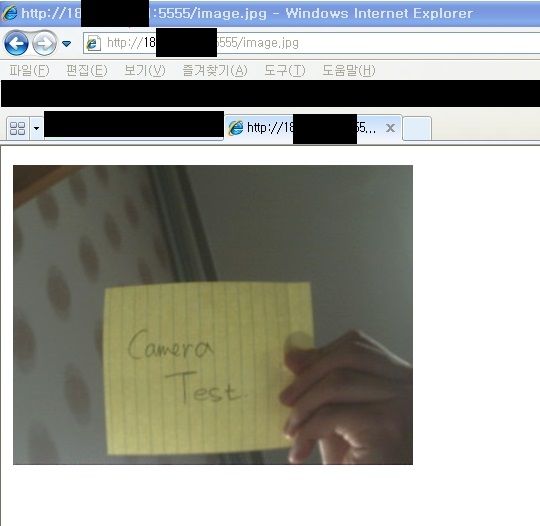
1. To take a picture
Just type http:/xxx.xxx.xxx.xxx:5555/ttt on any internet browser.
2. To See a taken picture
Just type http:/xxx.xxx.xxx.xxx:5555/image.jpg on any internet browser.
3. To remove a tacke picture
Just type http:/xxx.xxx.xxx.xxx:5555/rrr on any internet browser.
The Picture shows the result of test.
Thank you and enjoy it.
Source: Arduino Ethernet Camera
- How do I take a picture using this project?
Type http:/xxx.xxx.xxx.xxx:5555/ttt on any internet browser. - What is the best way to view the taken picture?
Type http:/xxx.xxx.xxx.xxx:5555/image.jpg on any internet browser. - Can I remove a taken picture remotely?
Yes, type http:/xxx.xxx.xxx.xxx:5555/rrr on any internet browser. - Does this project require a smartphone app?
No, it is a simple way that does not need any app for smartphones. - Which libraries are needed for the TTL camera?
You need Adafruit_VC0706.h and SoftwareSerial.h. - What must be modified in the sketch code before running?
You have to modify mac[] and ip[] as your arduino's information. - How do you translate the data to jpg format in the code?
You give a command to translate to jpg format using four specific lines including Content-Type: image/jpeg. - Where can I download the required libraries?
You can download libraries in http://arduino.cc.