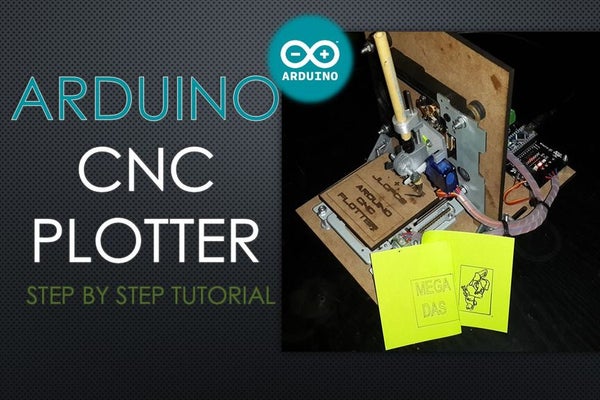
Hey guys! I Hope you already enjoyed my previous instructable “How to make your own Arduino training platform” and you are ready for a new one, as usual I made this tutorial to guide you step by step while making this kind of super amazing low cost electronic projects which is the “CNC plotter machine” known also as “CNC drawing” or just “Arduino CNC machine”. ^_^
I found lots of tutorial accross the web that explains how to make a CNC Plotter, but with the lack of information it was a bit difficult to make such machine, thats the reason why I’ve decided to start this instructable where I will show you in details how to easily make your own drawing machine.
This project is so handy to make specially after getting the customized PCB that we’ve ordered from JLCPCB
to improve the appearance of our machine and also there is enough documents and codes in this guide to allow you create your machine easily. We’ve made this project in just 5 days only, just three days to get all the needed parts and finish the hardware making and the assemble, then 2 days to prepare the code and start some adjustments. Before starting let’s see first
What you will learn from this instructable:
- Making the right hardware selection for your project depending on its functionalities
- Prepare the circuit diagram to connect all the choosen components
- Assemble all the project parts (mechanical and electronic assembly)
- Scaling of the machine balance
- Start manipulating the system
Step 1: What Is a Plotter Machine
Since I’ve made this instructable for beginners, I should explain in details first what is the drawing machine and how it works!
As it is defined in wikipedia, CNC stands for Computer numerical control, a machine which is a computer-controlled structure that receives instructions through a serial port sent from a computer and moves its actuators depending on the received instructions. Most of these machines are stepper motor based machines which includes stepper motors in theme axis.
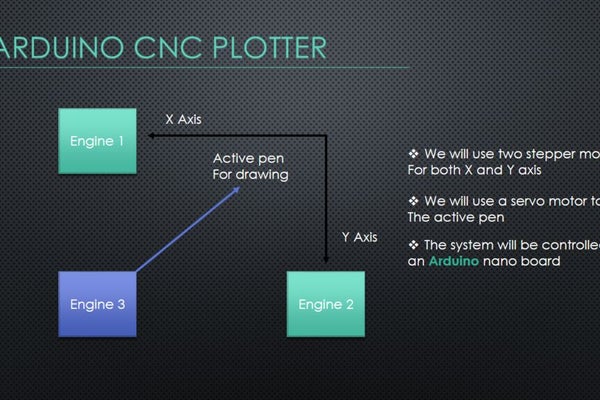
Another word to mentioned “axis”, yes, each CNC machine has a defined number of axis that will be controlled by the computer program.
In our case the CNC plotter that we made is a double axis machine “details in picture 1” that has a small stepper motors in its axis “stepper in picture 2” these steppers will move an active tray and make it move in a double axis plan to create the drawing design using a drawing pen. The pen will be holded and released using a third engine in our structure which will be a servo motor.
Step 2: Stepper Motor Is the Main Actuator
A stepper motor or step motor or stepping motor is a brushless DC electric motor that divides a full rotation into a number of equal steps. The motor’s position can then be commanded to move and hold at one of these steps without any position sensor for feedback(an open-loop controller), as long as the motor is carefully sized to the application in respect to torque and speed.
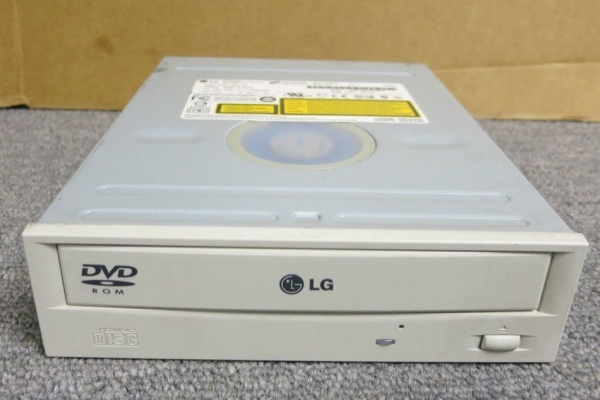
First verse, from where to get the stepper motors for our project, well easy, just grab an old DVD reader like the one in picture 1 above, I’ve got two for 2 dollars, than all what you need to do is disassemble it to extract the stepper motor and its support, as it shows picture 3, we will need two of them.
Once you get your motors from the DVD reader, you should make them ready to use by identifing the motor coils ends. Each stepper motor has two coils and using a multimeter you can identify the coil ends by measuring the resistance between the motor pins connector “as show picture 5” and for each coil it should be about 10Ohm measured. After identifing the motor coils just solder some wires to control the motor through them “see picture 6”
Step 3: The Circuit Diagram
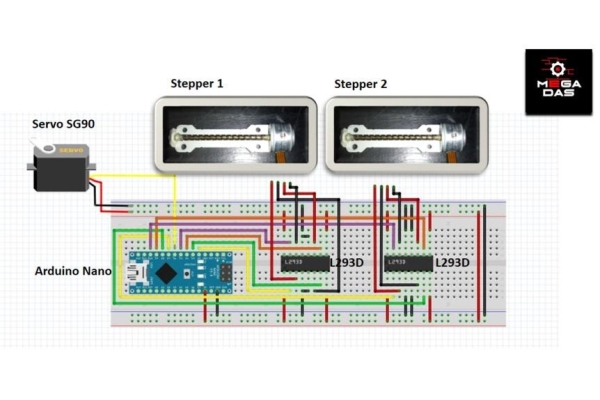
The heart of our machine is an arduino Nano Dev board that will control the movement of each actuator depending on the instruction received from the computer, in order to control these stepper motors we need a stepper motor driver to control the speed and direction of each actuator.
In our case we will use an L293D H bridge motor driver “see picture 3” which will receive the motor command sent from arduino through its inputs and control the stepper motors using its outputs.
in order to connect all the needed parts together with our Arduino board I’ve made the circuit diagram that shows picture 1 where you should follow the same connection for both stepper motors and the servo motor.
The picture 2 explain in details through a schematic the circuit diagram and how it should be the links between the Arduino and the other components, for sure you can adjust these links depending on your needs.
Source: Arduino CNC Plotter (DRAWING MACHINE)